Accents
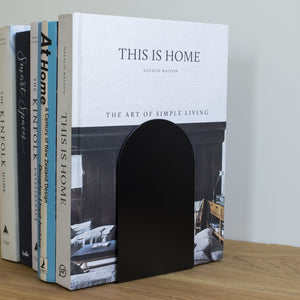
Jamb Bookends (Set of 2)


Jamb Bookends (Set of 2)
$89.00
Proof that less really is more. The Jamb Bookends offer understated style and practical function, keeping your books - or vinyl, if you're like Mr YOYO - neatly in place. Clean, minimal, and quietly effective. Indoor use only Material powder-coated steel Size 160 x 180 x 110 mm This piece can be tailor-made, just for you. Customisation options...

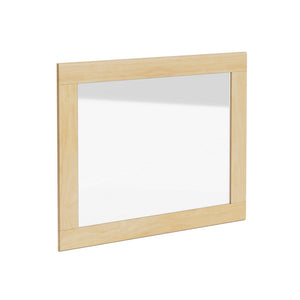
Karamea Wall Mirror - Ash

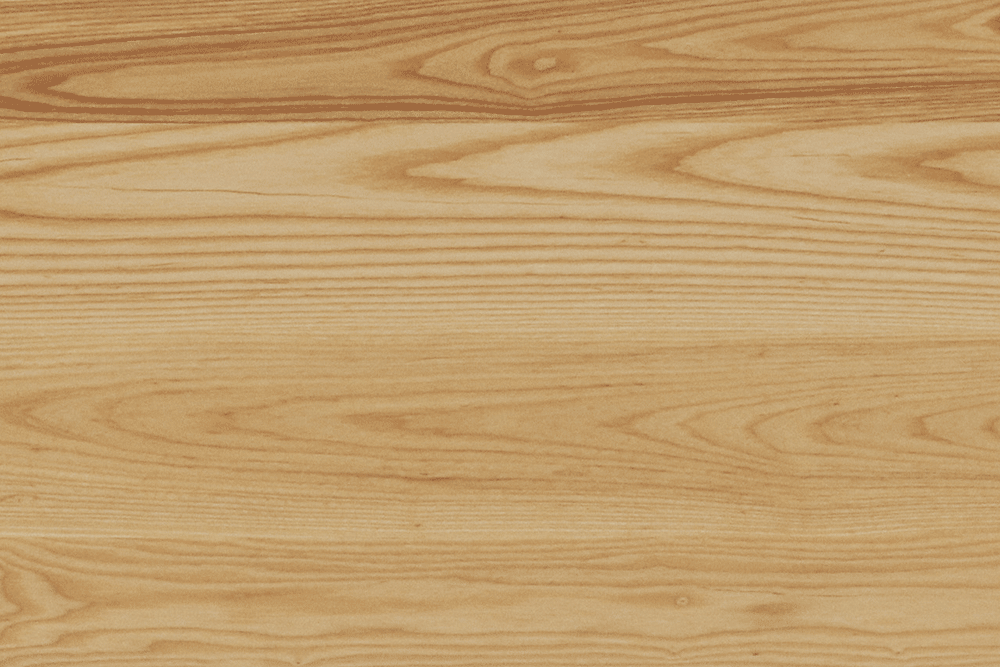
Karamea Wall Mirror - Ash
$989.00
The Karamea Wall Mirror - Ash offers a modern, streamlined design, making it a versatile addition to any room. Both functional and stylish, this mirror serves as an elegant focal point while enhancing the sense of light and openness in your home. Crafted from solid ash, each frame showcases unique variations in colour tone and grain pattern - ce...
Karamea Wall Mirror - Pine


Karamea Wall Mirror - Pine
$699.00
The Karamea Wall Mirror - Pine offers a modern, streamlined design, making it a versatile addition to any room. Both functional and stylish, this mirror serves as an elegant focal point while enhancing the sense of light and openness in your home. Crafted from solid pine, each frame showcases unique variations in color tone and grain pattern - c...
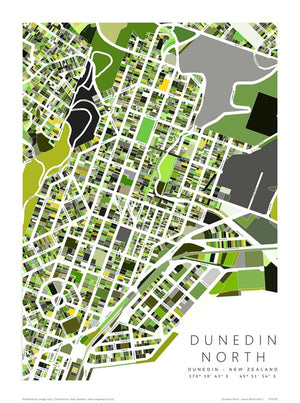
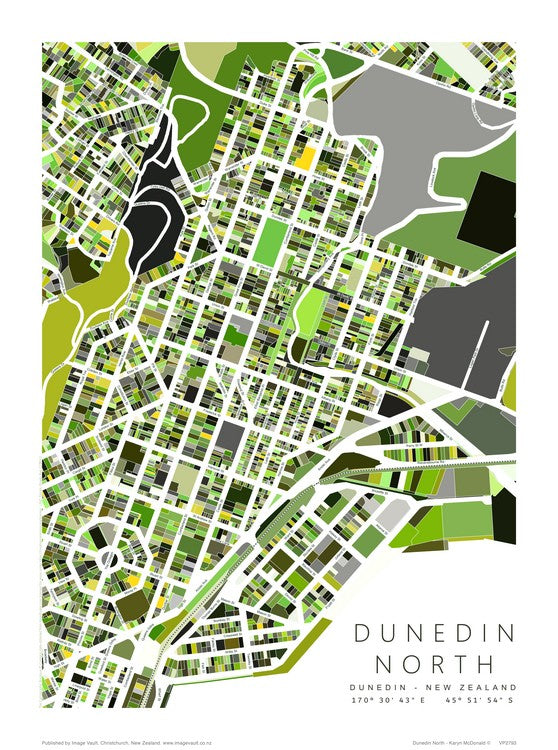
Karyn McDonald Map - Dunedin North
$249.00
Karyn McDonald's path to map design has been slightly unorthodox. She studied Spatial Information Studies at Otago University, then worked for over 10 years as a Geographic Information Systems (GIS) Analyst in New Zealand, as well as in London and Melbourne. After returning from overseas and starting a family, Karyn wanted a more flexible work a...

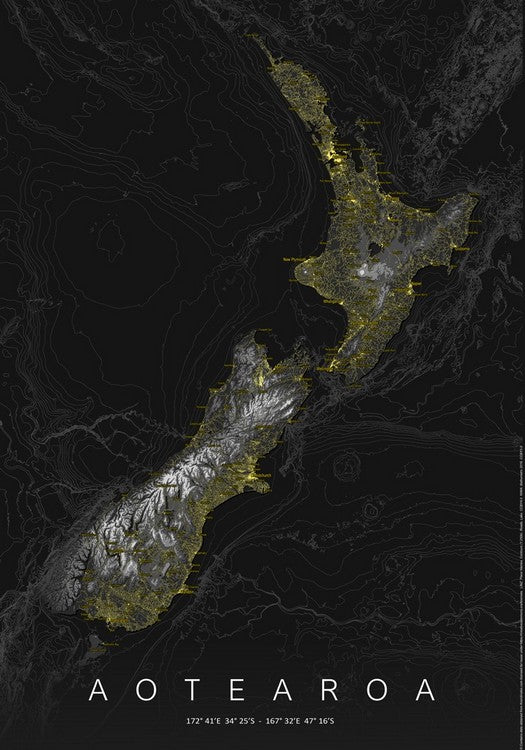
Karyn McDonald Map - New Zealand Black
$199.00
Karyn McDonald's path to map design has been slightly unorthodox. She studied Spatial Information Studies at Otago University, then worked for over 10 years as a Geographic Information Systems (GIS) Analyst in New Zealand, as well as in London and Melbourne. After returning from overseas and starting a family, Karyn wanted a more flexible work a...
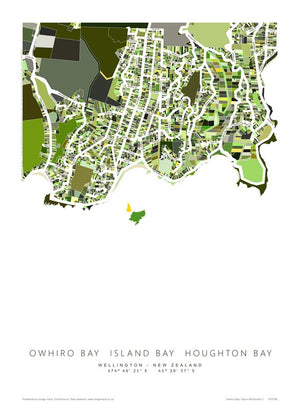
Karyn McDonald Map - Owhiro Bay
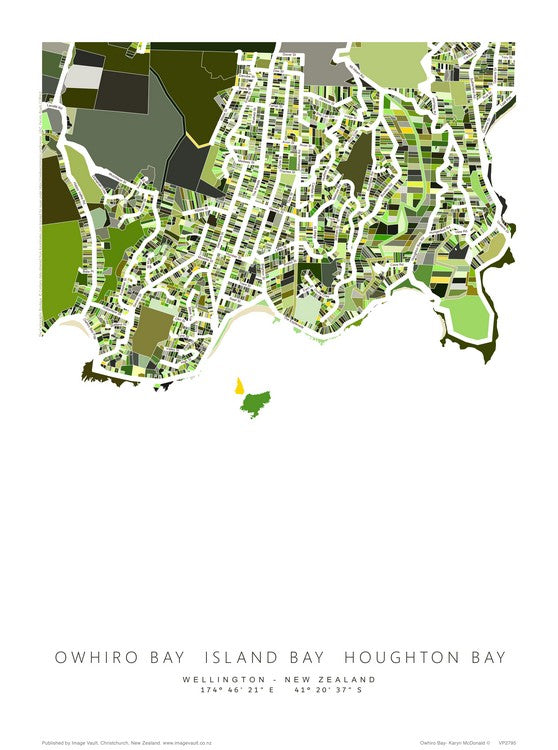
Karyn McDonald Map - Owhiro Bay
$249.00
Karyn McDonald's path to map design has been slightly unorthodox. She studied Spatial Information Studies at Otago University, then worked for over 10 years as a Geographic Information Systems (GIS) Analyst in New Zealand, as well as in London and Melbourne. After returning from overseas and starting a family, Karyn wanted a more flexible work a...

Karyn McDonald Map - Titahi Bay
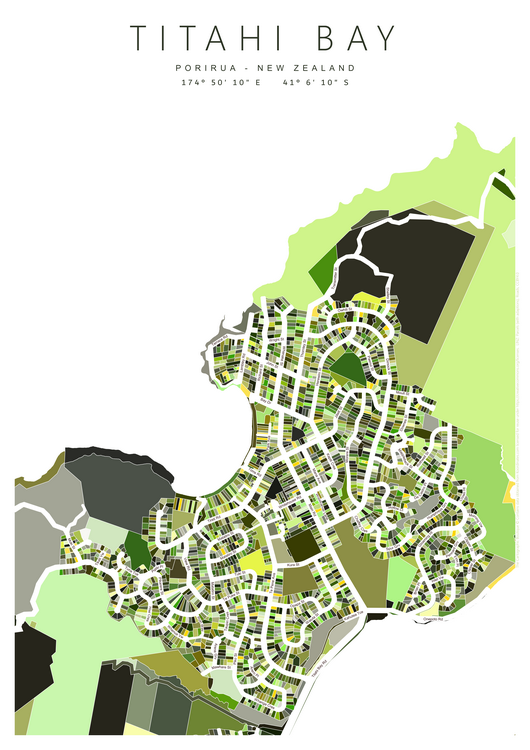
Karyn McDonald Map - Titahi Bay
$249.00
Karyn McDonald's path to map design has been slightly unorthodox. She studied Spatial Information Studies at Otago University, then worked for over 10 years as a Geographic Information Systems (GIS) Analyst in New Zealand, as well as in London and Melbourne. After returning from overseas and starting a family, Karyn wanted a more flexible work a...
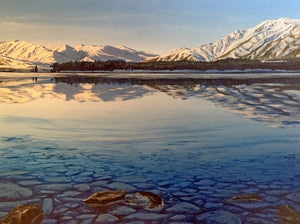
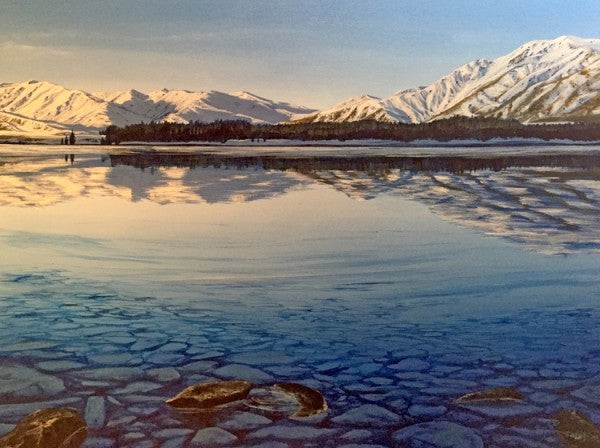
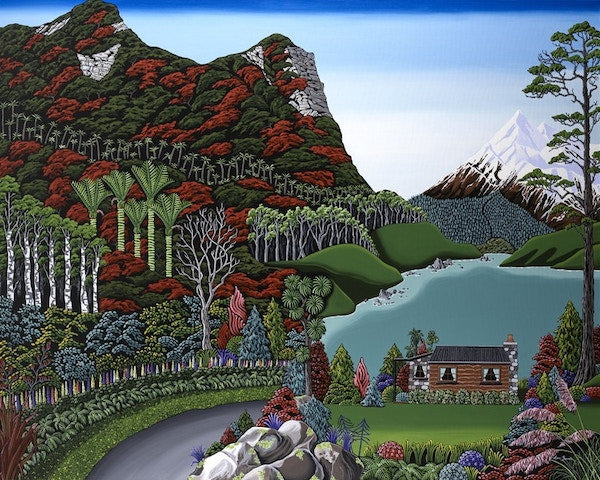
Katrina McGettigan Print - Lake Tekapo
$199.00
Katrina McGettigan is an established artist and tutor based in Christchurch, originally from Methven. She is passionate about capturing the beauty of Aotearoa on canvas and shares her love of art through adult and children's classes at her gallery, Kat’s Art Studio in Christchurch. An award-winning artist, Katrina has exhibited widely across New...
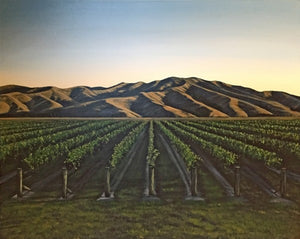
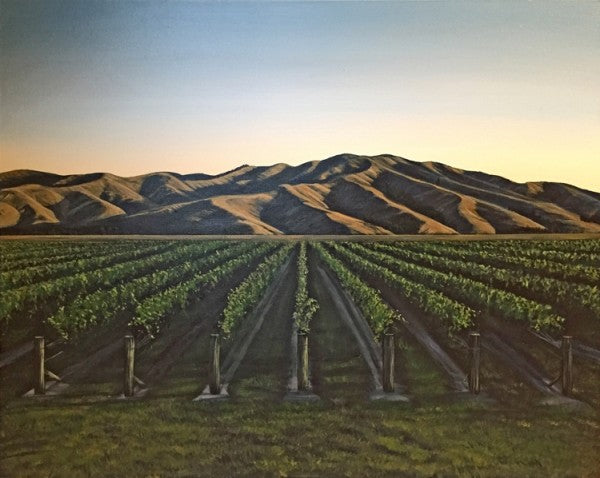
Katrina McGettigan Print -Wither Hills
$349.00
Katrina McGettigan is an established artist and tutor based in Christchurch, originally from Methven. She is passionate about capturing the beauty of Aotearoa on canvas and shares her love of art through adult and children's classes at her gallery, Kat’s Art Studio in Christchurch. An award-winning artist, Katrina has exhibited widely across New...

Kids Wobble Bird Clocks

Kids Wobble Bird Clocks
$79.00
Tick-tock just got a whole lot more fun! These adorable Kiwi, Kererū, Pīwakawaka, and Tūī Kids Wobble Bird clocks don’t just tell the time - they wobble, nod, flap, and swing, bringing a splash of Aotearoa New Zealand magic to any kid’s room. Why You’ll Love Them: Fun in motion Heads nod, wings sway, or tails swing with every tick! Made in N...
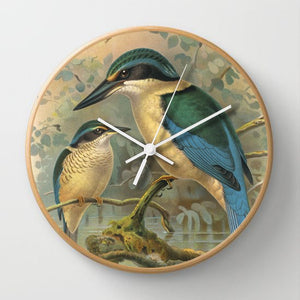
Kingfisher Wooden Frame Clock
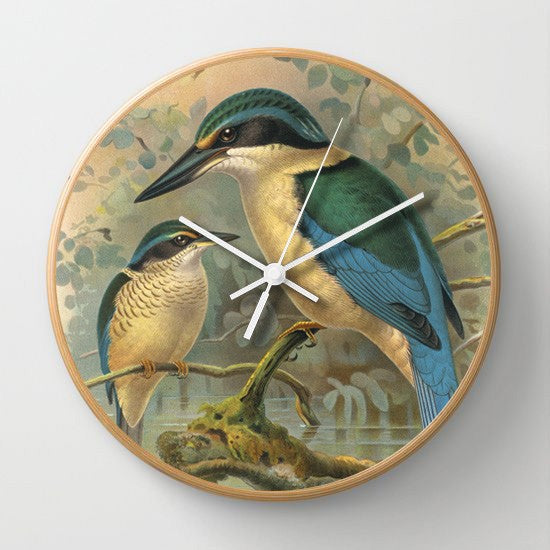
Kingfisher Wooden Frame Clock
$119.00
Blonde wood framed Kingfisher Wooden Frame Clock, featuring an iconic native New Zealand kingfisher. The silent movement clock is protected by a glass front and sits 45mm deep from the wall. Designed, printed and assembled in Aotearoa New Zealand. Material blonde wood frame, glass front, silent movement Size 320Dia x 45D mm
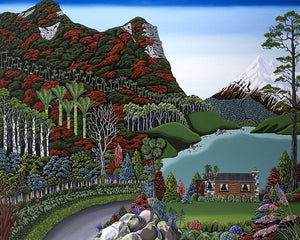
Lisa Jepson Print - Beach Beauty
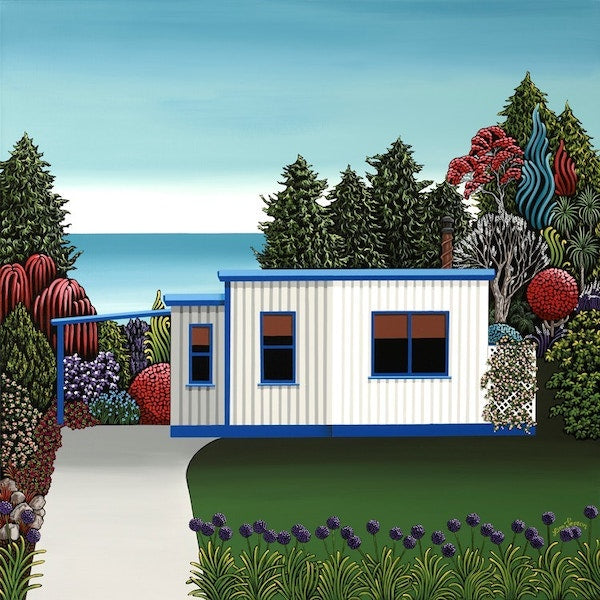
Lisa Jepson Print - Beach Beauty
$249.00
Designing and Fine Art have been a life-long passion of Lisa Jepson. She works from home, based at the bottom of the beautiful Mount Grey in rural North Canterbury. Lisa has a strong desire, drive and love for her work, devoting countless hours. She has a love of colour and a need for detail, so keeping the simplistic approach is always an enthu...
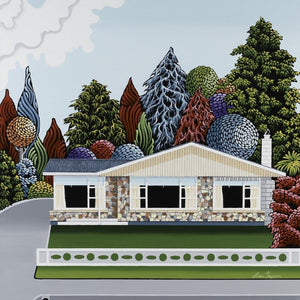
Lisa Jepson Print - Retro Charm
Lisa Jepson Print - Retro Charm
$249.00
Designing and Fine Art have been a life-long passion of Lisa Jepson. She works from home, based at the bottom of the beautiful Mount Grey in rural North Canterbury. Lisa has a strong desire, drive and love for her work, devoting countless hours. She has a love of colour and a need for detail, so keeping the simplistic approach is always an enthu...
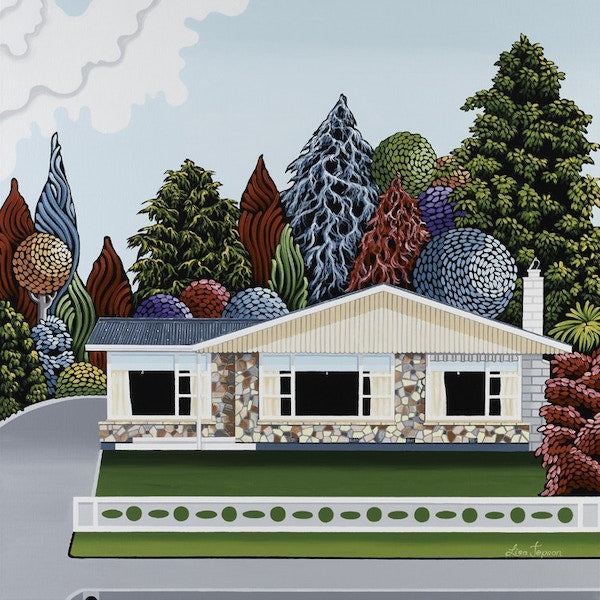
Lisa Jepson Print - Wild Heart
Lisa Jepson Print - Wild Heart
$349.00
Designing and Fine Art have been a life-long passion of Lisa Jepson. She works from home, based at the bottom of the beautiful Mount Grey in rural North Canterbury. Lisa has a strong desire, drive and love for her work, devoting countless hours. She has a love of colour and a need for detail, so keeping the simplistic approach is always an enthu...

Lisa Moes Print - Backcountry Huts
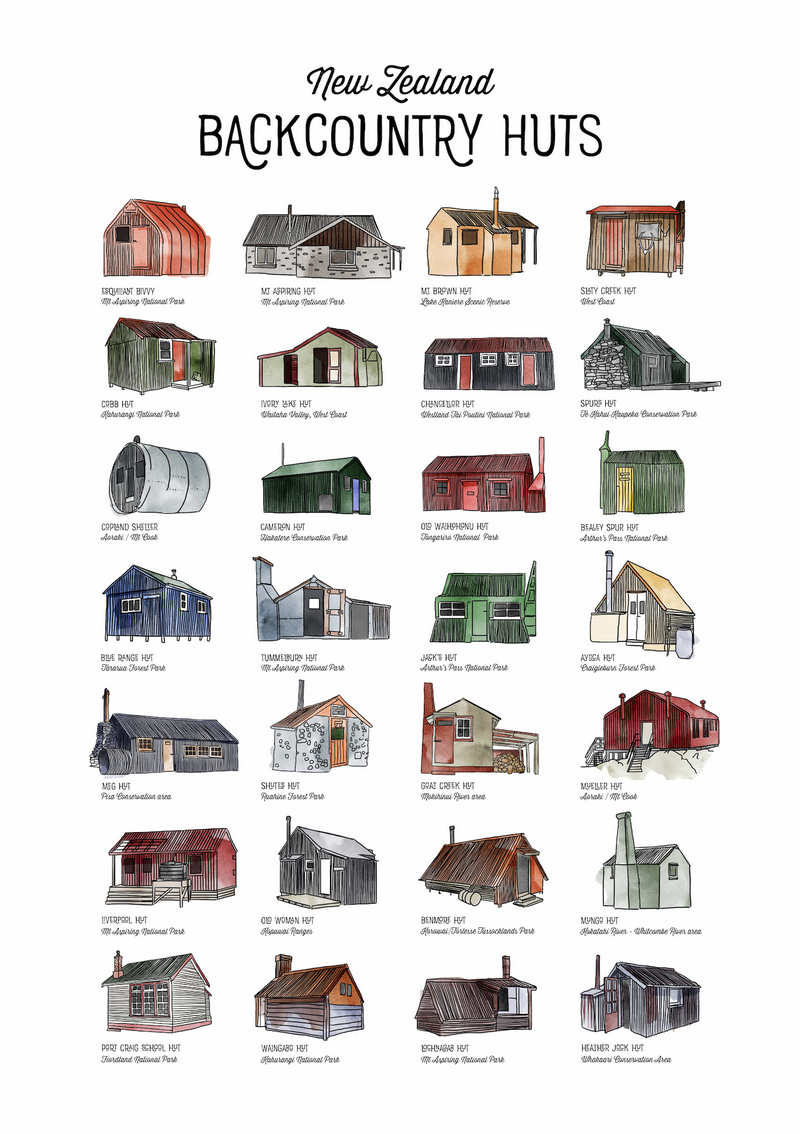
Lisa Moes Print - Backcountry Huts
$159.00
Take the spirit of New Zealand’s backcountry home with Lisa Moes’ Print – Backcountry Huts. This A3 fine art print, produced on premium 310gsm German etching paper, features a collection of iconic huts — capturing quiet nights, logbook stories, and the thrill of adventure. Available in two options — Framed and Unframed — with the framed option p...
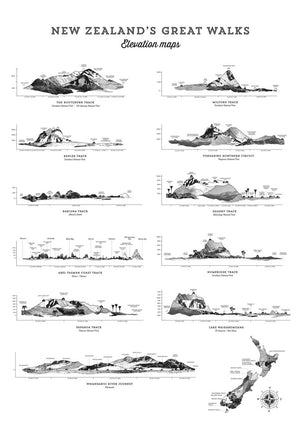
Lisa Moes Print - Great Walks Elevation Maps
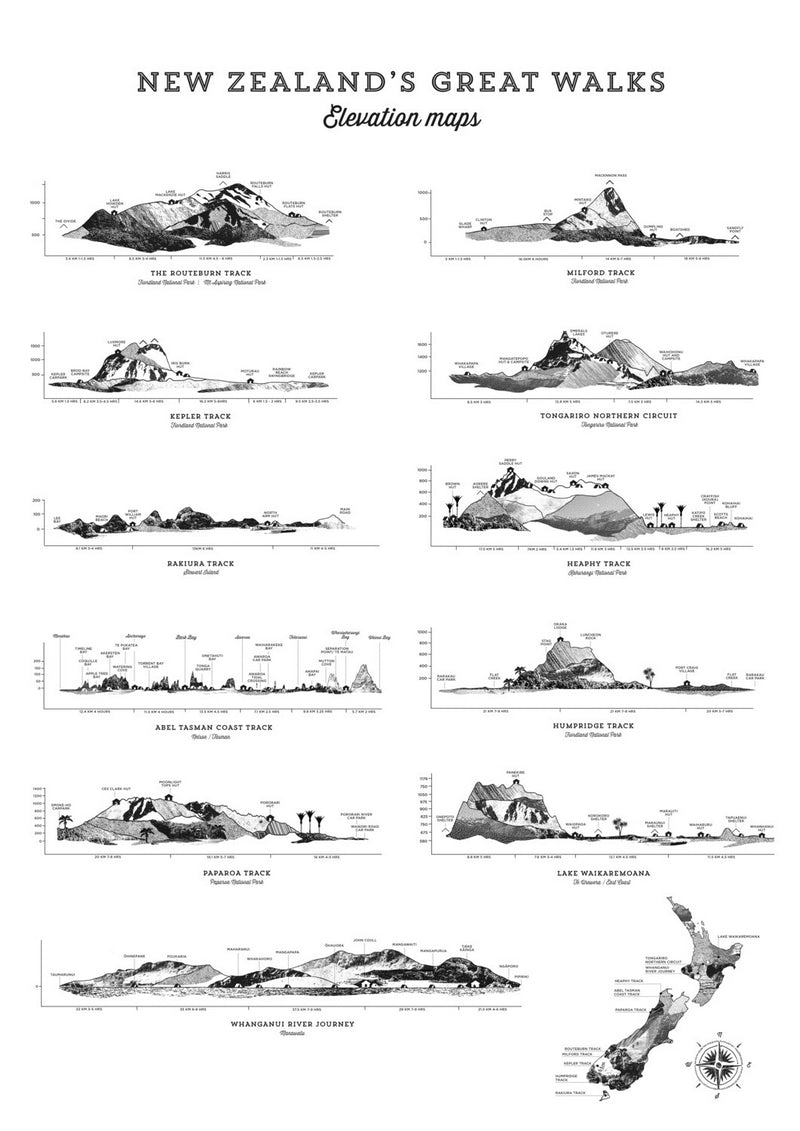
Lisa Moes Print - Great Walks Elevation Maps
$159.00
Bring the trails of Aotearoa into your space with Lisa Moes’ Print – Great Walks Elevation Maps. This A3 black fine art print, produced on premium 310gsm German etching paper, showcases the dramatic landscapes and elevation profiles of New Zealand’s iconic Great Walks — a celebration of the terrain that shapes every step of the journey. Availabl...


Lisa Moes Print - Historic Hotels of Central Otago
$159.00
Bring the charm of Central Otago’s historic hotels into your home with Lisa Moes’ Print – Historic Hotels of Central Otago. This A3 fine art print, produced on premium 310gsm German etching paper, captures the timeless architecture and stories of the region’s most iconic accommodations. Available in two options — Framed and Unframed — with the f...

Lisa Moes Print - NZ Peaks
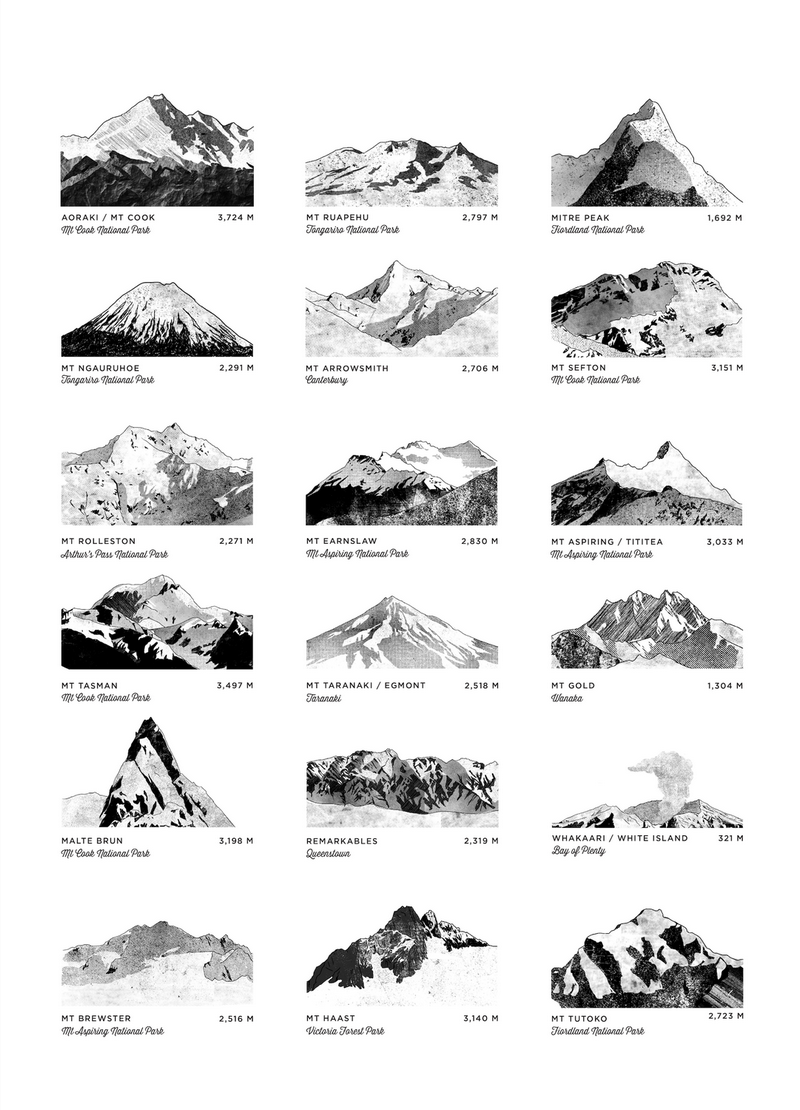
Lisa Moes Print - NZ Peaks
$159.00
Bring the majesty of New Zealand’s mountains into your home with Lisa Moes’ Print – NZ Peaks. This A3 fine art print, produced on premium 310gsm German etching paper, celebrates the iconic peaks that define Aotearoa’s dramatic landscapes. Available in two options — Framed and Unframed — with the framed option presented in a white timber box-fram...
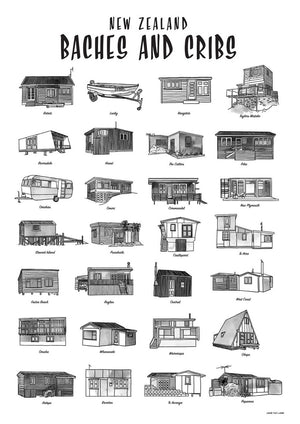
Lisa Moes Print – Baches and Cribs
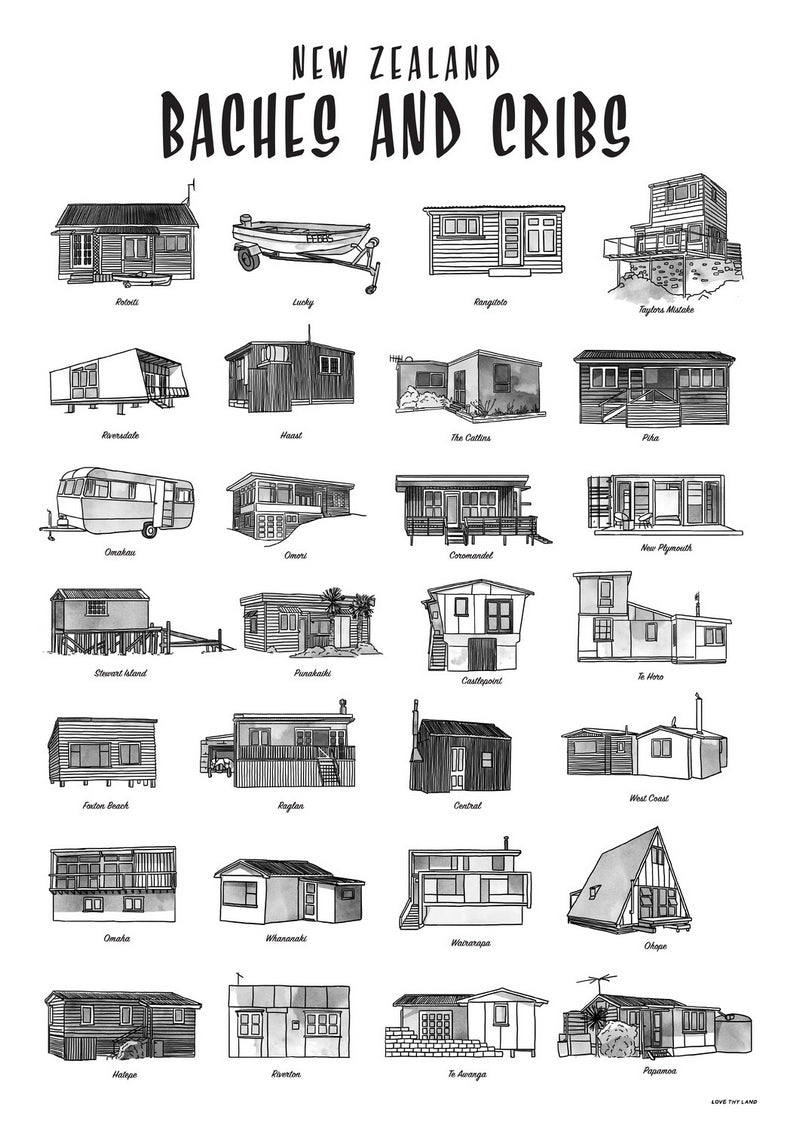
Lisa Moes Print – Baches and Cribs
$159.00
Bring a touch of Kiwi heritage home with Lisa Moes’ Print - Baches and Cribs. This A3 fine art print, produced on premium 310gsm German etching paper, celebrates the charm, character, and nostalgia of New Zealand’s most iconic holiday homes. Available in two options — Framed and Unframed — with the framed option presented in a white timber box-f...

Lisa Moes Print – Backcountry Trucks
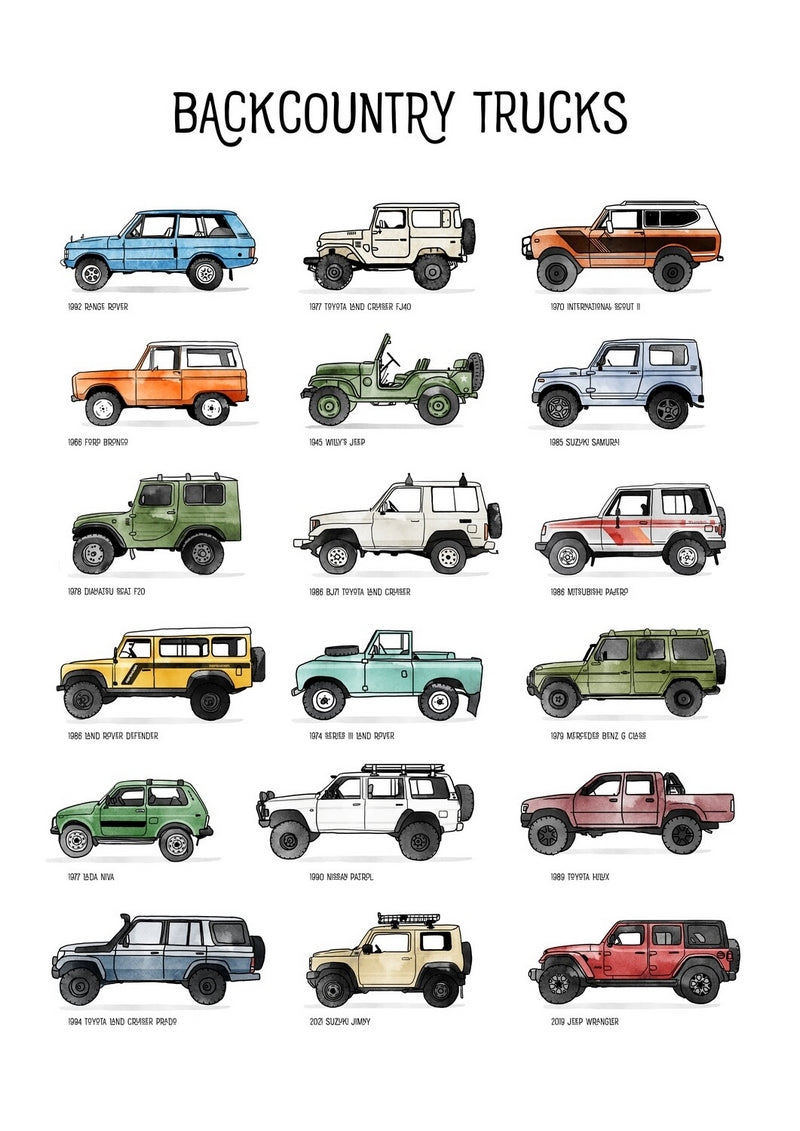
Lisa Moes Print – Backcountry Trucks
$159.00
Celebrate the rugged charm of New Zealand’s high-country travel with Lisa Moes’ Print – Backcountry Trucks. This A3 fine art print, produced on premium 310gsm German etching paper, pays tribute to the old 4WDs that rumble their way into Aotearoa’s remote corners — the rusted, rugged workhorses that carry us and our gear into the heart of the bac...

Lisa Moes’ Print - Ōhau

Lisa Moes’ Print - Ōhau
$159.00
Bring a touch of alpine nostalgia home with Lisa Moes’ Print – Ōhau. This A3 fine art print, produced on premium 310gsm German etching paper, captures the mellow charm and expansive alpine views of Ōhau — a much-loved escape near Wānaka. Inspired by vintage travel posters, the artwork features bold, simplified forms and a nostalgic feel, reflect...

Lisa Moes’ Print – Cardrona

Lisa Moes’ Print – Cardrona
$159.00
Bring a touch of alpine nostalgia home with Lisa Moes’ Print – Cardrona. This A3 fine art print, produced on premium 310gsm German etching paper, captures the wide-open pistes, crisp alpine air, and laid-back energy of one of New Zealand’s most iconic ski fields. Inspired by vintage travel posters, the artwork features bold, simplified forms and...

Lisa Moes’ Print – The Remarkables

Lisa Moes’ Print – The Remarkables
$159.00
Bring a touch of alpine adventure home with Lisa Moes’ Print – The Remarkables. This A3 fine art print, produced on premium 310gsm German etching paper, captures a skier poised at the top of The Remarkables, looking out over Lake Whakatipu and the mountains beyond. Inspired by vintage travel posters, the artwork features bold, simplified forms a...

Lisa Moes’ Print – Treble Cone

Lisa Moes’ Print – Treble Cone
$159.00
Bring a touch of alpine energy home with Lisa Moes’ Print – Treble Cone. This A3 fine art print, produced on premium 310gsm German etching paper, celebrates one of New Zealand’s most iconic ski fields, known for its dramatic terrain and sweeping views over Lake Wānaka. Available in two options — Framed and Unframed — with the framed option prese...

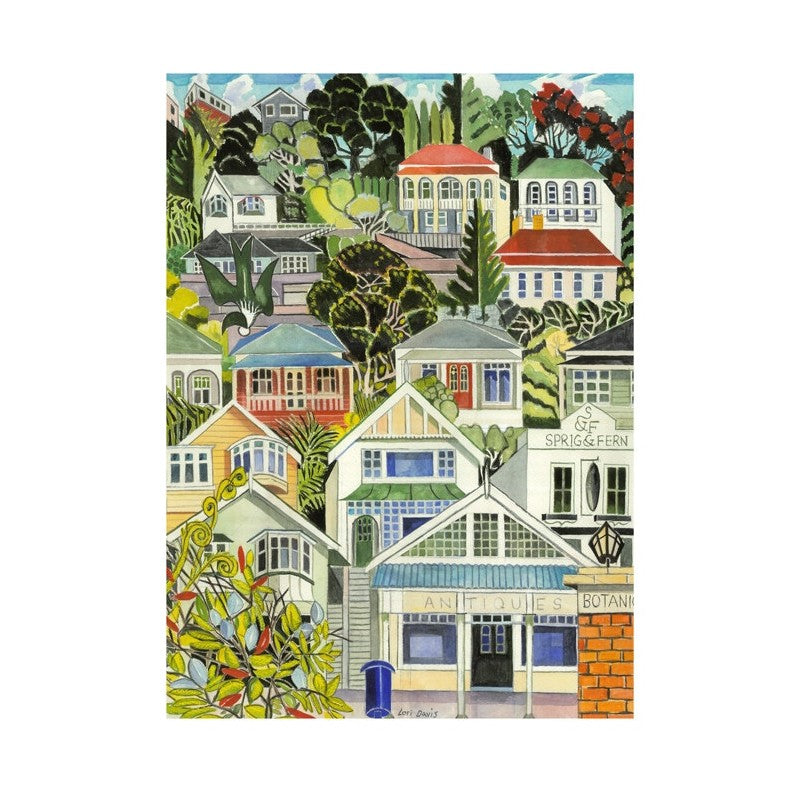
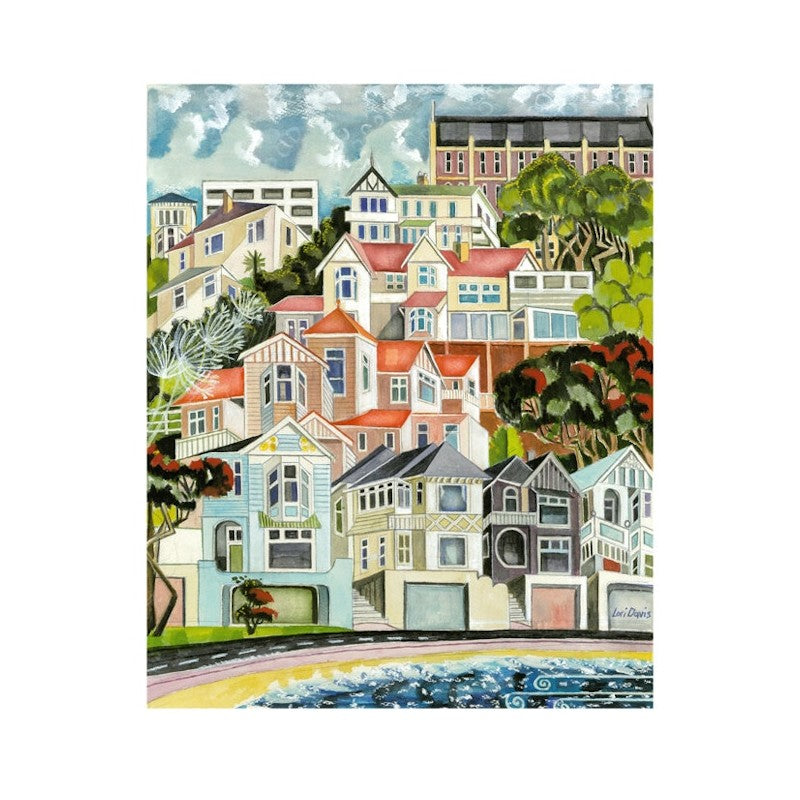
Lori Davis - Tinakori Road Wellington
$279.00
Lori Davis is a painter with a deep passion for the patterns, rhythms and colours of Wellington and the wider New Zealand landscape. “The land we stand on — what it provides, how it is formed, the geology and layers that create hills, valleys, rivers and bush — increasingly fascinate and inspire me. I want to understand and tell the story of our...

Lori Davis Print - Aotearoa Summer
$249.00
Lori Davis loves to paint. She is passionate about the patterns, rhythms and colours of Wellington and regional landscapes of New Zealand. “The land we stand on, what it provides, how it is made, the geology and layers creating hills, valleys, rivers and bush, are things that increasingly fascinate and inspire me, to understand and tell the stor...

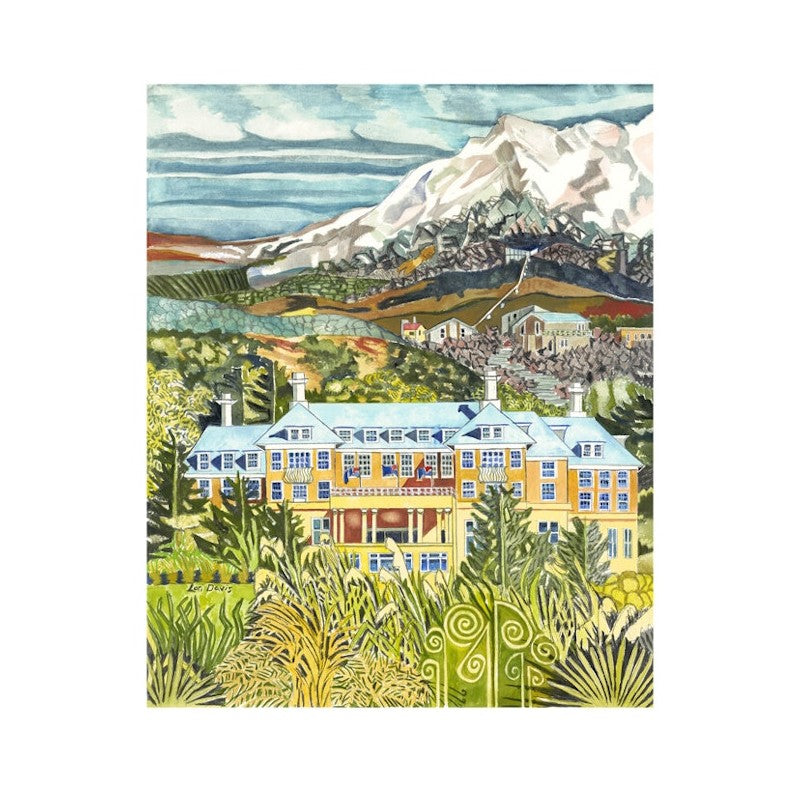
Lori Davis Print - Chateau Tongariro Heyday
$279.00
Lori Davis loves to paint. She is passionate about the patterns, rhythms and colours of Wellington and regional landscapes of New Zealand. “The land we stand on, what it provides, how it is made, the geology and layers creating hills, valleys, rivers and bush, are things that increasingly fascinate and inspire me, to understand and tell the stor...
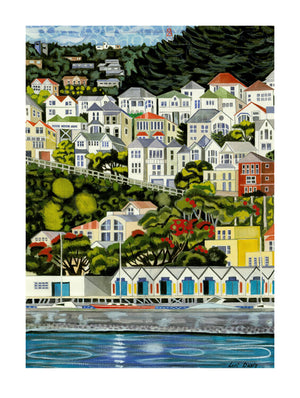

Lori Davis Print - House Stack Mt Victoria
$279.00
Lori Davis is a painter with a deep passion for the patterns, rhythms and colours of Wellington and the wider New Zealand landscape. “The land we stand on — what it provides, how it is formed, the geology and layers that create hills, valleys, rivers and bush — increasingly fascinate and inspire me. I want to understand and tell the story of our...

Lori Davis Print - Painted Ladies
$279.00
Lori Davis loves to paint. She is passionate about the patterns, rhythms and colours of Wellington and regional landscapes of New Zealand. “The land we stand on, what it provides, how it is made, the geology and layers creating hills, valleys, rivers and bush, are things that increasingly fascinate and inspire me, to understand and tell the stor...

Lori Davis print - Tinakori Road Wellington
$279.00
Lori Davis loves to paint. She is passionate about the patterns, rhythms and colours of Wellington and regional landscapes of New Zealand. “The land we stand on, what it provides, how it is made, the geology and layers creating hills, valleys, rivers and bush, are things that increasingly fascinate and inspire me, to understand and tell the stor...

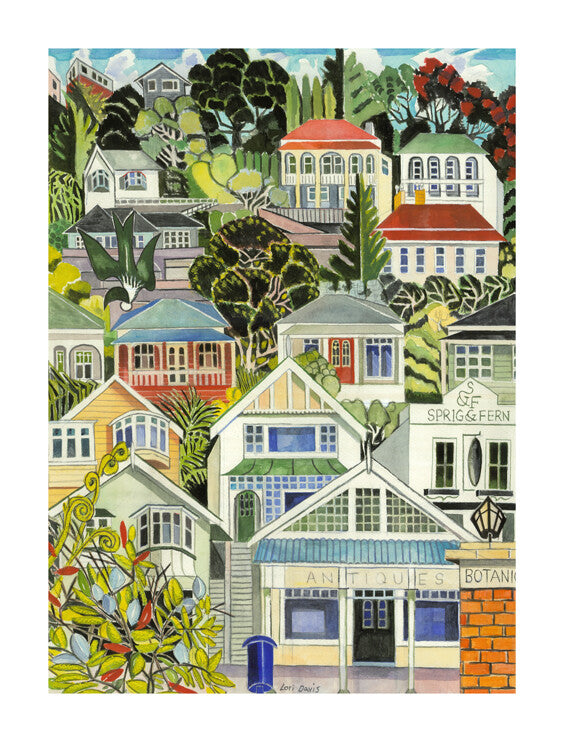
Lori Davis Print - Tohu Pou
Lori Davis Print - Tohu Pou
$199.00
Lori Davis loves to paint and is deeply inspired by the patterns, rhythms and colours of Wellington and the wider New Zealand landscape. “The land we stand on — what it provides, how it is formed, the geology and layers that create hills, valleys, rivers and bush — increasingly fascinate and inspire me. I want to understand and tell the story of...

Mandy Williams Print - Courage

Mandy Williams Print - Courage
$319.00
Inspired by her two children and memories of her own childhood, Mandy Williams captures the essence of what it means to be a child — the freedom of riding a bike, the exhilaration of being pushed on a swing, the joy of hiding beneath Mum’s washing. Her figures carry a lively, childlike energy, expressed through flowing movement and large, expres...


