Products
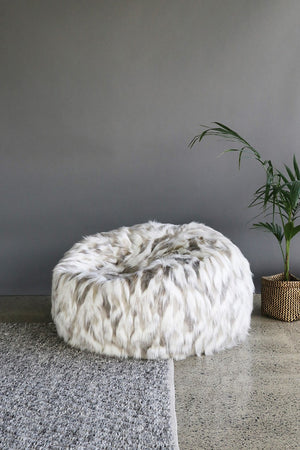
Heirloom Faux Fur Bean Bag
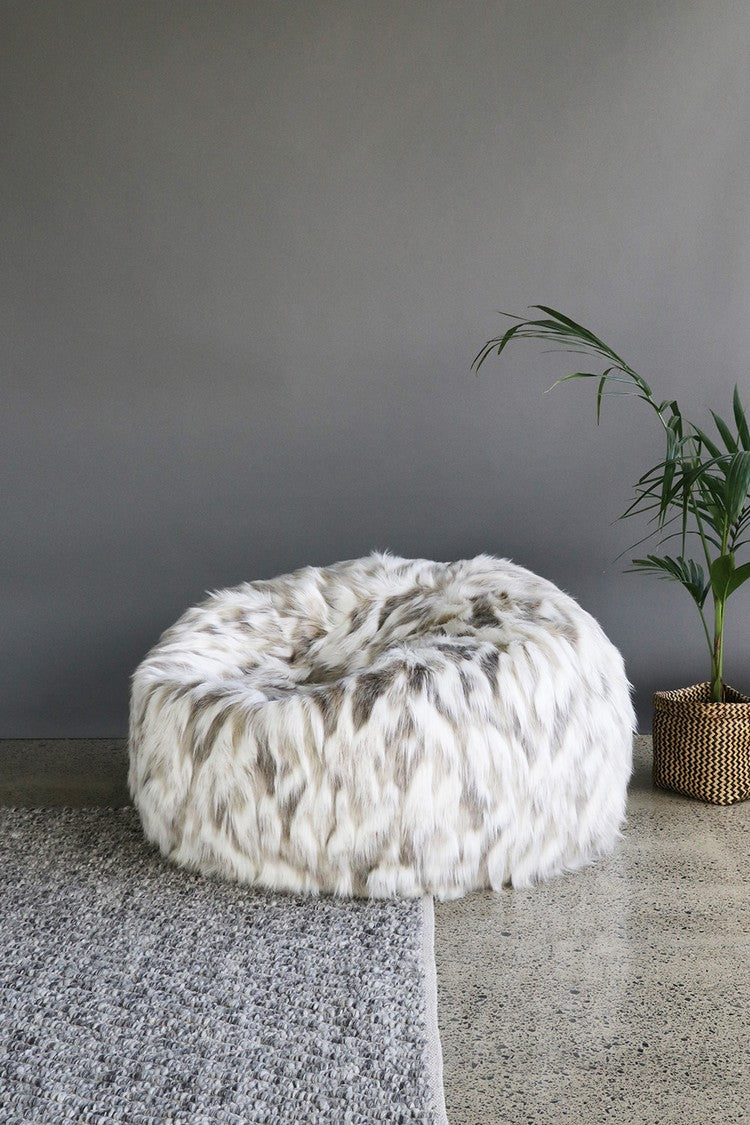
Heirloom Faux Fur Bean Bag
$899.00
Designed and made in New Zealand, Heirloom Faux Fur Bean Bag is a warm and luxurious place to rest your toosh. Quality materials and skilled craftsmanship result in timeless bean bags that are as beautiful and indulgent as the real thing. Their silky touch is due to carefully selected modacrylic fibres, which sets them well ahead of any counterp...
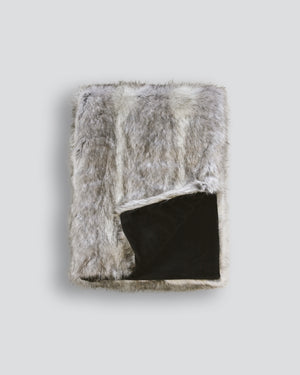
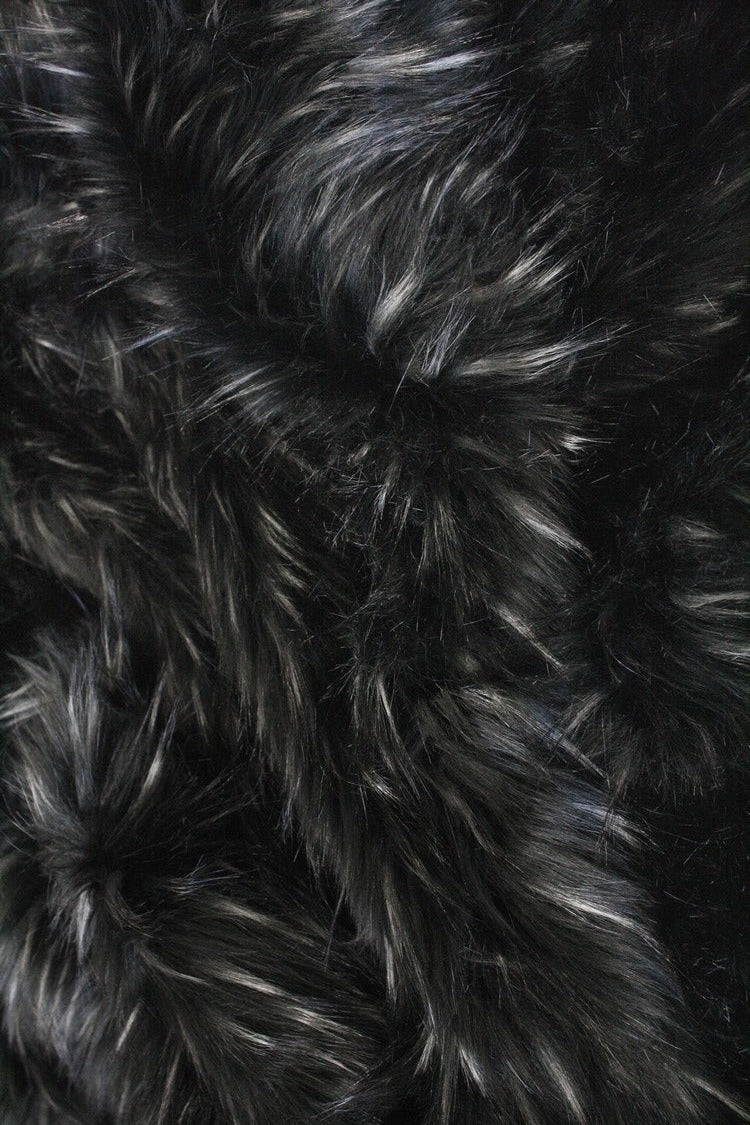
Heirloom Faux Fur Throw
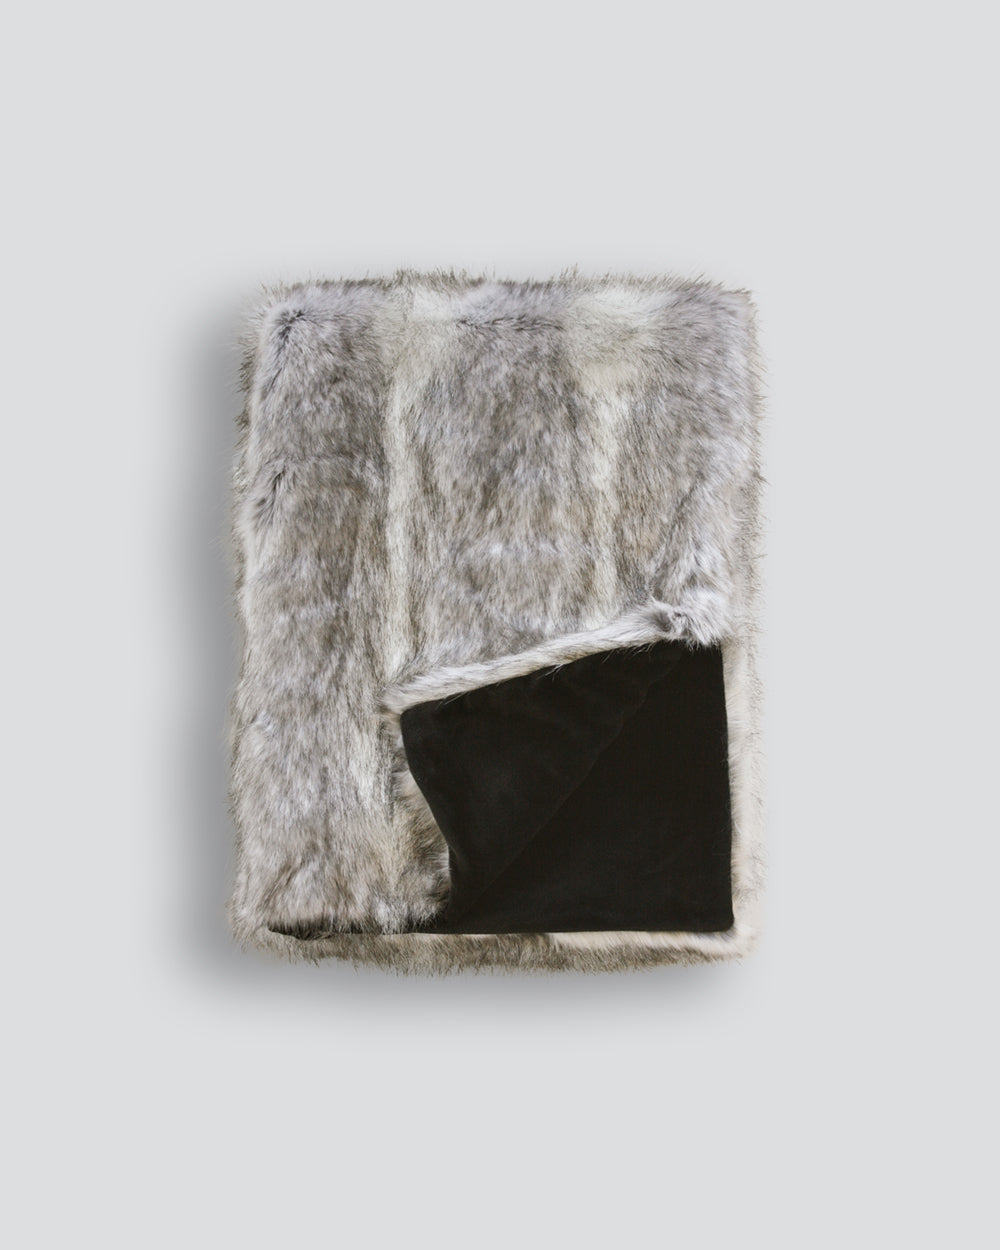

Heirloom Faux Fur Throw
$499.00
Designed and made in New Zealand, a luxurious Heirloom faux fur throw is bound to become a genuine family heirloom. Quality materials and skilled craftsmanship result in a timeless fur that is as beautiful and indulgent as the real thing. Their silky touch is due to carefully selected modacrylic fibres, which sets them well ahead of any counterp...

Henley Sofa

Henley Sofa
$5,599.00
The Henley Sofa seamlessly blends vintage glamour with contemporary sophistication. Designed as a versatile transitional piece, it fits effortlessly into everything from century-old, wooden-floored bungalows to sleek, ultra-modern spaces. The English rolled-arm style - wide and gently flared outward - creates a sense of spaciousness, while thick...
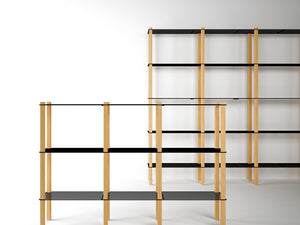
Historian Shelving


Historian Shelving
$2,199.00
Historian Shelving utilises just two materials, steel and wood, in a simple restrained manner. Elegant and refined, the Historian Shelving system is cleverly designed to be assembled and reconfigured without tools or fixings. Material power-coated steel (black or white); American white ash (stained back or natural) Flat-packed for delivery. This...
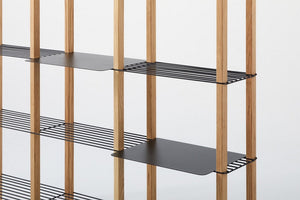
Historian Solid Shelf
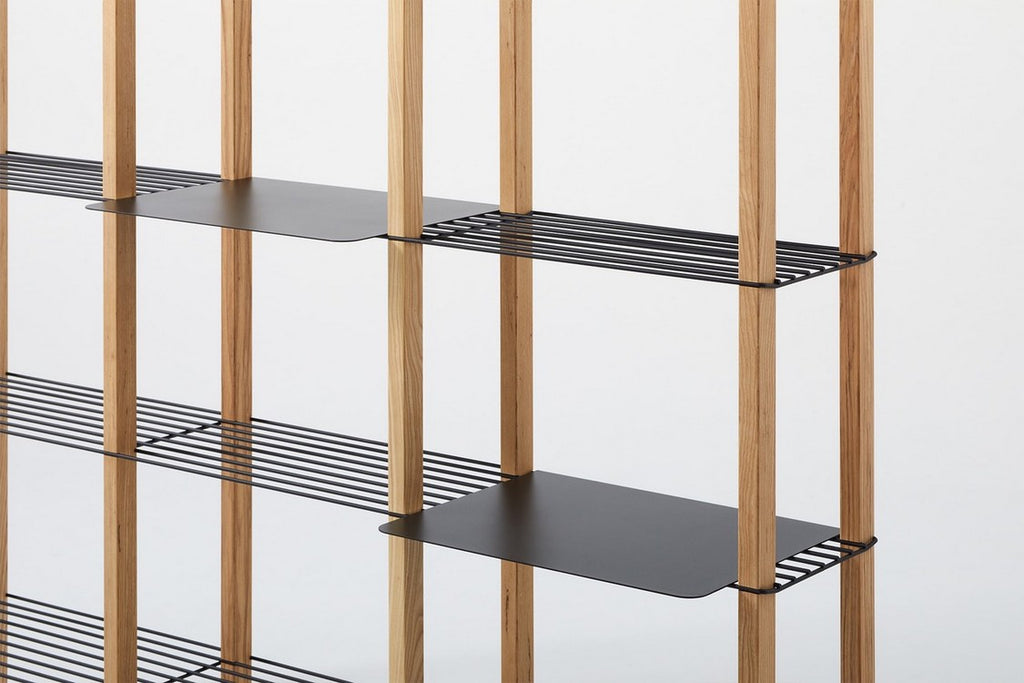
Historian Solid Shelf
$110.00
Designed to pair with Historian Shelving, the Historian Solid Shelf securely sits over the top of the standard wire shelving, without the use of tools or fittings. Ideal for storing and displaying your smaller items. Material power-coated steel This product can be tailor-made. It may be an option to change the dimensions, colour, material, or up...

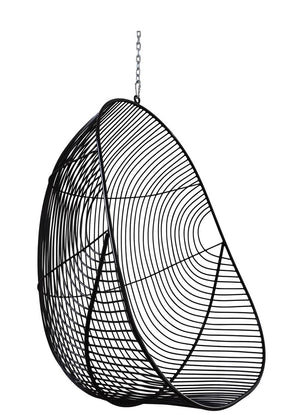
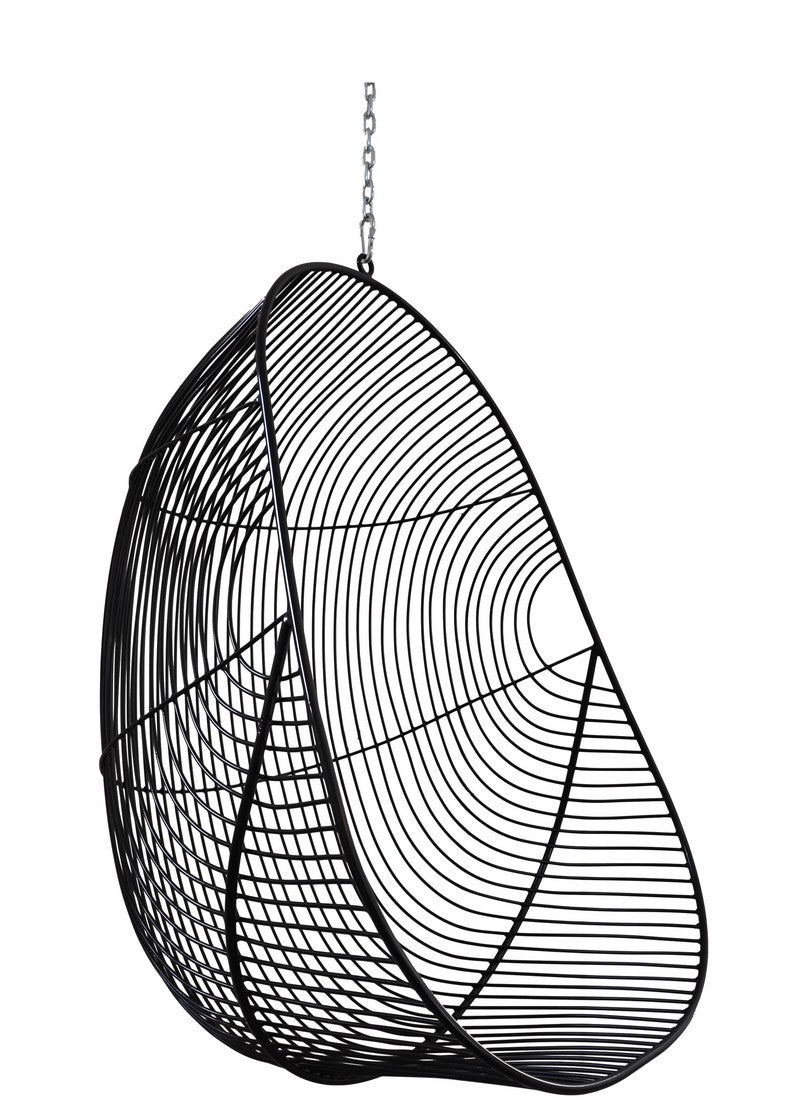
Hokianga Hanging Chair - Stainless Steel

Hokianga Hanging Chair - Stainless Steel
$1,349.00
Built for New Zealand’s tough outdoor conditions, the Hokianga Hanging Chair in stainless steel resists coastal winds, salty sea spray, high humidity, and heavy rainfall. Its durable stainless steel construction ensures long-lasting strength and corrosion resistance — a smart choice for exposed outdoor spaces. Inspired by the iconic cane hanging...
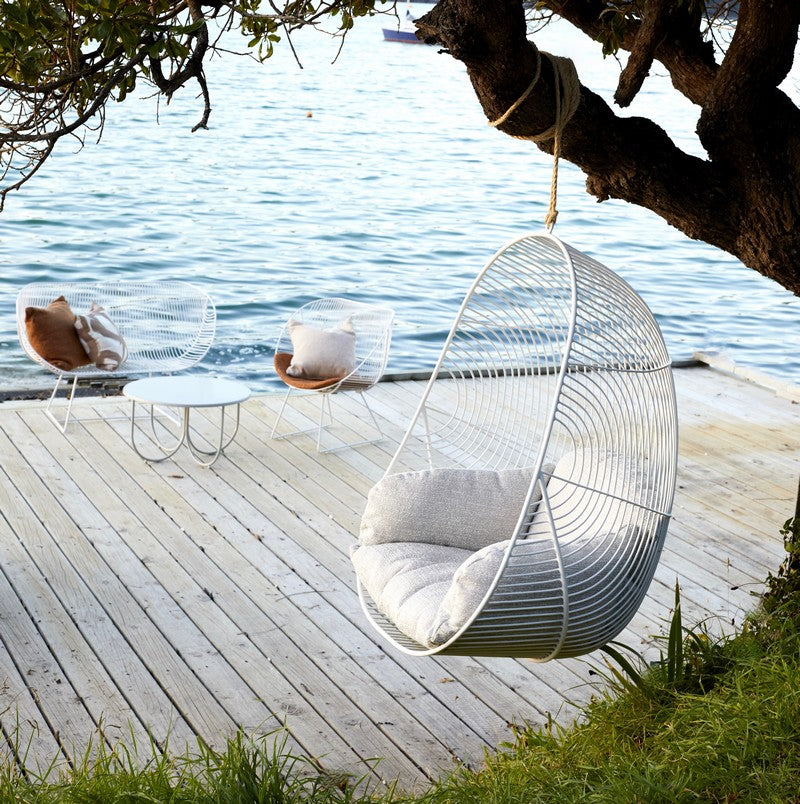
Hokianga Hanging Wire Chair
Hokianga Hanging Wire Chair
$1,099.00
Inspired by the retro charm of 1960s cane hanging chairs, the Hokianga Hanging Wire Chair brings striking style with a contemporary wire twist. Designed to make an impact, it’s as eye-catching as it is inviting. The wires are engineered and precisely spaced for comfort without the need for extra cushioning. That said, for added softness and a to...
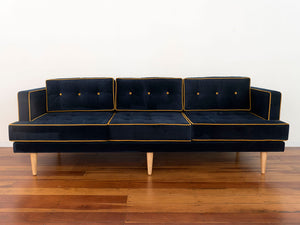
Hollywood Sofa
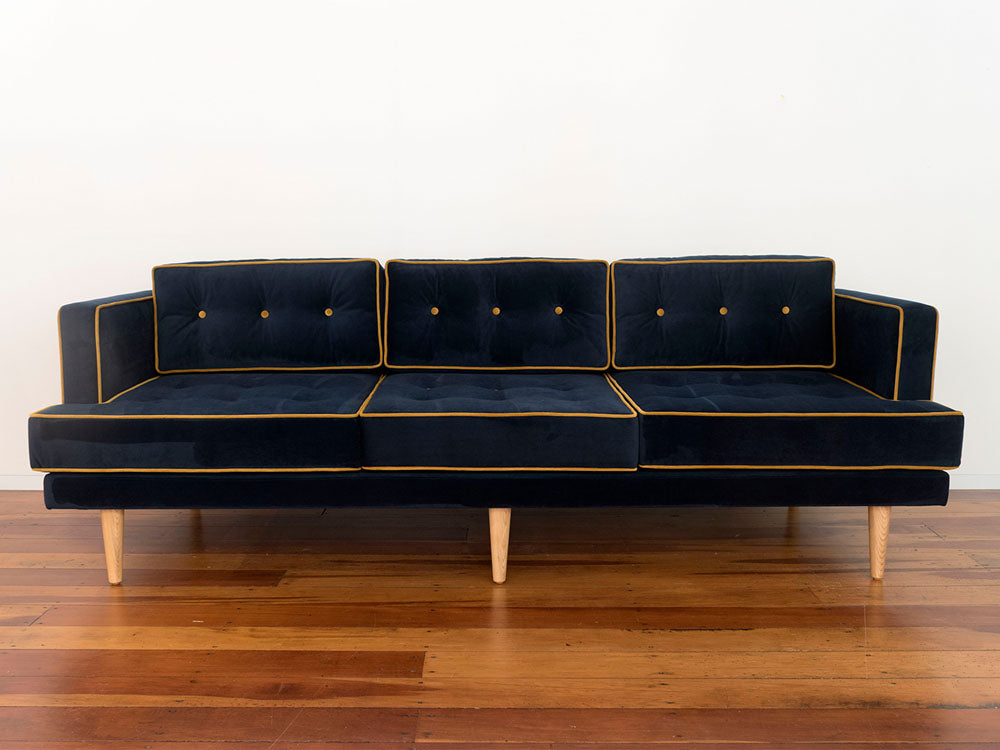
Hollywood Sofa
$4,749.00
True to its namesake, the Hollywood Sofa is theatrical, elegant and ready for entertaining. Accentuate its Tinseltown roots by dressing in velvet, or chose a more modest “outfit” to showcase its vintage charm. Frame Furniture-grade pine timber (lifetime guarantee) Seat & Back Upholstery-grade elastic webbing & highest-grade foam (10 year...

Hopscotch Cabinet
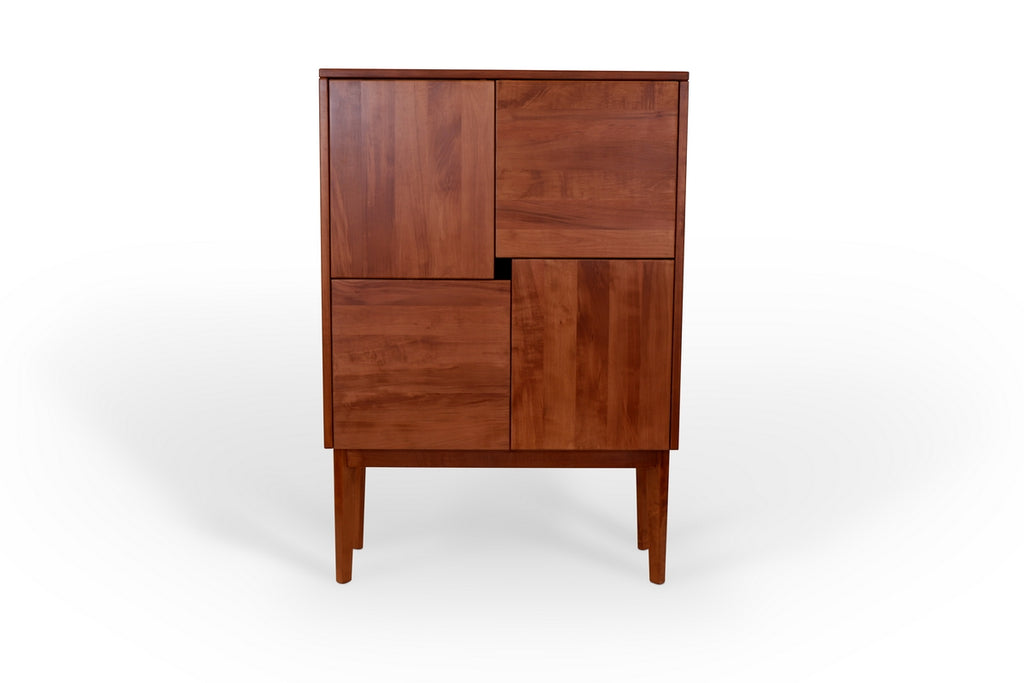
Hopscotch Cabinet
$4,899.00
The Hopscotch Cabinet is a playful yet functional storage solution, designed to intrigue and delight. At first glance, its seamless façade conceals four distinct compartments, only revealing their access upon closer inspection. With adjustable shelves, it effortlessly accommodates everything from glassware and linens to dinnerware and collectibl...


Household Almond Taper Candle
$5.00
Crafted using the slow and precise drawing method — an ancient layering technique used to create candles of exceptional quality with a beautifully textured composition. Made using only the highest quality wax for a prolonged burn time and exceptional brightness. Each Household Almond Taper Candle is individually coloured by hand using a careful ...

Hugo Floor Rug


Hugo Floor Rug
$2,499.00
A contemporary statement, the Hugo floor rug is a masterclass in craftsmanship. Handcrafted from 100% New Zealand wool, its distinctive checkerboard design is created through carefully hand-carved sections of pile, adding subtle depth and rich visual texture. Dense yet soft underfoot, Hugo brings warmth, character, and refined craftsmanship to a...
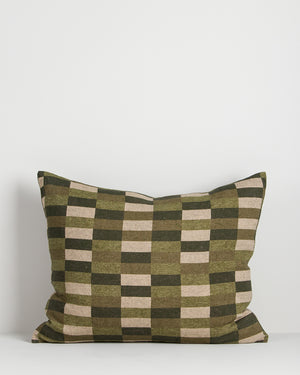
Hugo Lumbar Cushion

Hugo Lumbar Cushion
$149.00
Nature meets geometry in the Hugo lumbar cushion, where a grid-patterned design is printed on a pure linen base. Inspired by tranquil landscapes — from open skies and alpine lakes to forest undergrowth — the palettes bring a calm, grounded presence to interiors. Its elongated lumbar shape makes Hugo ideal for layering, adding both comfort and a ...


Hushed Birds Coasters (Set of 6)
$39.00
A stunning boxed set of six coasters featuring our beautiful native birds. The Hushed Birds Coasters (Set of 6) include a different design on each coaster. The coasters are heat resistant, hard wearing and an ideal gift to send by post. Wipe clean only. Material print on coated MDF, cork backed Size ø100 mm Check out other placemats & coasters


Hushed Birds Placemats (Set of 6)
$69.00
A stunning boxed set of six placemats featuring our beautiful native birds. The Hushed Birds Placemats (Set of 6) include a different design on each coaster. The placemats are heat resistant, hard wearing and an ideal gift to send by post. Wipe clean only. Material print on coated MDF, cork backed Size ø290 mm Check out other placemats & coa...

Hut Candles (Set of 3)
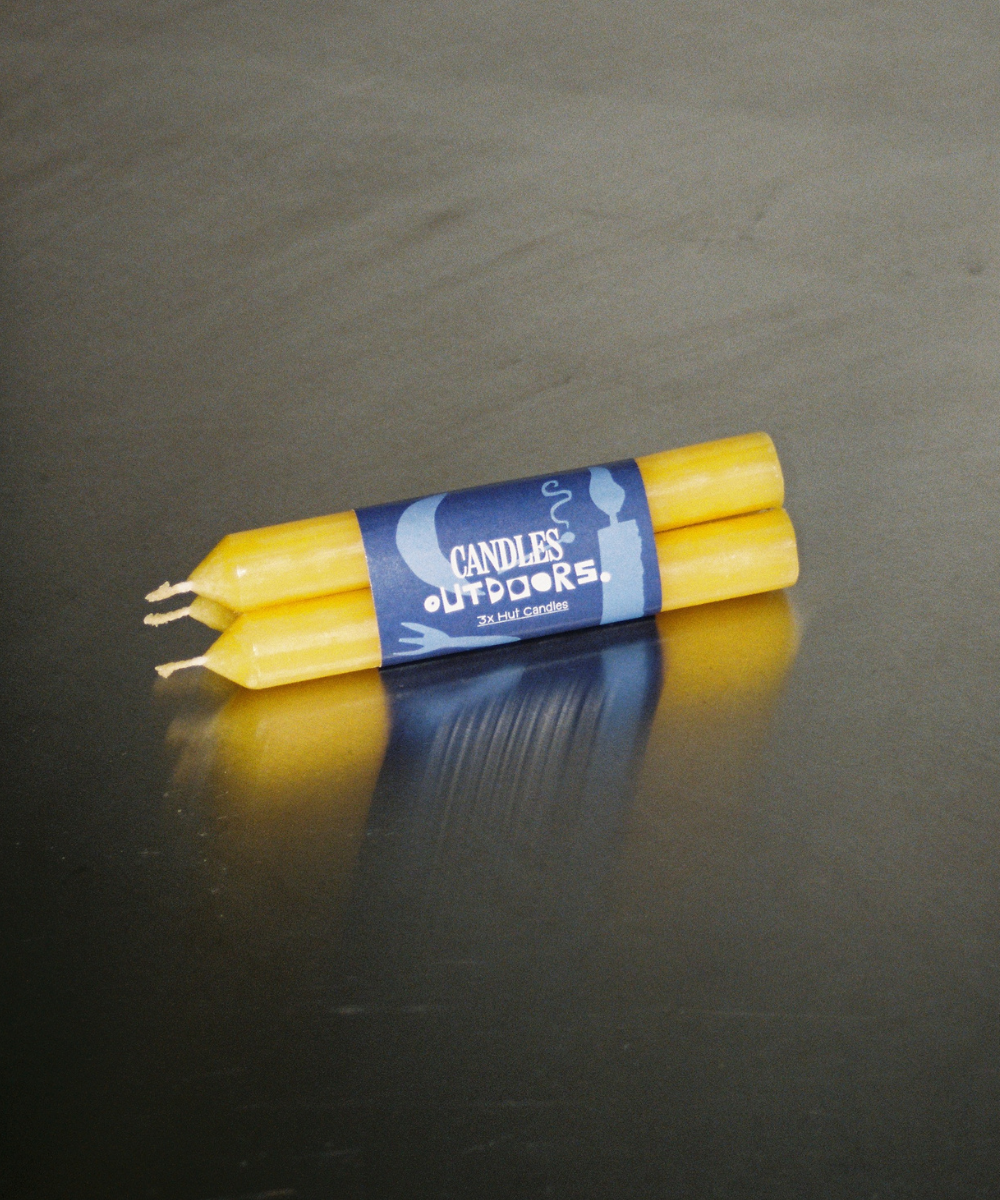
Hut Candles (Set of 3)
$19.00
Crafted in collaboration with neighbours Coffee Outdoors, the Hut Candles (Set of 3) are compact, durable, and thoughtfully sized to fit perfectly into a DOC hut sconce. Striking the ideal balance between packability and performance, they’re an essential companion for backcountry adventures. Each candle is made using the slow and precise drawing...
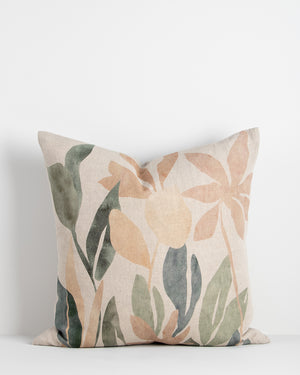
Imelda cushion

Imelda cushion
$139.00
Simplified cut-outs, reminiscent of pressed botanicals, explore the interplay of form and colour in the Imelda cushion. Printed on a natural pure-linen base, its blush and sage tones bring a fresh and elegant ambience to any space. Colour blush-sage Material 100% linen (outer), feather (inner) Construction Single-sided printed design, with knif...

Indira Cushion
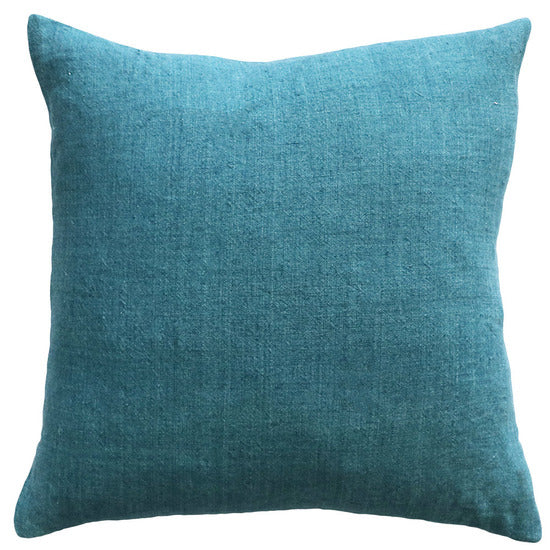
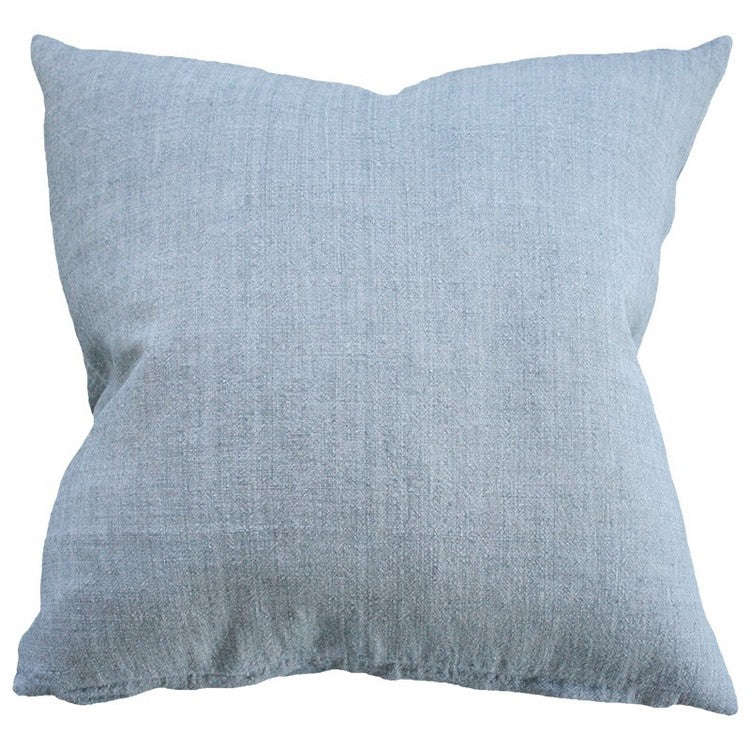
Indira Cushion
$99.00
Revive and renew your space with the Indira cushion, a contemporary yet timeless addition to any room. Handwoven from fine, 100% linen fibres, it features a light-weight texture and soft, relaxed tones that bring a sense of effortless style. Enzyme-washed for a softer handle, the gently distressed finish adds sophistication and understated chara...

iO Drum Light Shade
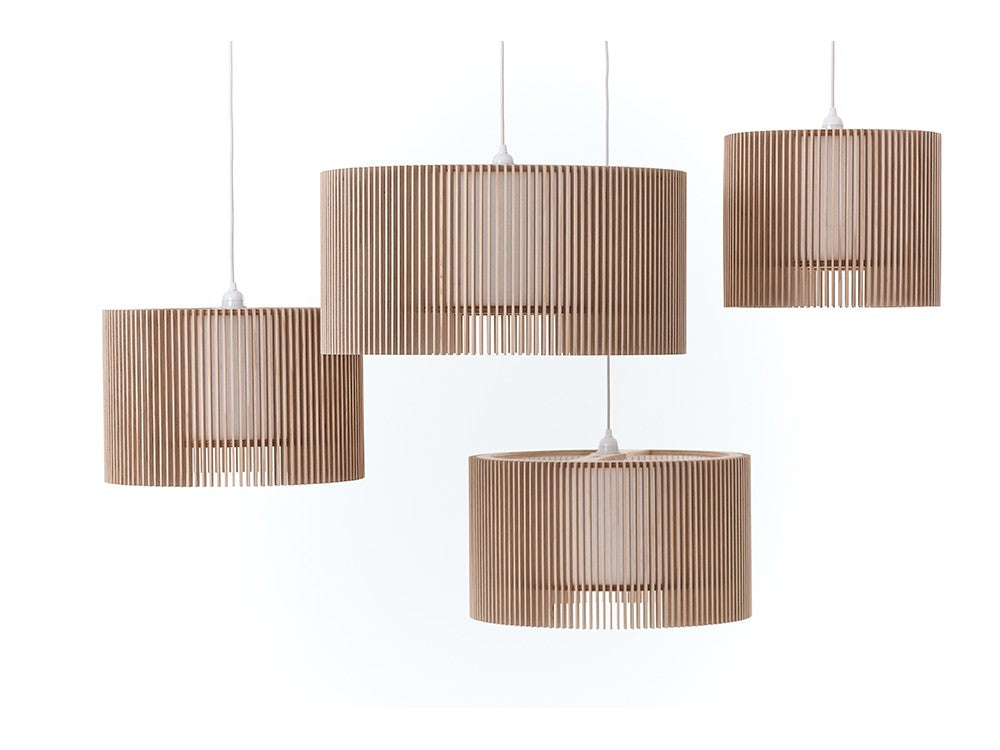
iO Drum Light Shade
$529.00
The iO Drum light shade merges traditional craftsmanship with digital precision, striking a balance between human artistry and modern fabrication. This fusion results in a meticulously detailed yet beautifully simple form - each piece unique yet precise. With a diffuser, it emits a warm, soft glow for a cosy and relaxing ambiance. Inspired by Io...

iO Floor Light
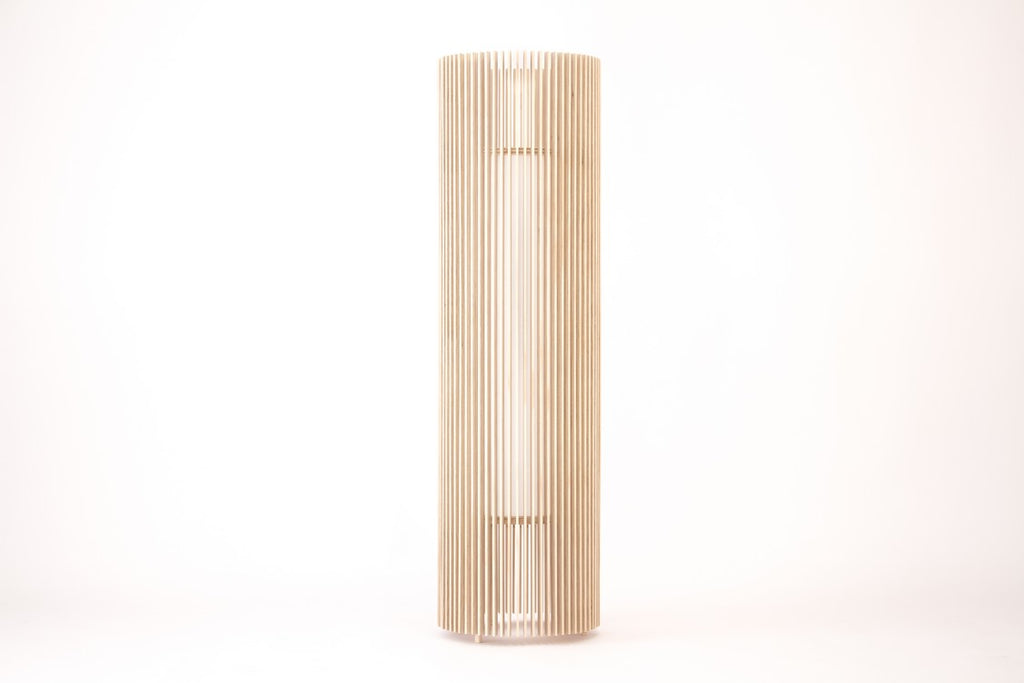
iO Floor Light
$1,455.00
The iO Floor Light merges traditional craftsmanship with digital precision, striking a balance between human artistry and modern fabrication. This fusion results in a meticulously detailed yet beautifully simple form - each piece unique yet precise. With a diffuser, it emits a warm, soft glow for a cosy and relaxing ambiance. Inspired by Io, the...
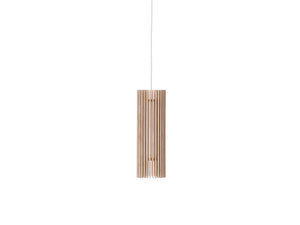
iO Flute Light Shade

iO Flute Light Shade
$418.00
The iO Flute light shade merges traditional craftsmanship with digital precision, striking a balance between human artistry and modern fabrication. This fusion results in a meticulously detailed yet beautifully simple form - each piece unique yet precise. With a diffuser, it emits a warm, soft glow for a cosy and relaxing ambiance. Inspired by I...

iO Long Light Shade
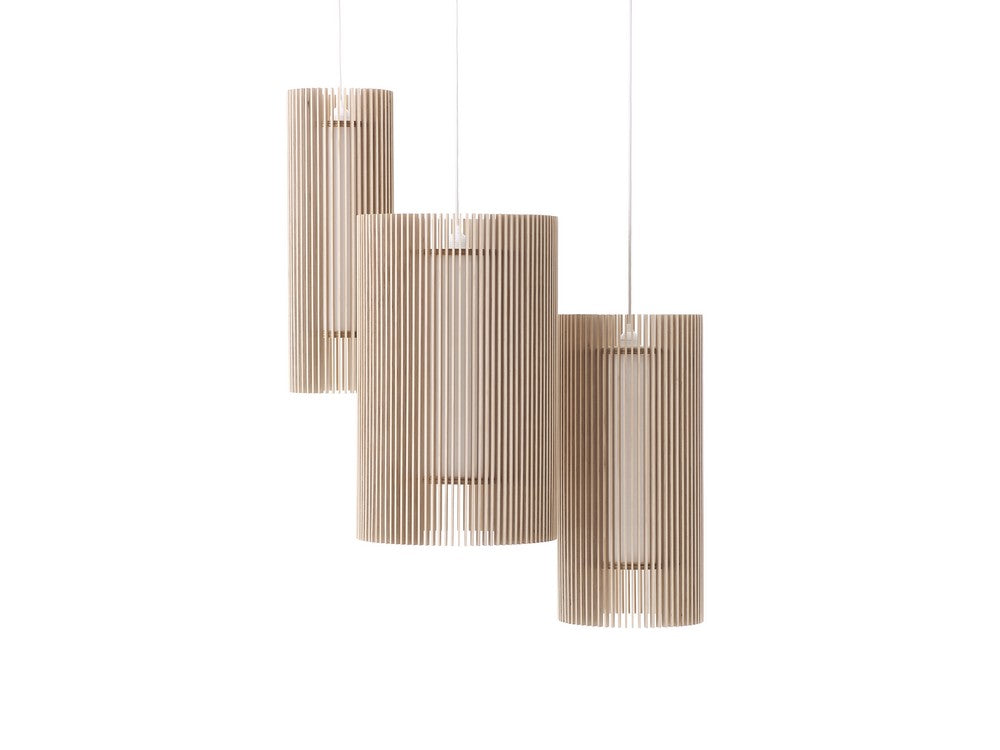
iO Long Light Shade
$499.00
The iO Long light shade merges traditional craftsmanship with digital precision, striking a balance between human artistry and modern fabrication. This fusion results in a meticulously detailed yet beautifully simple form - each piece unique yet precise. With a diffuser, it emits a warm, soft glow for a cosy and relaxing ambiance. Inspired by Io...
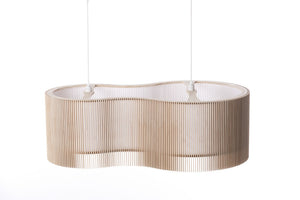
iO Nimbus Light Shade

iO Nimbus Light Shade
$3,370.00
The iO Nimbus light shade merges traditional craftsmanship with digital precision, striking a balance between human artistry and modern fabrication. This fusion results in a meticulously detailed yet beautifully simple form - each piece unique yet precise. With a diffuser, it emits a warm, soft glow for a cosy and relaxing ambiance. Inspired by ...

iO Phoebus Pendant Light

iO Phoebus Pendant Light
$7,395.00
The iO Phoebus pendant light brings a touch of galactic awe to your space — a stunning fusion of traditional craftsmanship and precision technology. At 1.2 metres wide, its sculptural circular form makes a striking statement while maintaining the signature warmth and elegance of the iO range. Complete with a double-facing dimmable LED ring lumin...

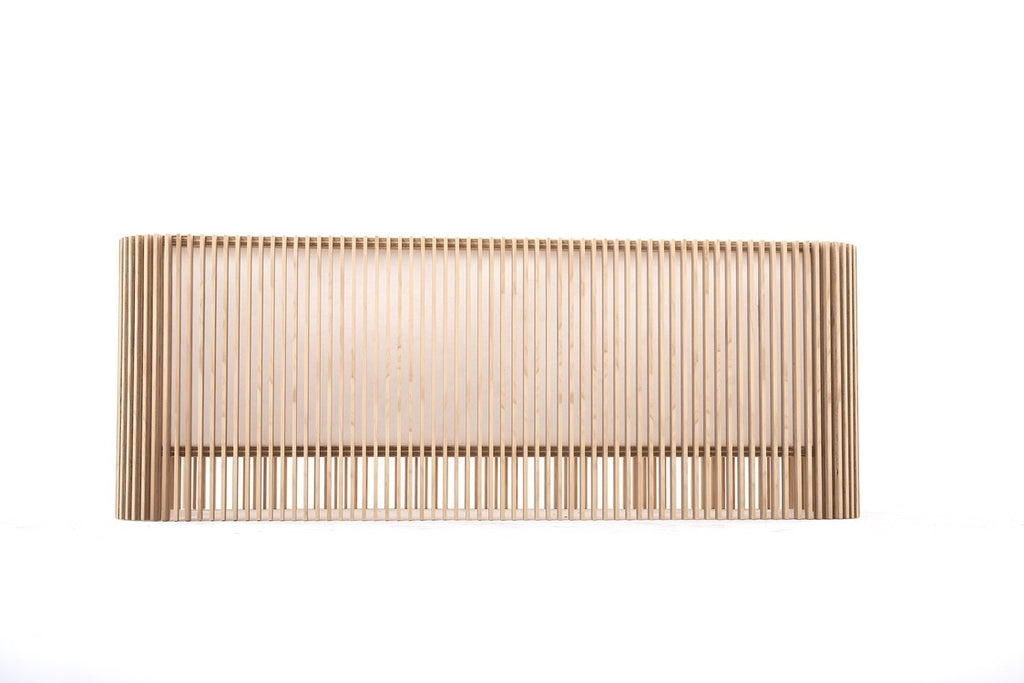
iO Rectangle Light Shade
iO Rectangle Light Shade
$1,739.00
The iO Rectangle light shade merges traditional craftsmanship with digital precision, striking a balance between human artistry and modern fabrication. This fusion results in a meticulously detailed yet beautifully simple form — each piece unique yet precise. With a diffuser, it emits a warm, soft glow for a cosy and relaxing ambiance. The oblon...
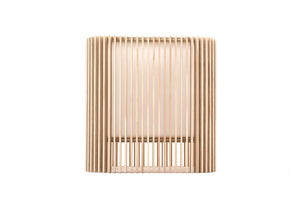
iO Square light shade

iO Square light shade
$1,088.00
The iO Square light shade merges traditional craftsmanship with digital precision, striking a balance between human artistry and modern fabrication. This fusion results in a meticulously detailed yet beautifully simple form—each piece unique yet precise. With a diffuser, it emits a warm, soft glow for a cosy and relaxing ambiance. Inspired by Io...
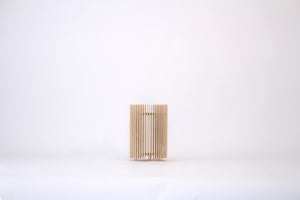
iO Table Light
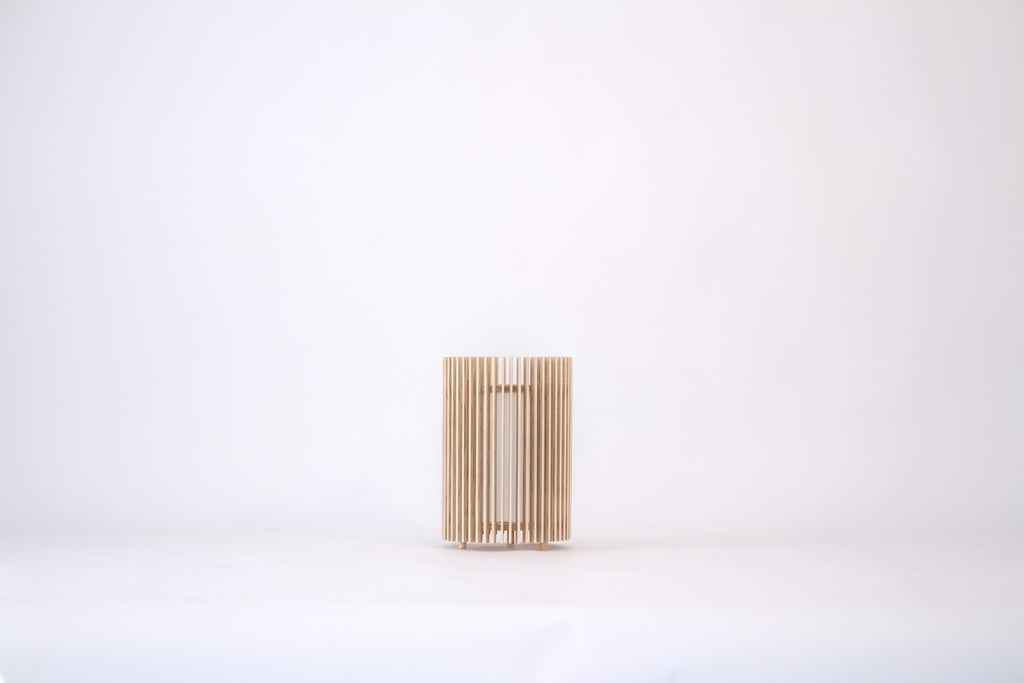
iO Table Light
$625.00
The iO Table Light merges traditional craftsmanship with digital precision, creating a form that is both meticulously detailed and beautifully simple — each piece unique yet precise. With its diffuser, it casts a warm, soft glow, perfect for creating a cosy and relaxing ambiance. Designed to sit gracefully on any table, sideboard, desk, or bedsi...

iO² Slimline Rectangle Light Shade

iO² Slimline Rectangle Light Shade
$3,229.00
The iO² Slimline Rectangle light shade merges traditional craftsmanship with digital precision, striking a balance between human artistry and modern fabrication. This fusion results in a meticulously detailed yet beautifully simple form — each piece unique yet precise. Designed as a refined centrepiece, the Slimline Rectangle is ideal for positi...


Ira Mitchell Print - Auckland Museum
$229.00
Queenstown-born artist Ira Mitchell is a trained teacher and Bachelor of Fine Arts graduate. She is also an artist-educator for GOLDEN paints of New York, where she travels annually to train and show. A nomad by nature, she moves constantly to create images in locations that inspire her. Her work is informed by the bold palette of David Hockney...
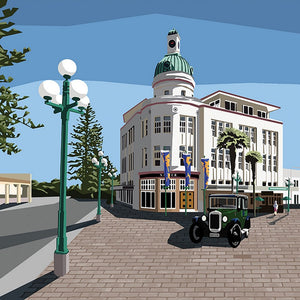

Ira Mitchell Print - Napier Clock
$229.00
Queenstown-born artist Ira Mitchell is a trained teacher and Bachelor of Fine Arts graduate. She is also an artist-educator for GOLDEN paints of New York, where she travels annually to train and show. A nomad by nature, she moves constantly to create images in locations that inspire her. Her work is informed by the bold palette of David Hockney...
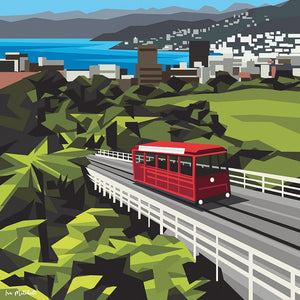

Ira Mitchell Print - Wellington Cable Car
$229.00
Queenstown-born artist Ira Mitchell is a trained teacher and Bachelor of Fine Arts graduate. She is also an artist-educator for GOLDEN paints of New York, where she travels annually to train and show. A nomad by nature, she moves constantly to create images in locations that inspire her. Her work is informed by the bold palette of David Hockney...

Ira Mitchell Print - Whangamata

Ira Mitchell Print - Whangamata
$849.00
Queenstown-born artist Ira Mitchell is a trained teacher and Bachelor of Fine Arts graduate. She is also an artist-educator for GOLDEN paints of New York, where she travels annually to train and show. A nomad by nature, she moves constantly to create images in locations that inspire her. Her work is informed by the bold palette of David Hockney...
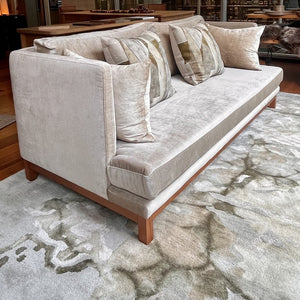
Isla Sofa

Isla Sofa
$2,599.00
The Isla Sofa offers a classic design with a contemporary edge, complementing both traditional and modern spaces. Its back features reversible feather and down cushions, with two additional cushions resting against the high, slimline arms. A striking solid timber plinth base supports an Italian sprung webbing single-seat cushion, delivering the ...


