Products
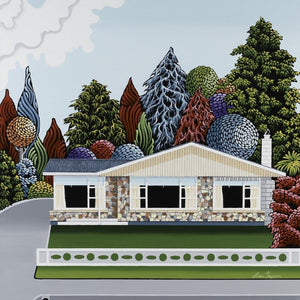
Lisa Jepson Print - Retro Charm
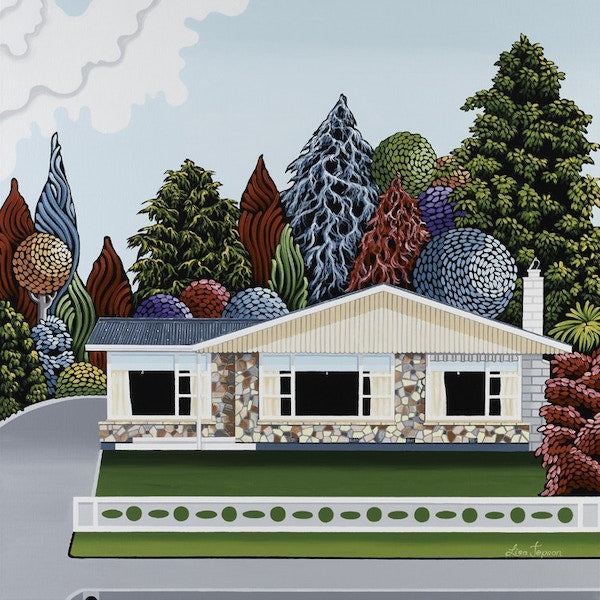
Lisa Jepson Print - Retro Charm
$249.00
Designing and Fine Art have been a life-long passion of Lisa Jepson. She works from home, based at the bottom of the beautiful Mount Grey in rural North Canterbury. Lisa has a strong desire, drive and love for her work, devoting countless hours. She has a love of colour and a need for detail, so keeping the simplistic approach is always an enthu...
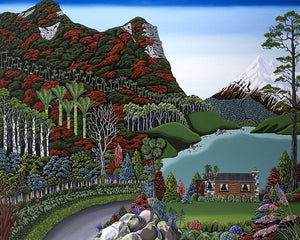
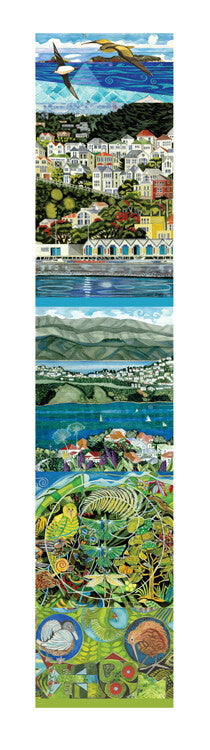
Lisa Jepson Print - Wild Heart
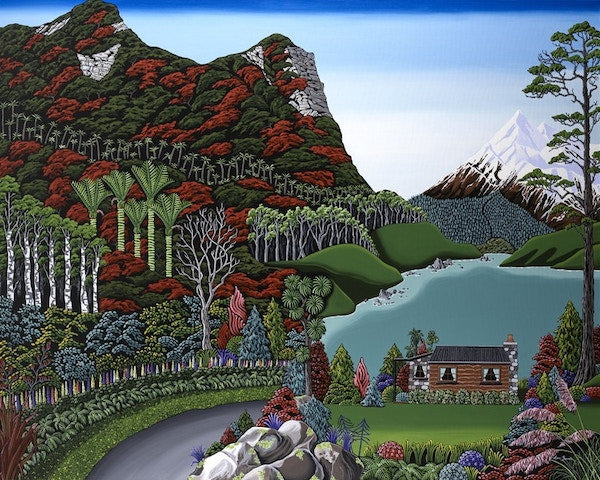
Lisa Jepson Print - Wild Heart
$349.00
Designing and Fine Art have been a life-long passion of Lisa Jepson. She works from home, based at the bottom of the beautiful Mount Grey in rural North Canterbury. Lisa has a strong desire, drive and love for her work, devoting countless hours. She has a love of colour and a need for detail, so keeping the simplistic approach is always an enthu...

Lisa Moes Print - Backcountry Huts
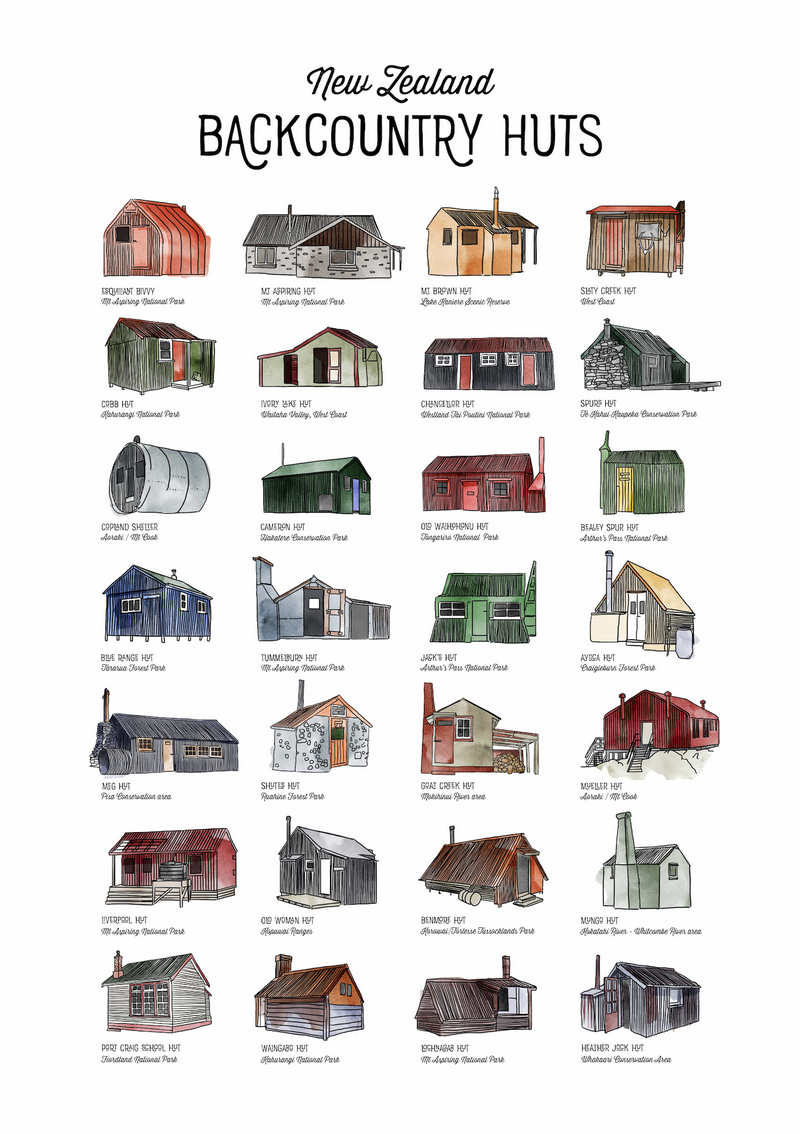
Lisa Moes Print - Backcountry Huts
$159.00
Take the spirit of New Zealand’s backcountry home with Lisa Moes’ Print – Backcountry Huts. This A3 fine art print, produced on premium 310gsm German etching paper, features a collection of iconic huts — capturing quiet nights, logbook stories, and the thrill of adventure. Available in two options — Framed and Unframed — with the framed option p...
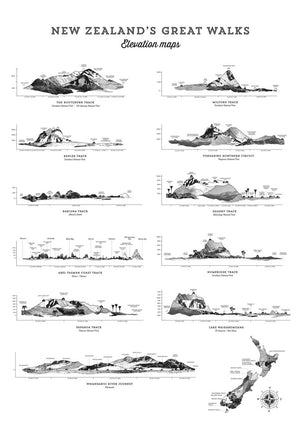
Lisa Moes Print - Great Walks Elevation Maps
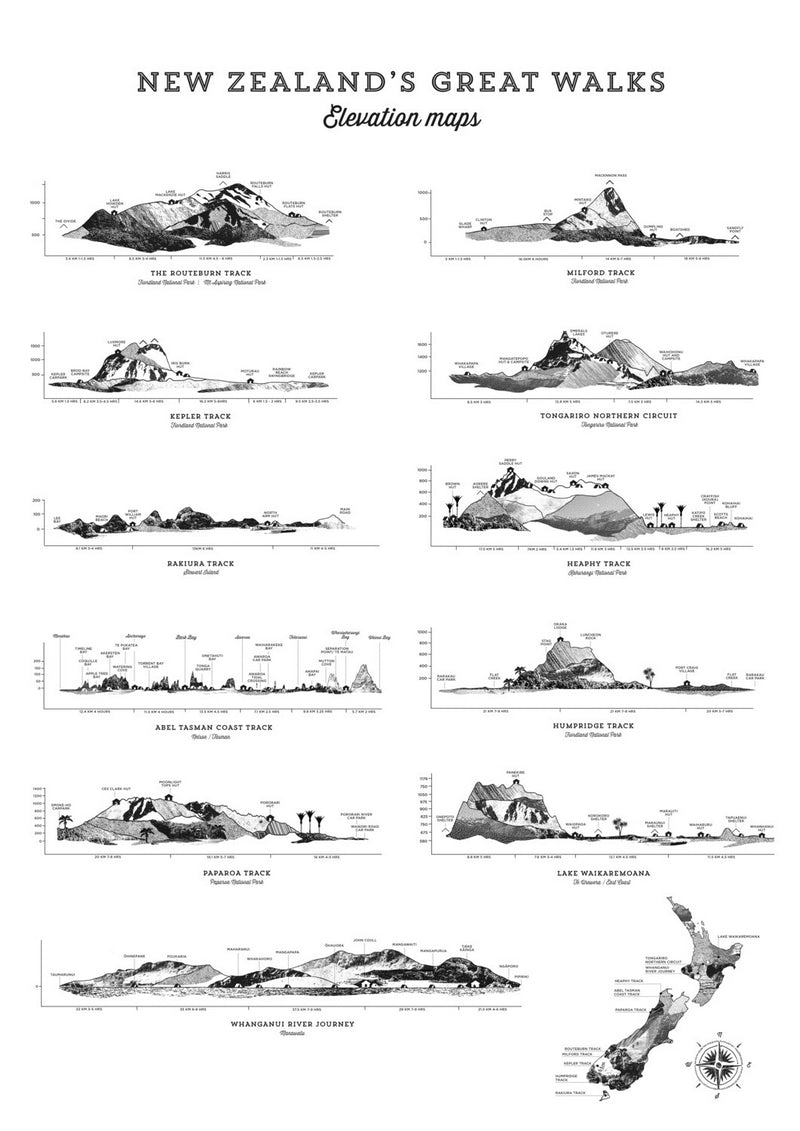
Lisa Moes Print - Great Walks Elevation Maps
$159.00
Bring the trails of Aotearoa into your space with Lisa Moes’ Print – Great Walks Elevation Maps. This A3 black fine art print, produced on premium 310gsm German etching paper, showcases the dramatic landscapes and elevation profiles of New Zealand’s iconic Great Walks — a celebration of the terrain that shapes every step of the journey. Availabl...


Lisa Moes Print - Historic Hotels of Central Otago
$159.00
Bring the charm of Central Otago’s historic hotels into your home with Lisa Moes’ Print – Historic Hotels of Central Otago. This A3 fine art print, produced on premium 310gsm German etching paper, captures the timeless architecture and stories of the region’s most iconic accommodations. Available in two options — Framed and Unframed — with the f...

Lisa Moes Print - NZ Peaks
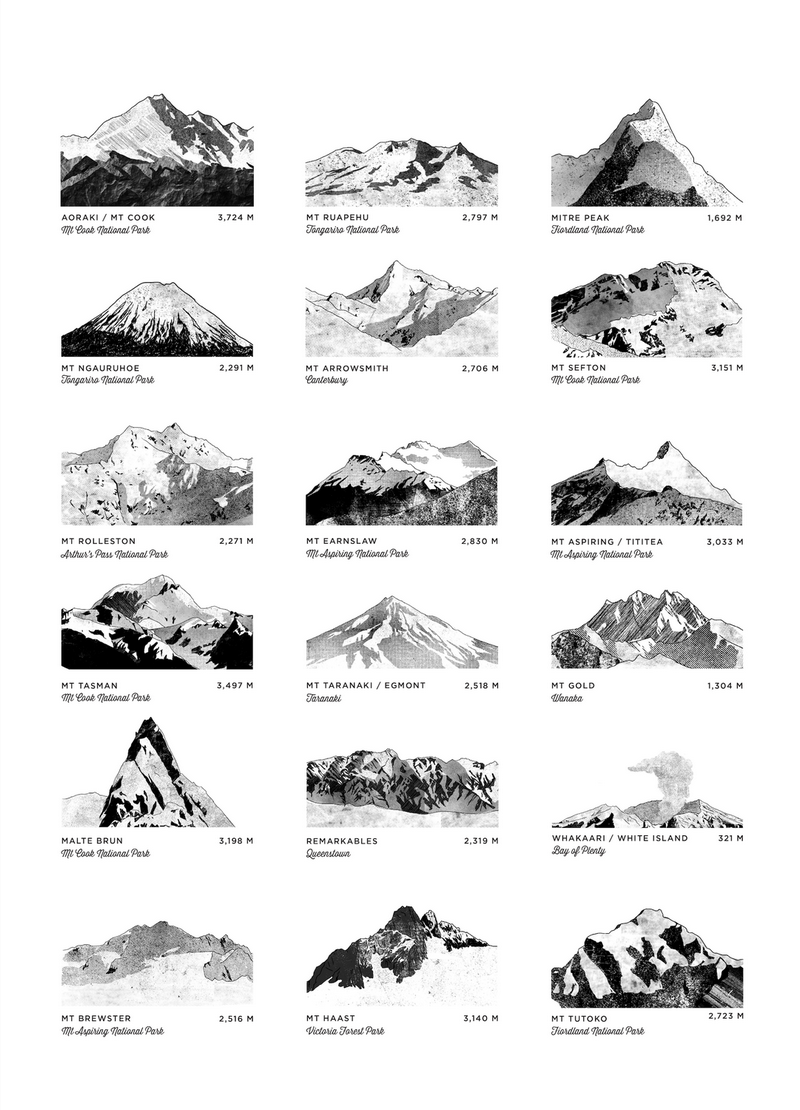
Lisa Moes Print - NZ Peaks
$159.00
Bring the majesty of New Zealand’s mountains into your home with Lisa Moes’ Print – NZ Peaks. This A3 fine art print, produced on premium 310gsm German etching paper, celebrates the iconic peaks that define Aotearoa’s dramatic landscapes. Available in two options — Framed and Unframed — with the framed option presented in a white timber box-fram...
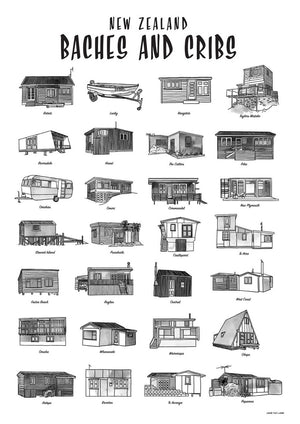
Lisa Moes Print – Baches and Cribs
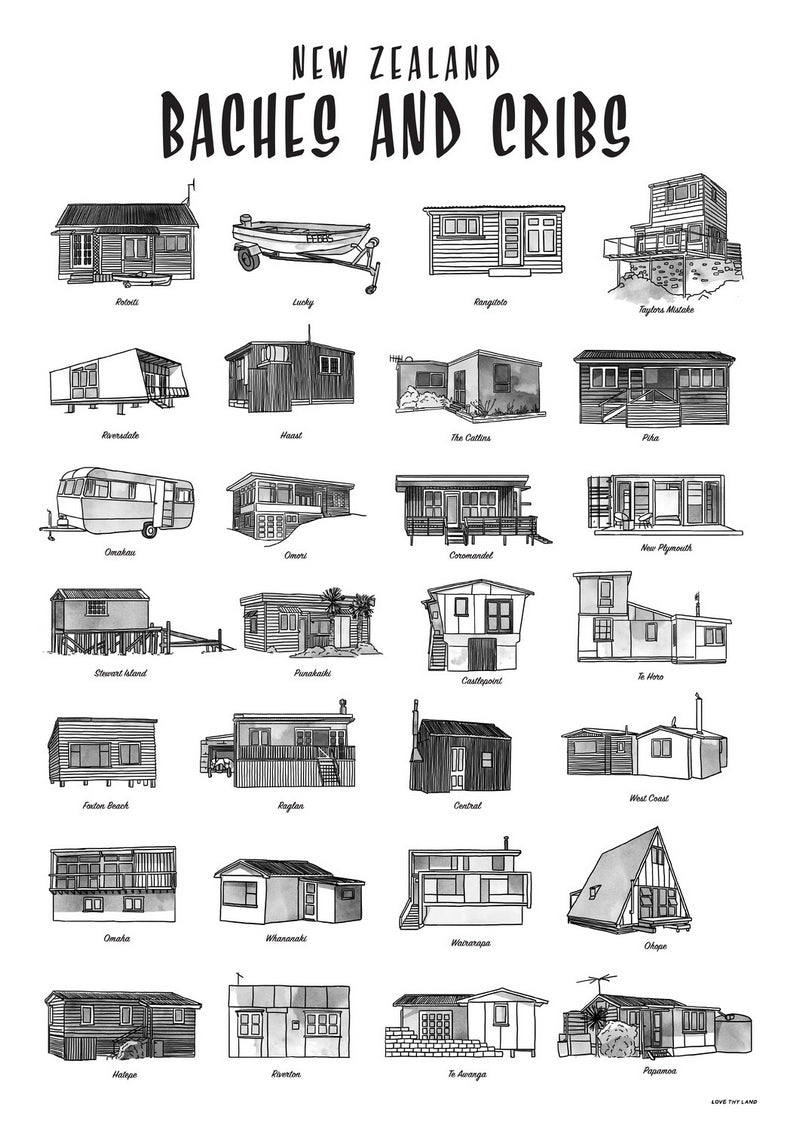
Lisa Moes Print – Baches and Cribs
$159.00
Bring a touch of Kiwi heritage home with Lisa Moes’ Print - Baches and Cribs. This A3 fine art print, produced on premium 310gsm German etching paper, celebrates the charm, character, and nostalgia of New Zealand’s most iconic holiday homes. Available in two options — Framed and Unframed — with the framed option presented in a white timber box-f...

Lisa Moes Print – Backcountry Trucks
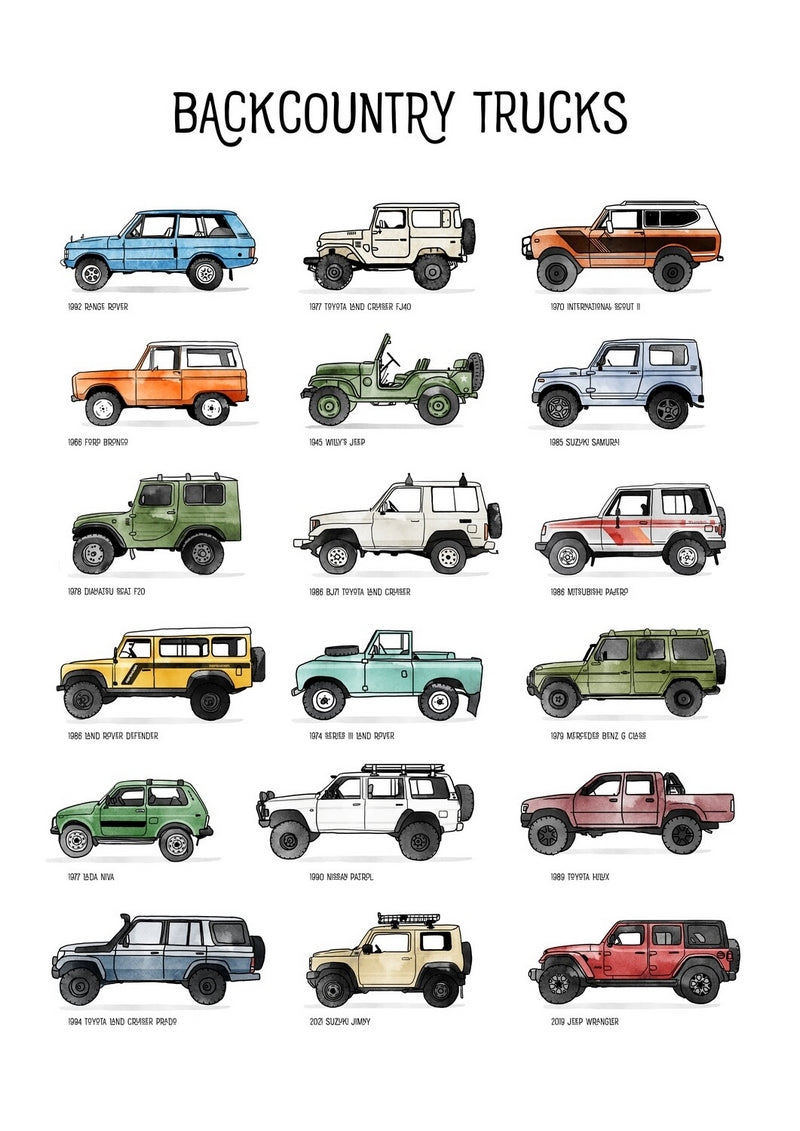
Lisa Moes Print – Backcountry Trucks
$159.00
Celebrate the rugged charm of New Zealand’s high-country travel with Lisa Moes’ Print – Backcountry Trucks. This A3 fine art print, produced on premium 310gsm German etching paper, pays tribute to the old 4WDs that rumble their way into Aotearoa’s remote corners — the rusted, rugged workhorses that carry us and our gear into the heart of the bac...

Lisa Moes’ Print - Ōhau

Lisa Moes’ Print - Ōhau
$159.00
Bring a touch of alpine nostalgia home with Lisa Moes’ Print – Ōhau. This A3 fine art print, produced on premium 310gsm German etching paper, captures the mellow charm and expansive alpine views of Ōhau — a much-loved escape near Wānaka. Inspired by vintage travel posters, the artwork features bold, simplified forms and a nostalgic feel, reflect...

Lisa Moes’ Print – Cardrona

Lisa Moes’ Print – Cardrona
$159.00
Bring a touch of alpine nostalgia home with Lisa Moes’ Print – Cardrona. This A3 fine art print, produced on premium 310gsm German etching paper, captures the wide-open pistes, crisp alpine air, and laid-back energy of one of New Zealand’s most iconic ski fields. Inspired by vintage travel posters, the artwork features bold, simplified forms and...

Lisa Moes’ Print – The Remarkables

Lisa Moes’ Print – The Remarkables
$159.00
Bring a touch of alpine adventure home with Lisa Moes’ Print – The Remarkables. This A3 fine art print, produced on premium 310gsm German etching paper, captures a skier poised at the top of The Remarkables, looking out over Lake Whakatipu and the mountains beyond. Inspired by vintage travel posters, the artwork features bold, simplified forms a...

Lisa Moes’ Print – Treble Cone

Lisa Moes’ Print – Treble Cone
$159.00
Bring a touch of alpine energy home with Lisa Moes’ Print – Treble Cone. This A3 fine art print, produced on premium 310gsm German etching paper, celebrates one of New Zealand’s most iconic ski fields, known for its dramatic terrain and sweeping views over Lake Wānaka. Available in two options — Framed and Unframed — with the framed option prese...


Little Difference Greeting Card - Biggest Bear Hug
$9.50
A Little Card That Makes a Big Difference Queenstown-based artist Sophie Stevens brings the natural world to life with her hand-drawn, joy-filled designs for Little Difference. Each card is part of a mission to reforest the planet — with one native tree planted for every card sold. Printed in Tāmaki Makaurau/Auckland on premium 100% recycled car...


Little Difference Greeting Card - Happy Birthday Rainbow
$9.50
A Little Card That Makes a Big Difference Queenstown-based artist Sophie Stevens brings the natural world to life with her hand-drawn, joy-filled designs for Little Difference. Each card is part of a mission to reforest the planet — with one native tree planted for every card sold. Printed in Tāmaki Makaurau/Auckland on premium 100% recycled car...


Little Difference Greeting Card - Hero Crabs
$9.50
A Little Card That Makes a Big Difference Queenstown-based artist Sophie Stevens brings the natural world to life with her hand-drawn, joy-filled designs for Little Difference. Each card is part of a mission to reforest the planet — with one native tree planted for every card sold. Printed in Tāmaki Makaurau/Auckland on premium 100% recycled car...


Little Difference Greeting Card - Mountain Moon
$9.50
A Little Card That Makes a Big Difference Queenstown-based artist Sophie Stevens brings the natural world to life with her hand-drawn, joy-filled designs for Little Difference. Each card is part of a mission to reforest the planet — with one native tree planted for every card sold. Printed in Tāmaki Makaurau/Auckland on premium 100% recycled car...


Little Difference Greeting Card - NZ Nature Map
$9.50
A Little Card That Makes a Big Difference Queenstown-based artist Sophie Stevens brings the natural world to life with her hand-drawn, joy-filled designs for Little Difference. Each card is part of a mission to reforest the planet — with one native tree planted for every card sold. Printed in Tāmaki Makaurau/Auckland on premium 100% recycled car...


Little Difference Greeting Card - Ruru Totara
$9.50
A Little Card That Makes a Big Difference Queenstown-based artist Sophie Stevens brings the natural world to life with her hand-drawn, joy-filled designs for Little Difference. Each card is part of a mission to reforest the planet — with one native tree planted for every card sold. Printed in Tāmaki Makaurau/Auckland on premium 100% recycled car...
Lola Outdoor Bean Bag
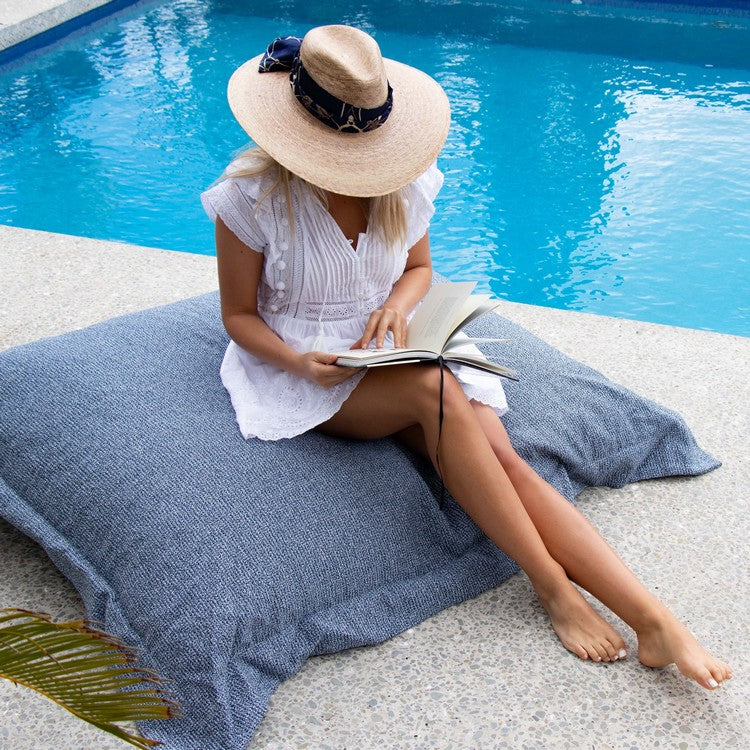

Lola Outdoor Bean Bag
$599.00
Lola Outdoor Bean Bag is made from lightfast, durable and easy to clean SUNDEC fabric. Whether it's in the garden, by the pool, on a boat, entertainment deck or at an outdoor cafe, SUNDEC is designed to create a beautifully coordinated environment that can be effortlessly maintained no matter the conditions. It’s developed to withstand commercia...
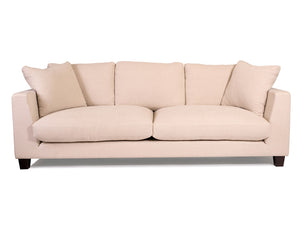
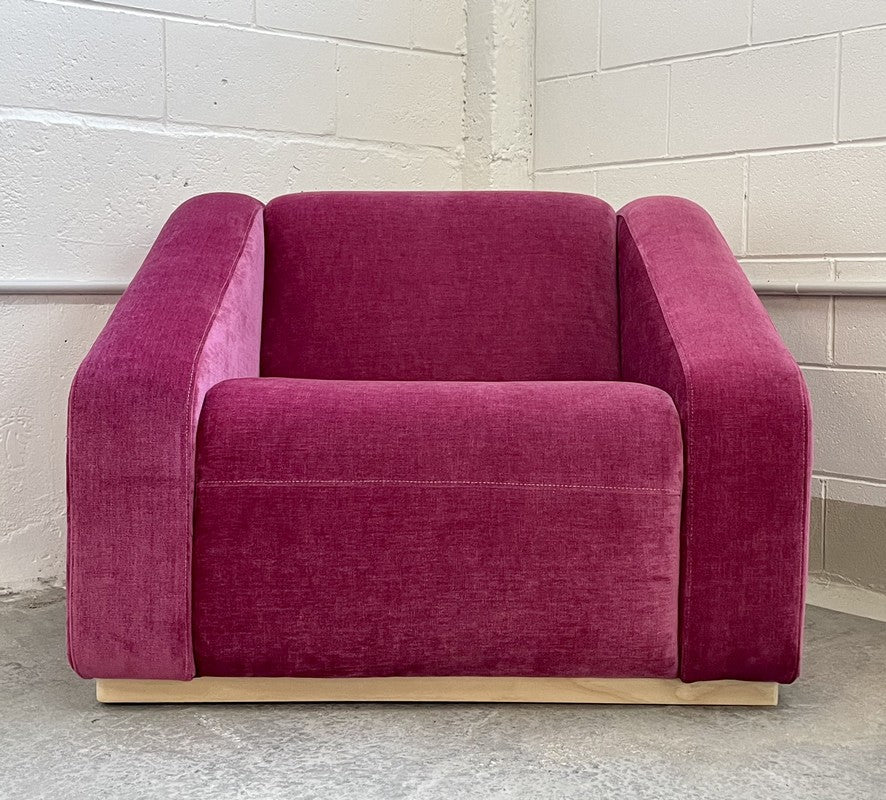
London Modern Sofa
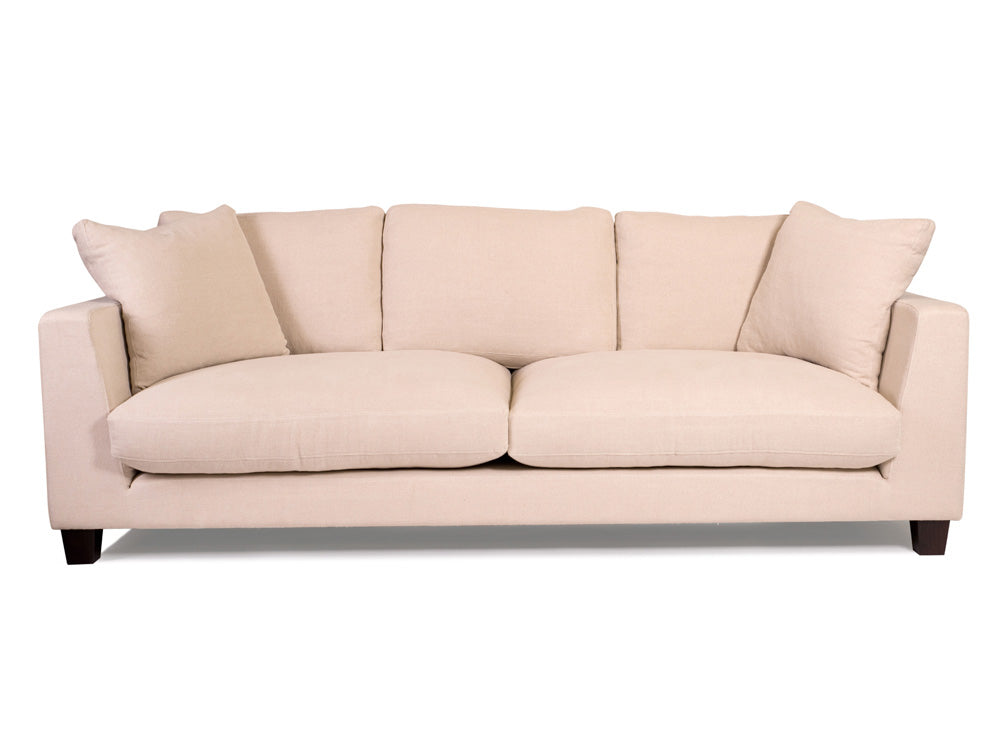
London Modern Sofa
$4,499.00
Big, bold, and utterly scrumptious, the London Modern Sofa is the perfect blend of style and comfort. Relax into London, and you'll quickly feel right at home. Just like the city, this sofa design suits both "old" and "new" settings. Frame Furniture-grade untreated pine timber (constructed using screws, corner blocks and glue) Seat & Tray Up...

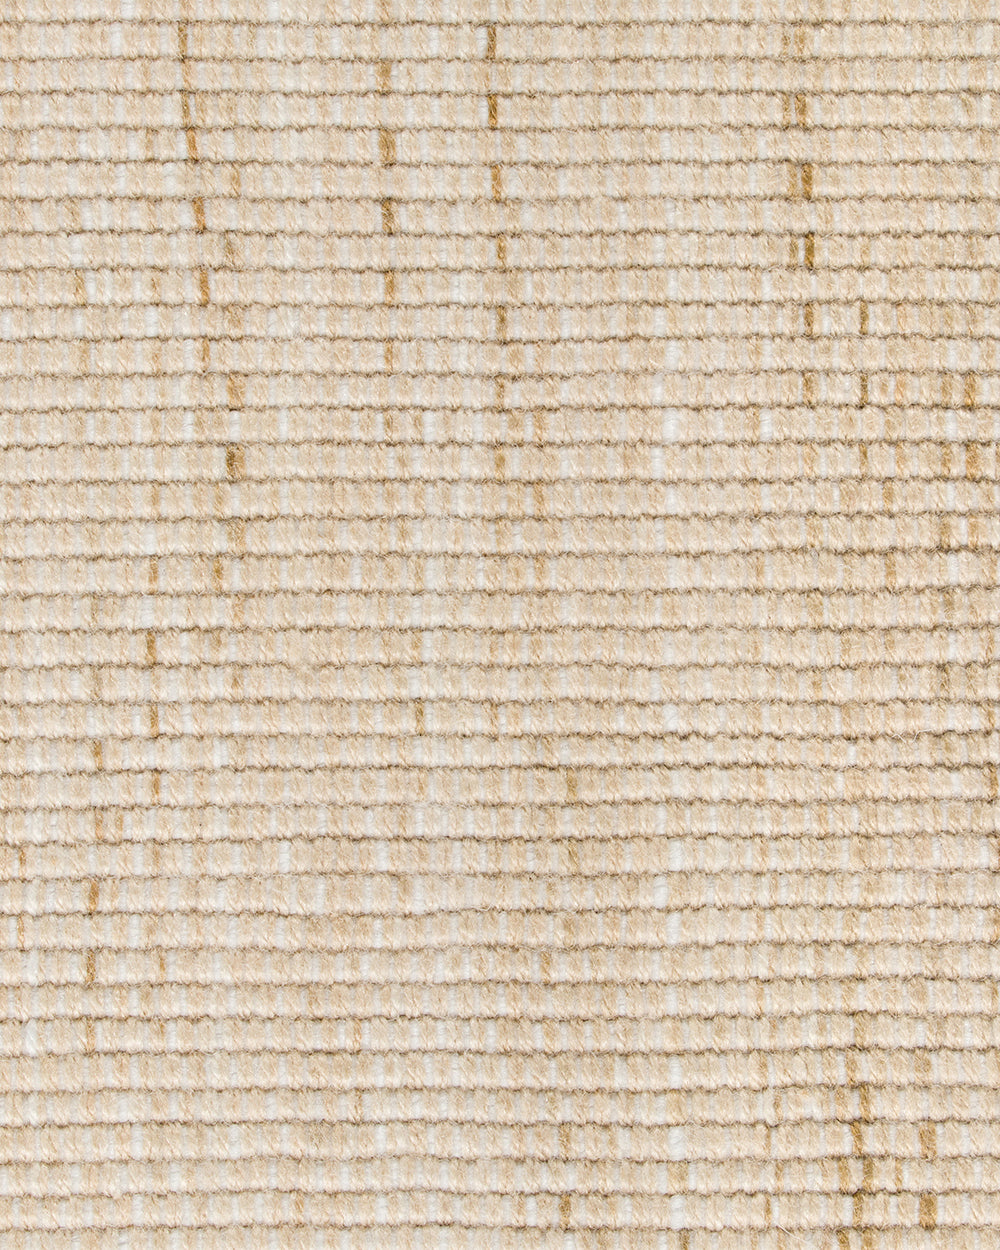
Lonsdale Entrance Mat


Lonsdale Entrance Mat
$109.00
Create a welcoming entrance with the Lonsdale Entrance Mat, where simple design meets lasting durability. Handwoven in a flatweave construction, its warm, earthy colourways provide a refined and versatile foundation for transition spaces. Crafted from recycled PET yarn — a resilient fibre made from plastic bottles — this mat is hard-wearing and ...
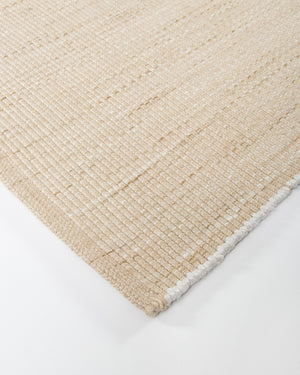
Lonsdale Outdoor Floor Rug

Lonsdale Outdoor Floor Rug
$699.00
Tightly woven from recycled PET fibres, the Lonsdale Outdoor Floor Rug’s flatweave design and warm earthy colourways provide the perfect foundation for contemporary exterior spaces. The durable nature of this rug makes it suitable for outdoors, high-traffic areas or under dining tables. 450 plastic bottles were saved from landfill to create this...

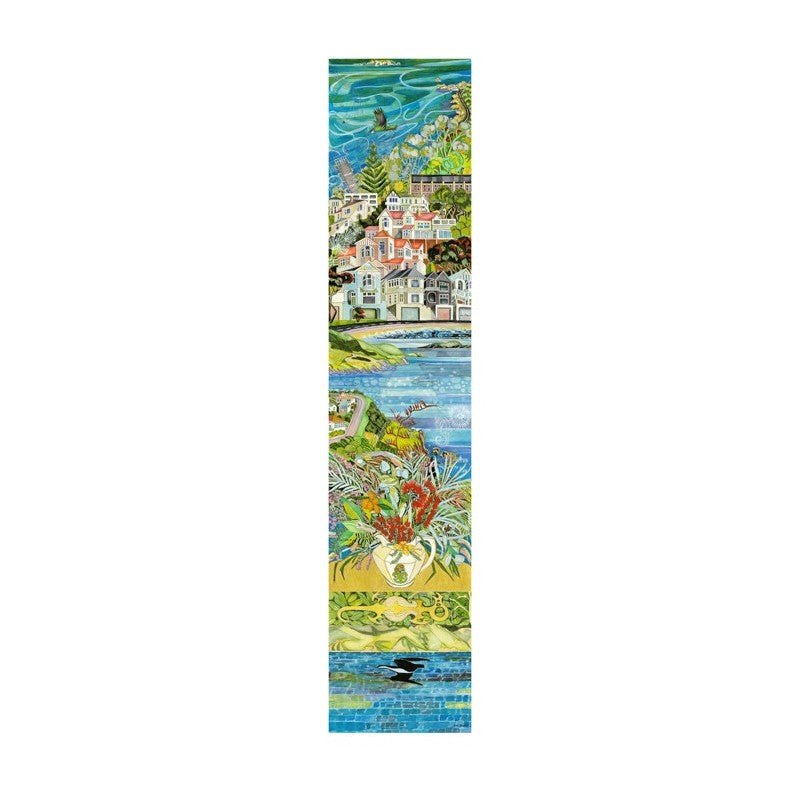
Lori Davis - Tinakori Road Wellington
$279.00
Lori Davis is a painter with a deep passion for the patterns, rhythms and colours of Wellington and the wider New Zealand landscape. “The land we stand on — what it provides, how it is formed, the geology and layers that create hills, valleys, rivers and bush — increasingly fascinate and inspire me. I want to understand and tell the story of our...

Lori Davis Print - Aotearoa Summer
$249.00
Lori Davis loves to paint. She is passionate about the patterns, rhythms and colours of Wellington and regional landscapes of New Zealand. “The land we stand on, what it provides, how it is made, the geology and layers creating hills, valleys, rivers and bush, are things that increasingly fascinate and inspire me, to understand and tell the stor...

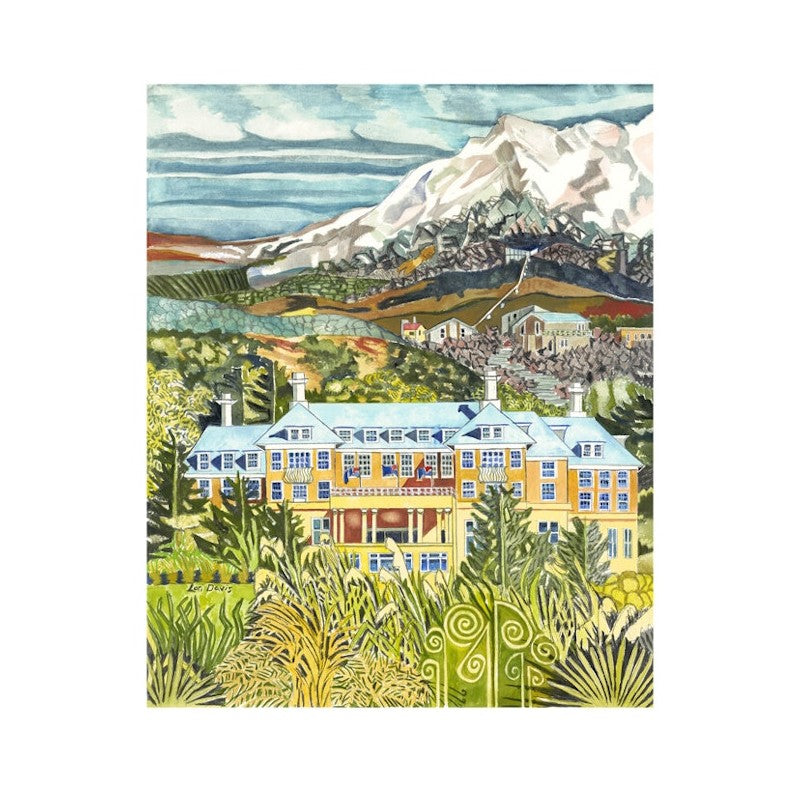
Lori Davis Print - Chateau Tongariro Heyday
$279.00
Lori Davis loves to paint. She is passionate about the patterns, rhythms and colours of Wellington and regional landscapes of New Zealand. “The land we stand on, what it provides, how it is made, the geology and layers creating hills, valleys, rivers and bush, are things that increasingly fascinate and inspire me, to understand and tell the stor...

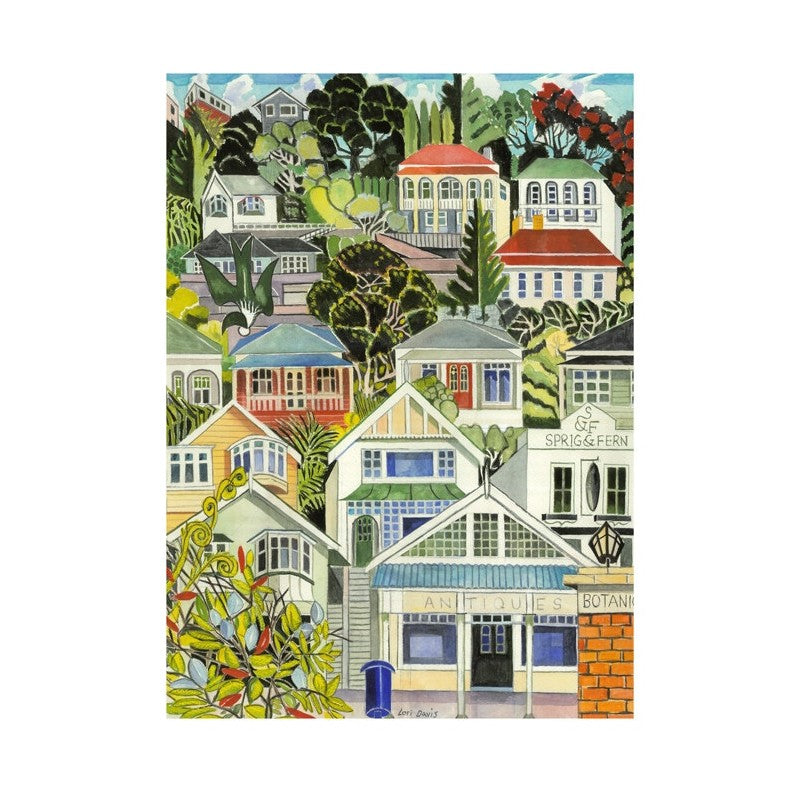
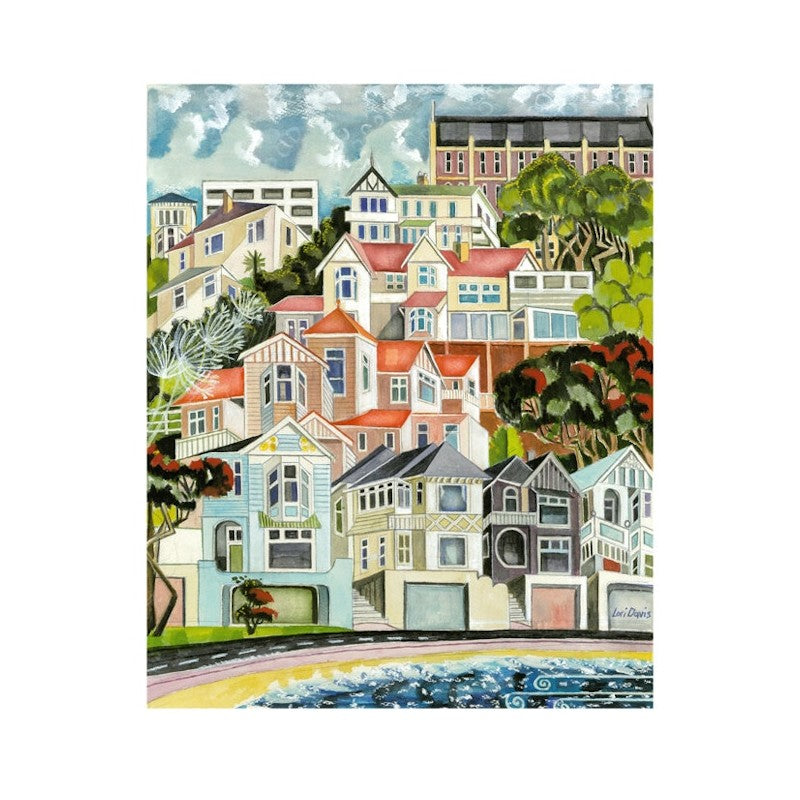
Lori Davis Print - House Stack Mt Victoria
$279.00
Lori Davis is a painter with a deep passion for the patterns, rhythms and colours of Wellington and the wider New Zealand landscape. “The land we stand on — what it provides, how it is formed, the geology and layers that create hills, valleys, rivers and bush — increasingly fascinate and inspire me. I want to understand and tell the story of our...

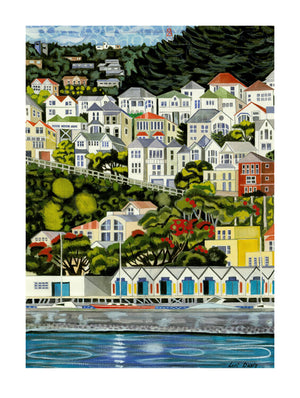
Lori Davis Print - Painted Ladies
$279.00
Lori Davis loves to paint. She is passionate about the patterns, rhythms and colours of Wellington and regional landscapes of New Zealand. “The land we stand on, what it provides, how it is made, the geology and layers creating hills, valleys, rivers and bush, are things that increasingly fascinate and inspire me, to understand and tell the stor...

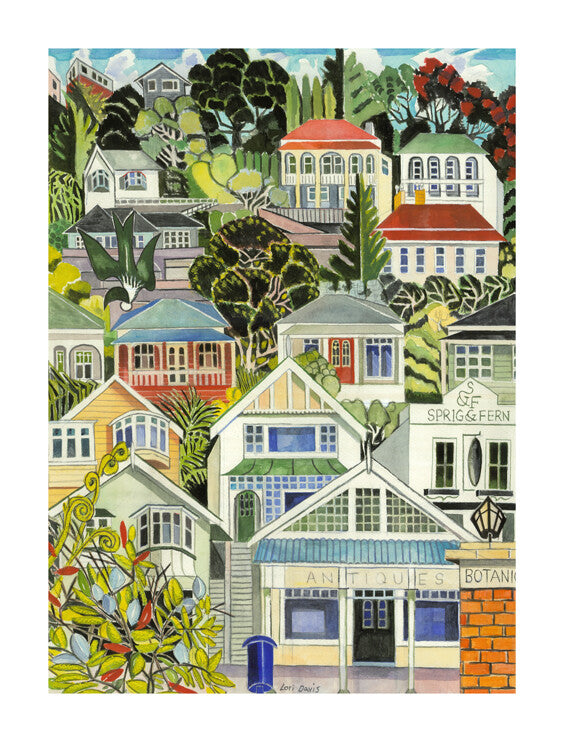
Lori Davis print - Tinakori Road Wellington
$279.00
Lori Davis loves to paint. She is passionate about the patterns, rhythms and colours of Wellington and regional landscapes of New Zealand. “The land we stand on, what it provides, how it is made, the geology and layers creating hills, valleys, rivers and bush, are things that increasingly fascinate and inspire me, to understand and tell the stor...

Lori Davis Print - Tohu Pou
Lori Davis Print - Tohu Pou
$199.00
Lori Davis loves to paint and is deeply inspired by the patterns, rhythms and colours of Wellington and the wider New Zealand landscape. “The land we stand on — what it provides, how it is formed, the geology and layers that create hills, valleys, rivers and bush — increasingly fascinate and inspire me. I want to understand and tell the story of...

Lucia Occasional Chair
Lucia Occasional Chair
$2,399.00
With wide sloping arms and a robust base, the Lucia Occasional Chair makes a bold statement in any room. Both striking and inviting, its seductive design entices everyone to sit and relax. Frame Solid NZ pine and plywood Seat & Back Italian Black Cat webbing and high-density foam with fibre overlay Plinth Base solid ash, stained black, mid-b...

Lucio cushion
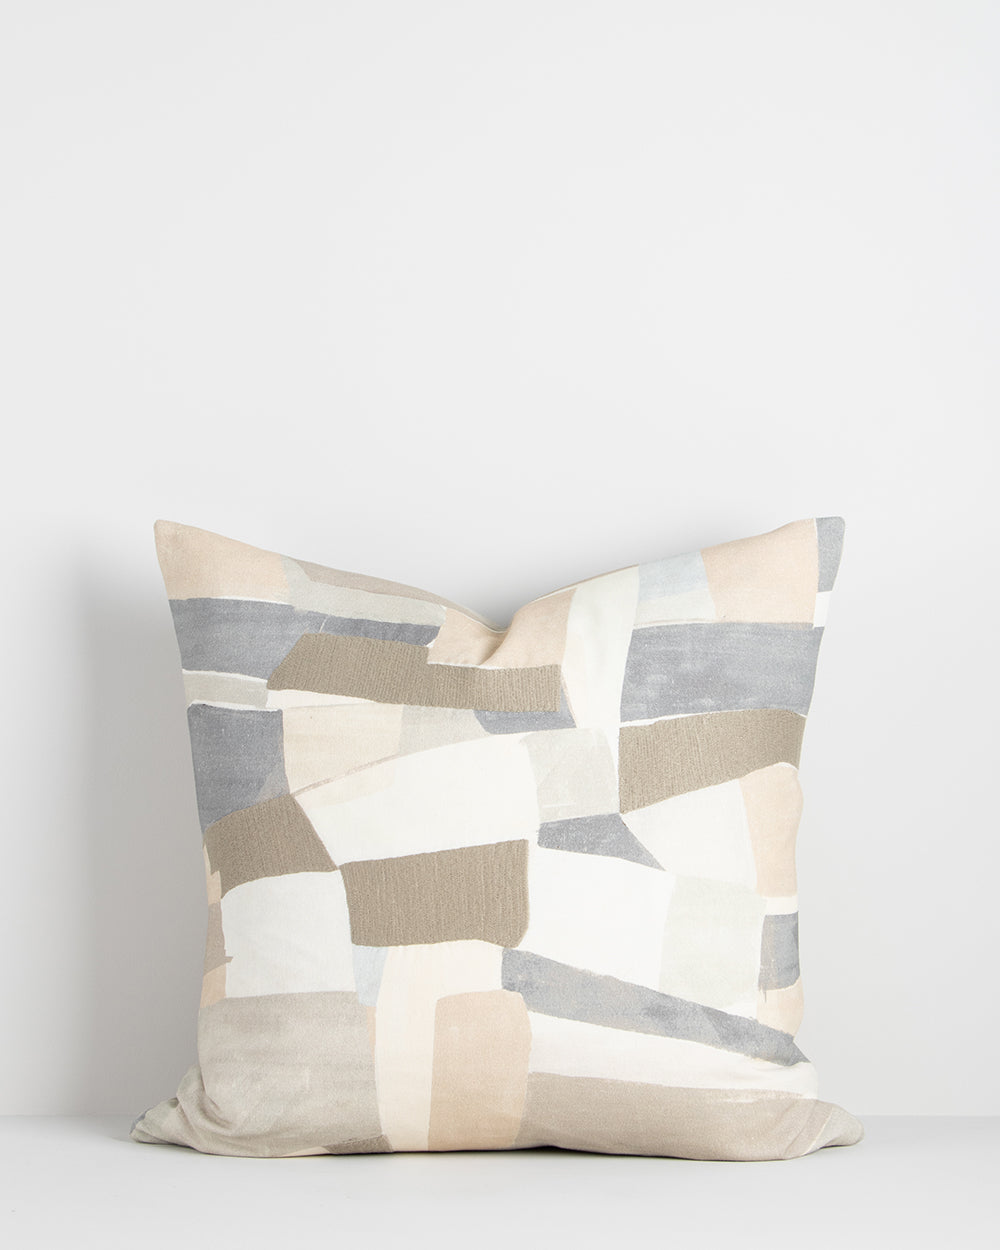
Lucio cushion
$99.00
Abstract shapes and soft tones (Multi – greys) or warm hues (Sienna – terracotta) come together in the striking composition of the Lucio cushion. Screen-printed onto a dense cotton base, the hand-painted design evokes the aerial view of fields and Mediterranean villages. Sections of matte embroidery add subtle texture and dimension to the piece....
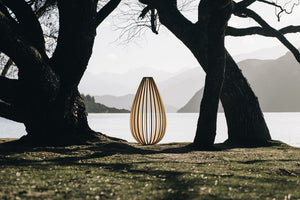
Luna Floor Light
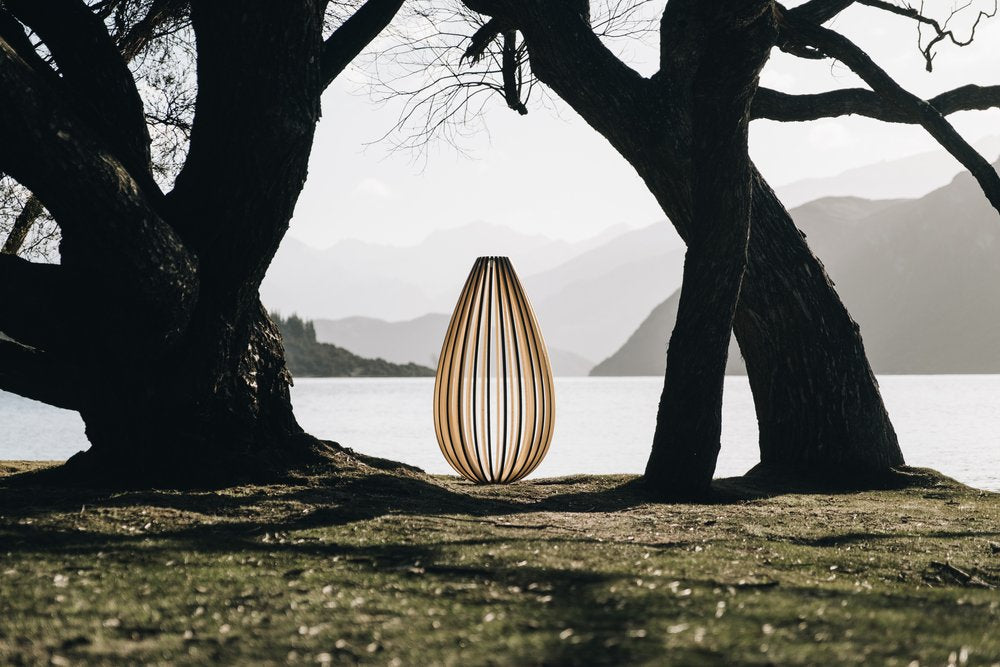
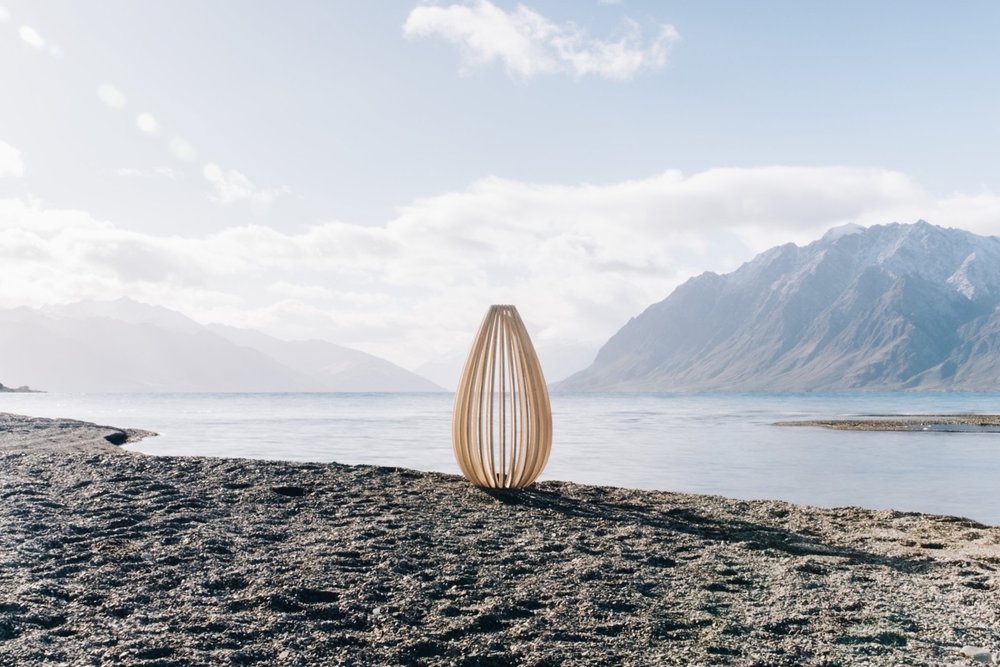
Luna Floor Light
$2,390.00
Timaru based designer Gus Leen is hugely influenced by the texture, form and movement found in Nature. He draws on these three elements to inform his designs. For some time, Gus had been experimenting with large, wide base floor lighting designs. Inspiration from organic forms found in nature such as the shape of a water droplet, combined with t...


