Products

RAW + Design Print - 12 Points
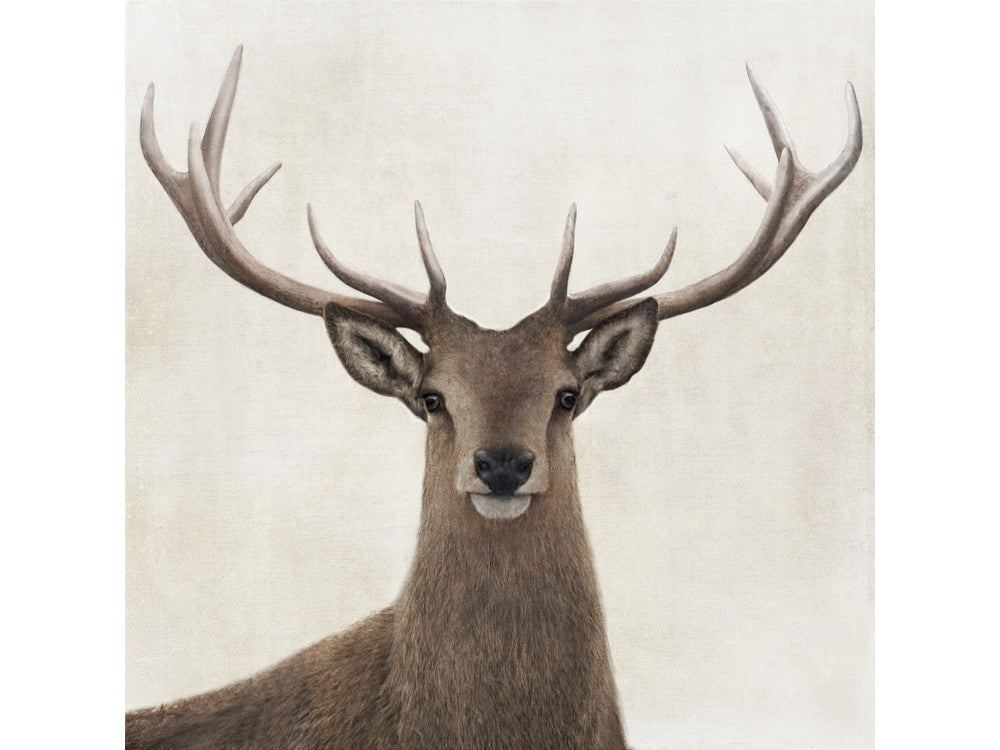
RAW + Design Print - 12 Points
$549.00
Christchurch based siblings Nathan and Janie Secker, collaborate to create mixed-media images using a variety of photographic, painted and vintage elements. Material canvas - ready to hang
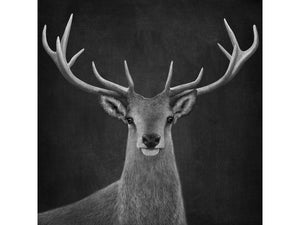
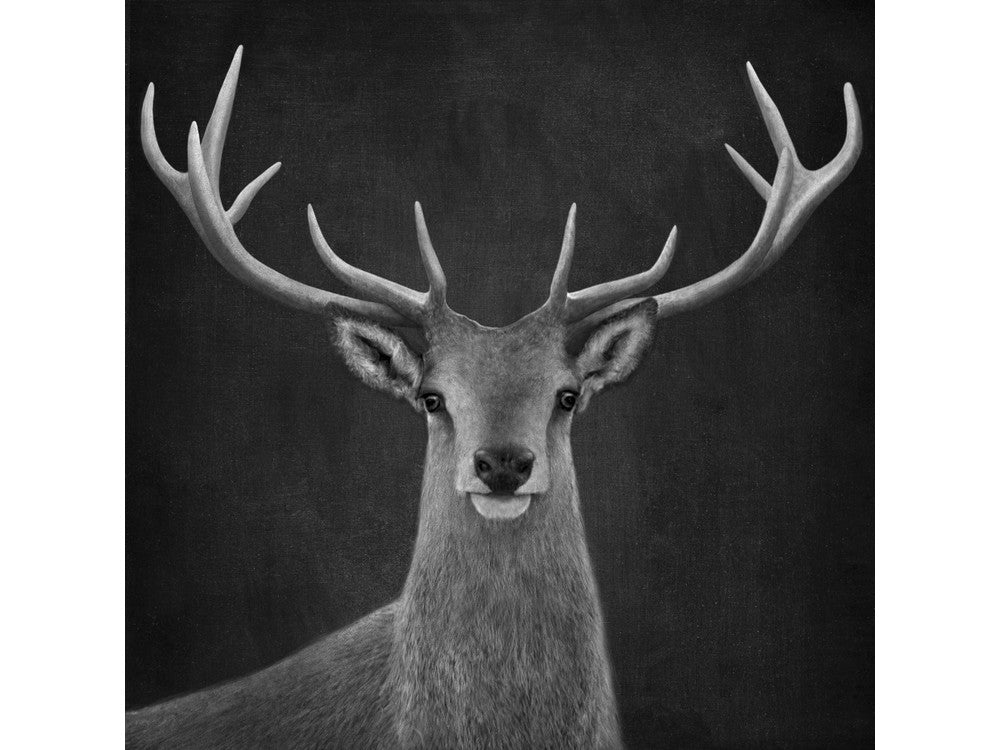
RAW + Design Print - 12 Points Black
$475.00
Christchurch based siblings Nathan and Janie Secker, collaborate to create mixed-media images using a variety of photographic, painted and vintage elements. Material canvas - ready to hang
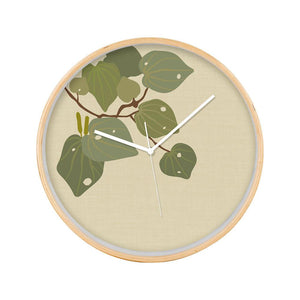
Raw Botanical Wooden Frame Clock

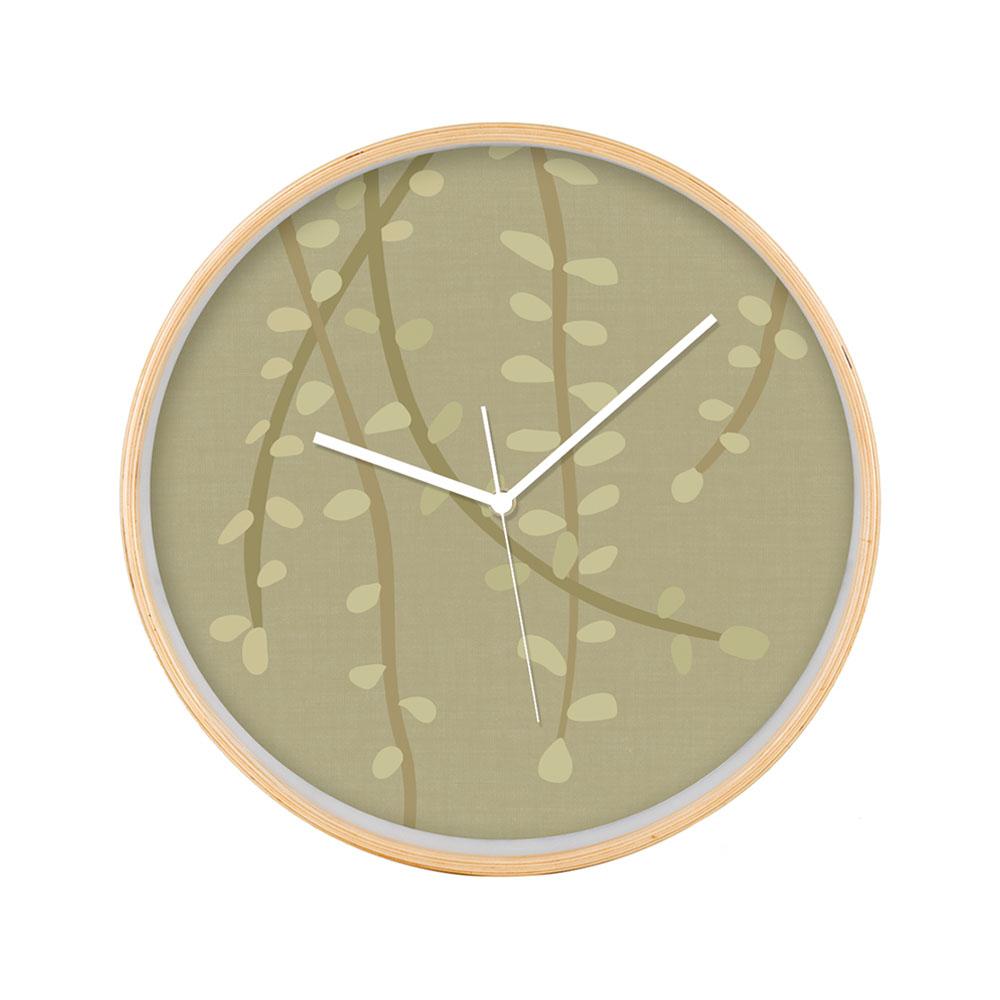
Raw Botanical Wooden Frame Clock
$119.00
Blonde wood framed Raw Botanical Wooden Frame Clock, featuring well-known New Zealand native flora. The silent movement clock is protected by a glass front and sits 45mm deep from the wall. Designed, printed and assembled in Aotearoa New Zealand. Material blonde wood frame, glass front, silent movement Size 320Dia x 45D mm

Recycled Timber Food Board
Recycled Timber Food Board
$99.00
More details coming soon... Do not put your board through the dishwasher, as it could cause cracking and fading. Rub with vegetable oil to maintain shine. Please note, each board is unique - colour and wood grain may vary from that pictured. Material 100% recycled matai & rimu, and all-natural, non-toxic adhesives and finishes Size 380 x 280...


Richard Robinson Print - Ding Swing
$369.00
Born in 1975, Richard Robinson began his career as a graphic designer before moving into painting full time in 2001. He is well known in New Zealand for his landscape works, with many of his paintings now held in private and corporate collections worldwide. More recently, Richard has become a sought-after teacher through his instructional videos...


Richard Robinson Print - Last Call
$349.00
Born in 1975, Richard Robinson began his career as a graphic designer before moving into painting full time in 2001. He is well known in New Zealand for his landscape works, with many of his paintings now held in private and corporate collections worldwide. More recently, Richard has become a sought-after teacher through his instructional videos...


Richard Robinson Print – Colours of the Cove
$579.00
Born in 1975, Richard Robinson began his career as a graphic designer before moving into painting full time in 2001. He is well known in New Zealand for his landscape works, with many of his paintings now held in private and corporate collections worldwide. More recently, Richard has become a sought-after teacher through his instructional videos...

Rika Nagahata Print - Kurage

Rika Nagahata Print - Kurage
$179.00
Born in Japan, Rika Nagahata has been living in New Zealand since 2008. While in Japan Rika graduated from Osaka Art University majoring in printmaking. During this time at University Rika experimented with different copper-plate printing techniques which has greatly influenced her art today. Although Rika now uses ink and watercolours to creat...
Rika Nagahata Print - Nishikigoi

Rika Nagahata Print - Nishikigoi
$179.00
Born in Japan, Rika Nagahata has been living in New Zealand since 2008. While in Japan Rika graduated from Osaka Art University majoring in printmaking. During this time at University Rika experimented with different copper-plate printing techniques which has greatly influenced her art today. Although Rika now uses ink and watercolours to creat...

Rimu Bottle Opener

Rimu Bottle Opener
$39.00
The Rimu Bottle Opener handcrafted from recycled NZ rimu and a genuine NZ nail is a winning combination. It is magnetised with one magnet to attach the opener to the fridge, so you always know where it is; and one magnet to hold the cap once released, so you don’t have to bend down and pick it up off the floor. You shouldn't have any trouble ope...
Rimu Salad Sticks

Rimu Salad Sticks
$49.00
These Rimu Salad Sticks handcrafted from recycled NZ rimu are bound to be a talking point around the dining table. The servers slide together to create a great interlocked shape and slide apart when you're ready for salad. The best kind of design uses form and function well and these sticks get the tick. Individually handcrafted in Nelson - henc...

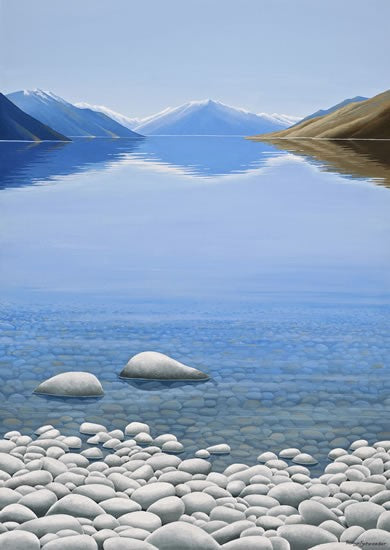
Robyn Schroeder Print - At The Edge Of The Lake
$249.00
Inspired by Aotearoa’s land, sea and sky, Christchurch artist Robyn Schroeder draws on the quiet beauty of her surroundings to inform her work. Her paintings reflect a deep connection to nature, often focusing on small, easily overlooked details — a line of hills, the edge of a tide, the softness of a shadow. With a refined use of line, form and...
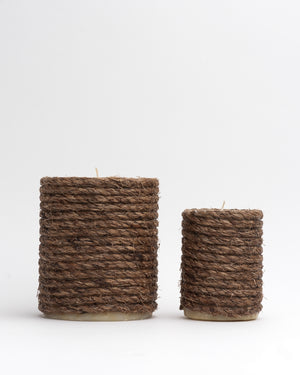
Rope Pillar Citronella Outdoor Candle

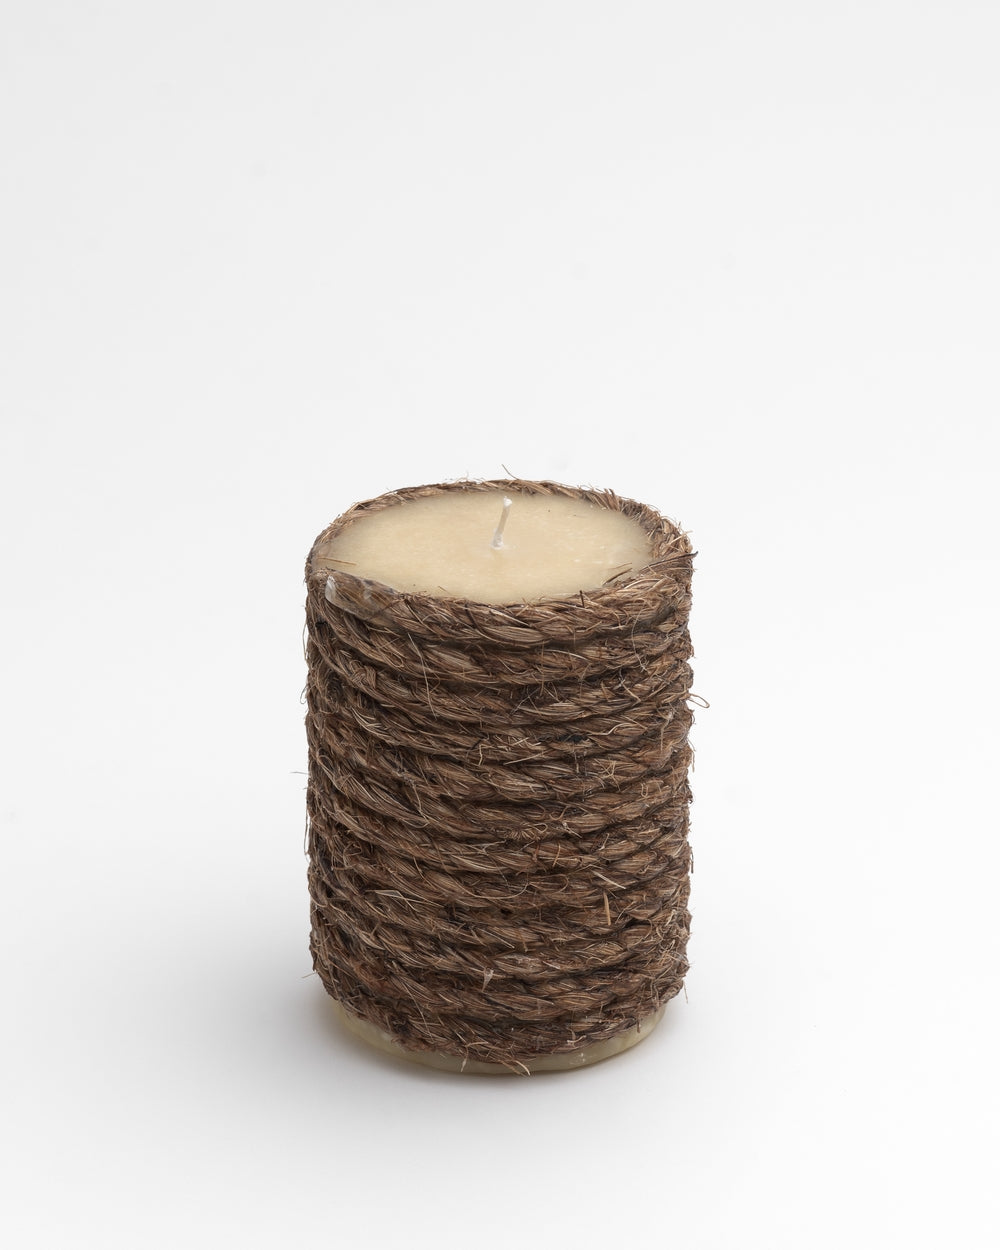
Rope Pillar Citronella Outdoor Candle
$59.00
The Rope Pillar Citronella Outdoor Candle features hand-laid manila rope — crafted from the natural fibres of the abacá plant — infused with pure citronella essential oil and a carefully balanced house wax blend. Specially designed for a slow, even burn, it’s the perfect outdoor companion, creating an inviting glow while naturally deterring inse...

Rotoiti Table - Stainless Steel

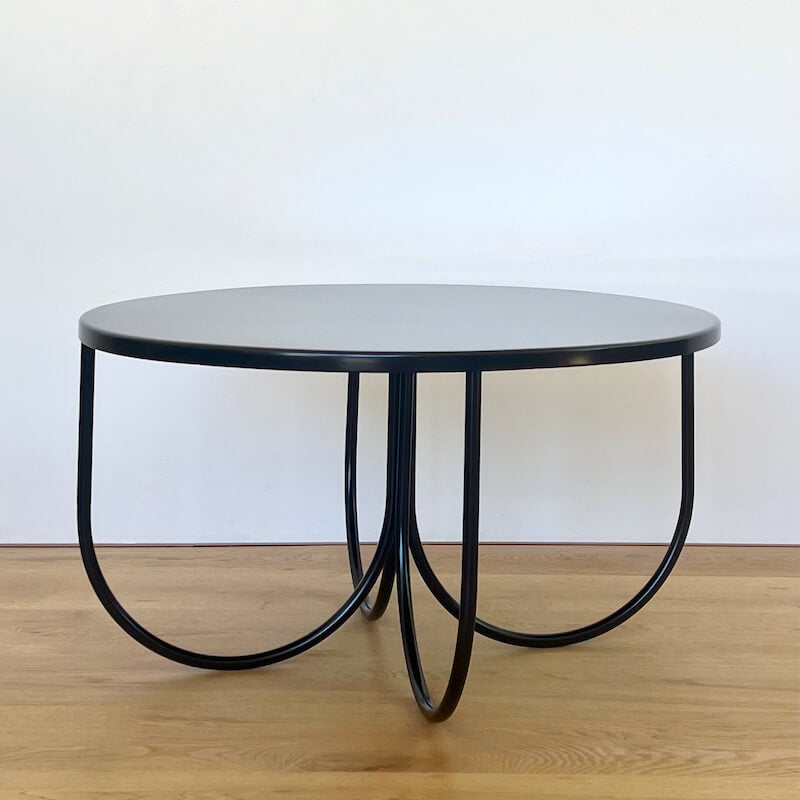
Rotoiti Table - Stainless Steel
$629.00
Built to handle New Zealand’s harshest conditions, the Rotoiti Table in stainless steel is designed for life outdoors. High humidity, heavy rainfall, and salty air are fended off thanks to its strength and corrosion-resistant construction. Durable, low-maintenance, and timeless in design, it’s perfect for homes in exposed or wetter climates. Tea...
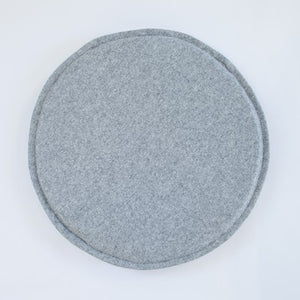
Round Wool Seat Pad

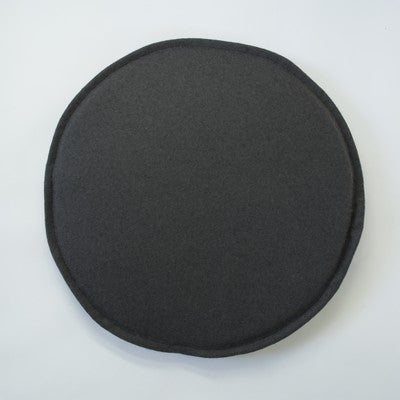
Round Wool Seat Pad
$189.00
Designed especially for the ICO Rangitoto Barstool, this luxurious Round Wool Seat Pad adds an extra layer of comfort and style. While the ICO wire stools are already impressively comfortable, this cushion takes things up a notch. Crafted from a durable blend of 80% marle wool and 20% polyamide, the fabric boasts a Martindale rub test result of ...

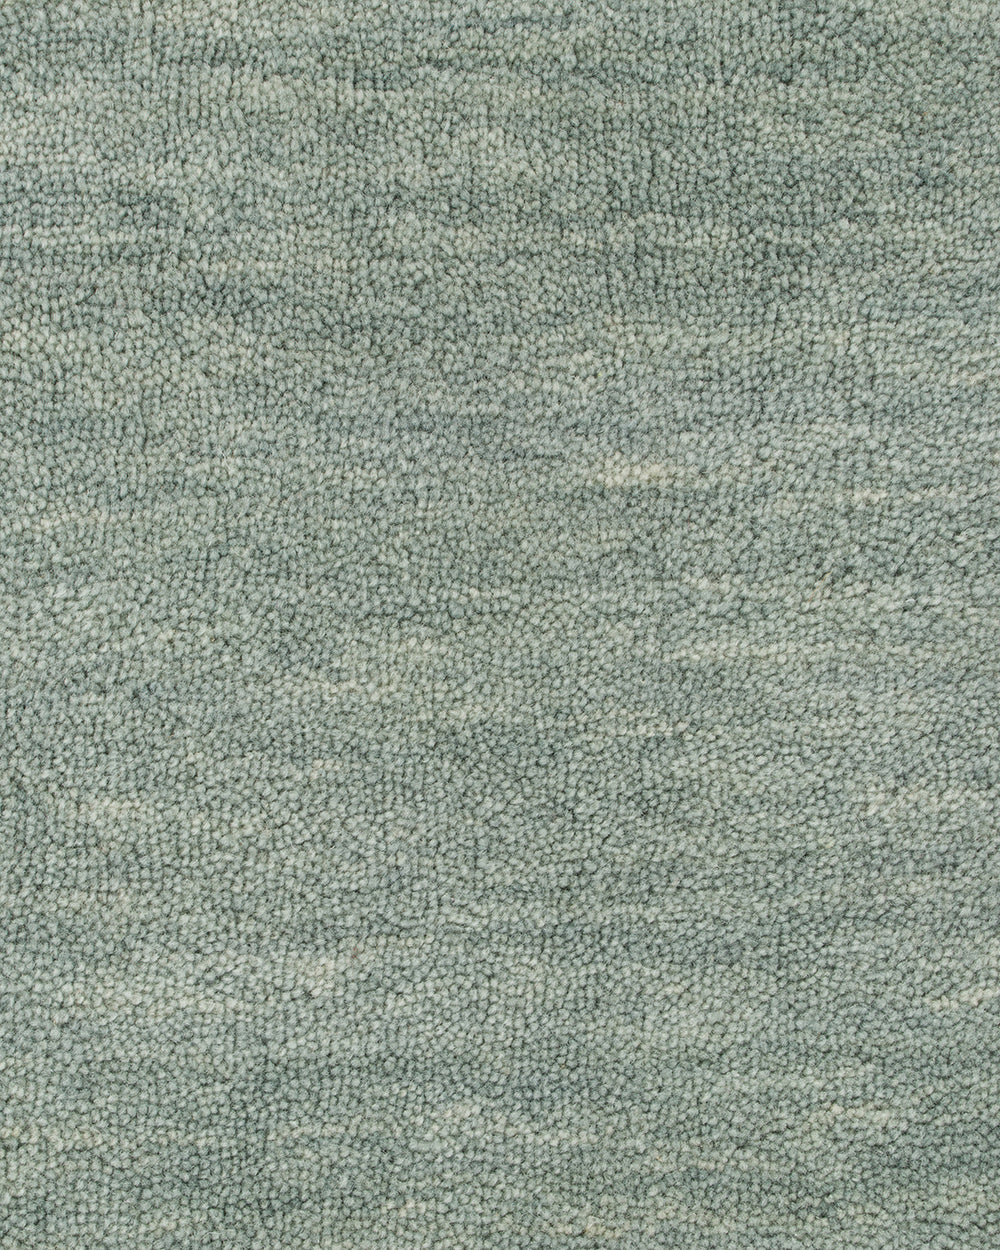
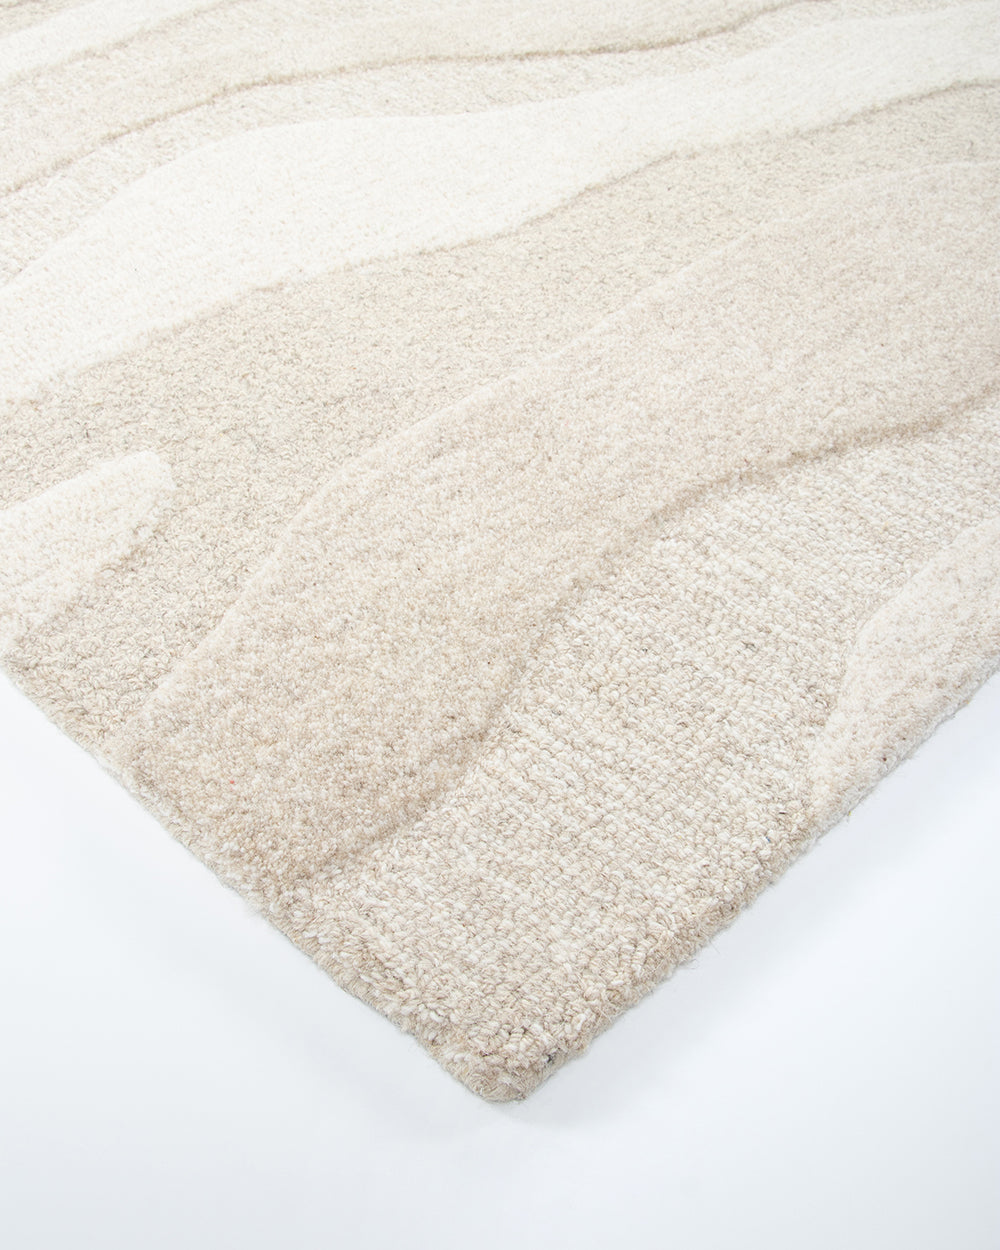
Roxburgh Floor Rug

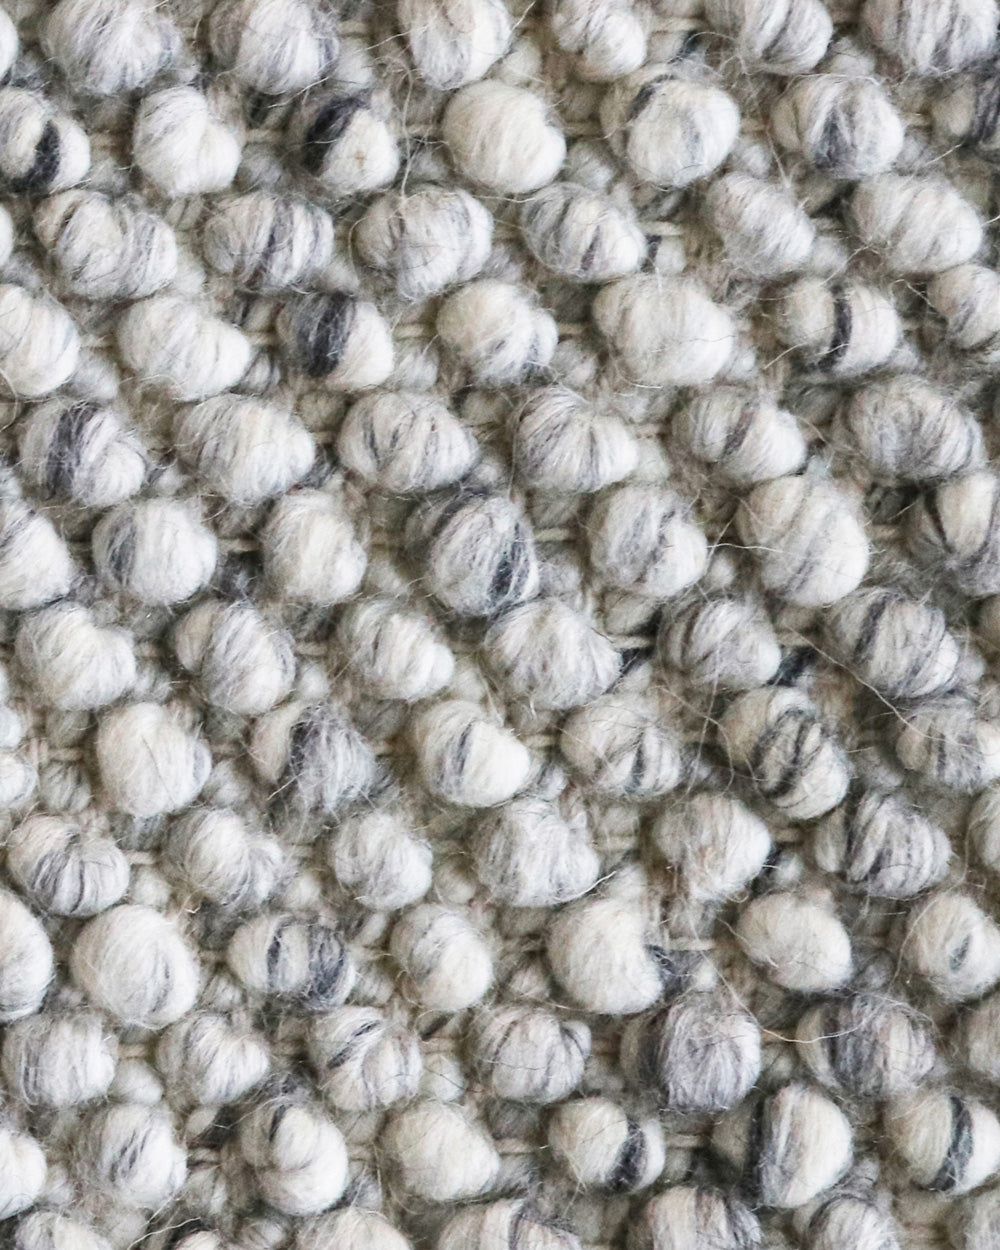
Roxburgh Floor Rug
$1,099.00
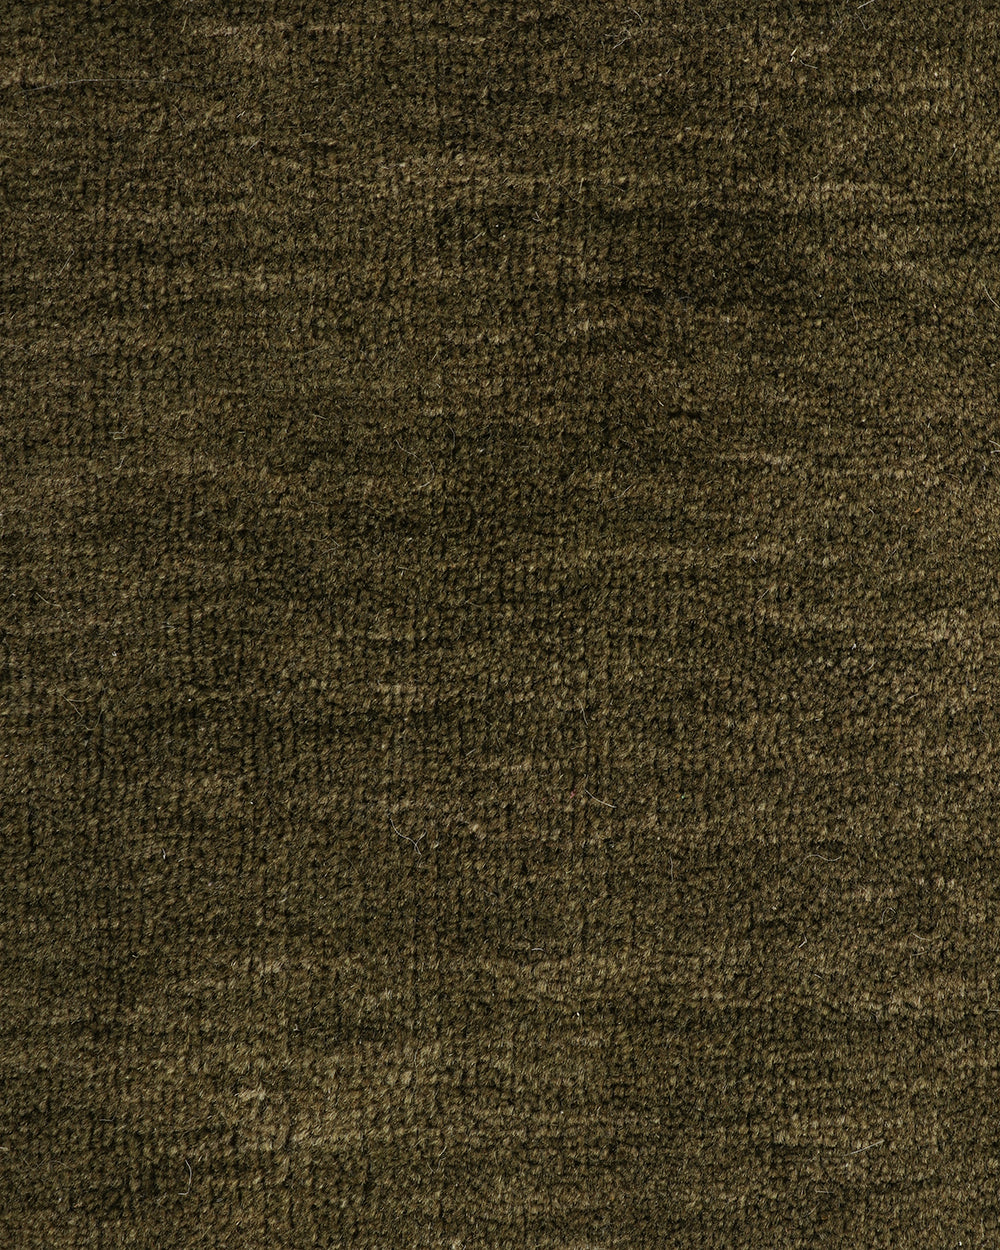
Bring a stylish and sophisticated feel to your space with the textured beauty of the Roxburgh Floor Rug. Carefully handcrafted, its wool-blend fibres are woven into tight bobbles that highlight subtle tonal variations. A refined yet relaxed piece, Roxburgh is an easy addition to any contemporary interior. Material 80% wool, 20% viscose with cott...
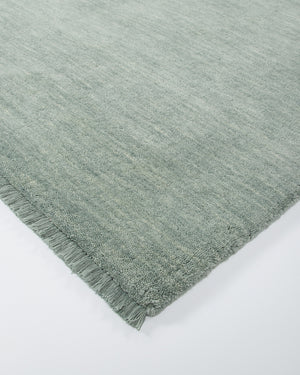
Sandringham Floor Rug

Sandringham Floor Rug
$1,499.00
Create a sophisticated sanctuary with the Sandringham Floor Rug, defined by its dense, sumptuous pile and timeless appeal. Loom-knotted from 100% New Zealand strong wool — a premium selection with a micron count of 31 or higher — this beautifully crafted piece offers enhanced durability, resilience, insulation, and natural fire resistance. The u...
Sandringham Floor Runner

Sandringham Floor Runner
$1,899.00
Elevate everyday spaces with the Sandringham Floor Runner, designed to bring warmth and sophistication to hallways and transitional areas. Loom-knotted from 100% New Zealand strong wool — a premium fibre with a micron count of 31 or higher — this runner offers superior durability, resilience, insulation, and natural fire resistance. The dense, u...
Sandringham Round Floor Rug

Sandringham Round Floor Rug
$2,699.00
Add a rich, earthen tone to your interior with the timeless beauty of the Sandringham Round Floor Rug. Expertly loom-knotted from 100% New Zealand strong wool — a premium fibre with a micron count of 31 or higher — this rug delivers enhanced durability, resilience, insulation, and natural fire resistance. Its circular form and plush, sumptuous p...
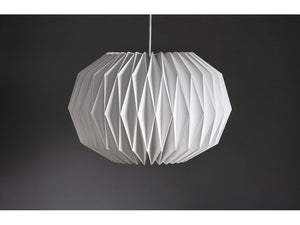
Seed Light Shade
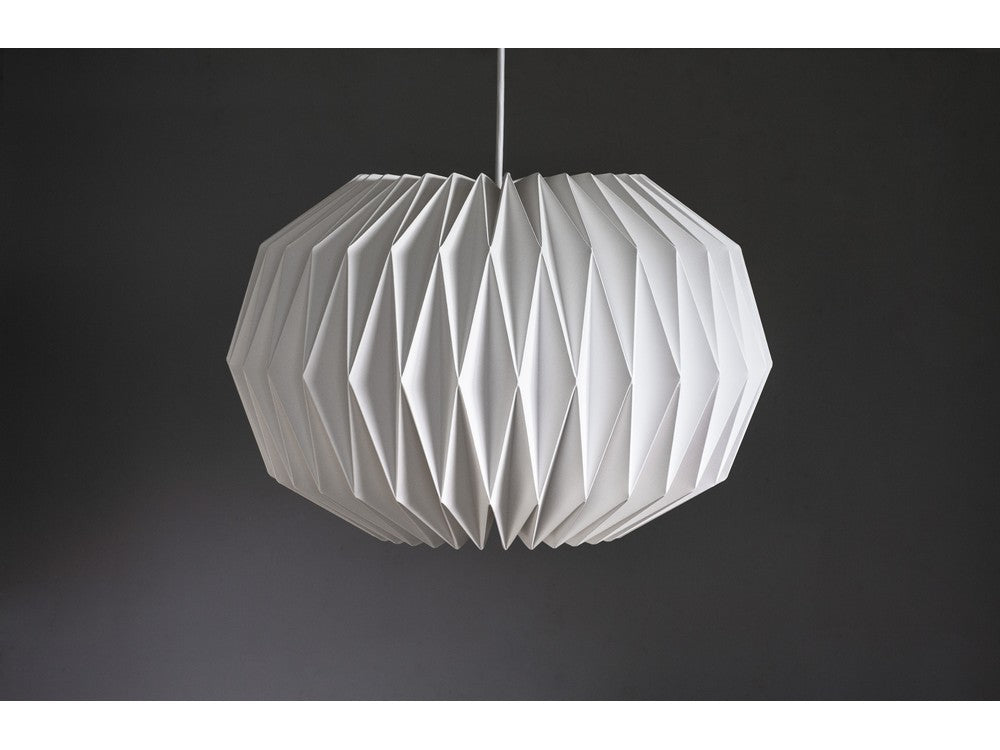
Seed Light Shade
$299.00
The Seed light shade's simple and elegant geometric design brings a timeless look to any room. Handcrafted from one continuous sheet of heavy weight paper or synthetic (PU) paper, Seed is designed for a pendant light fitting and produces a bright, diffused ambient light. Material heavy grade paper or PU (synthetic white paper) Flat-packed for ...
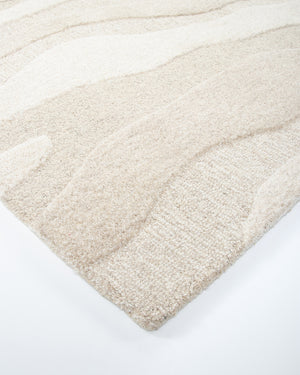
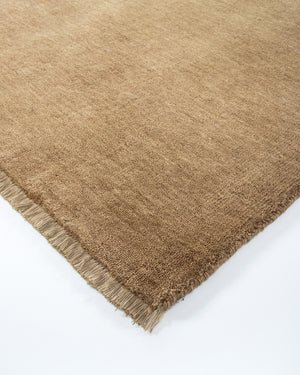
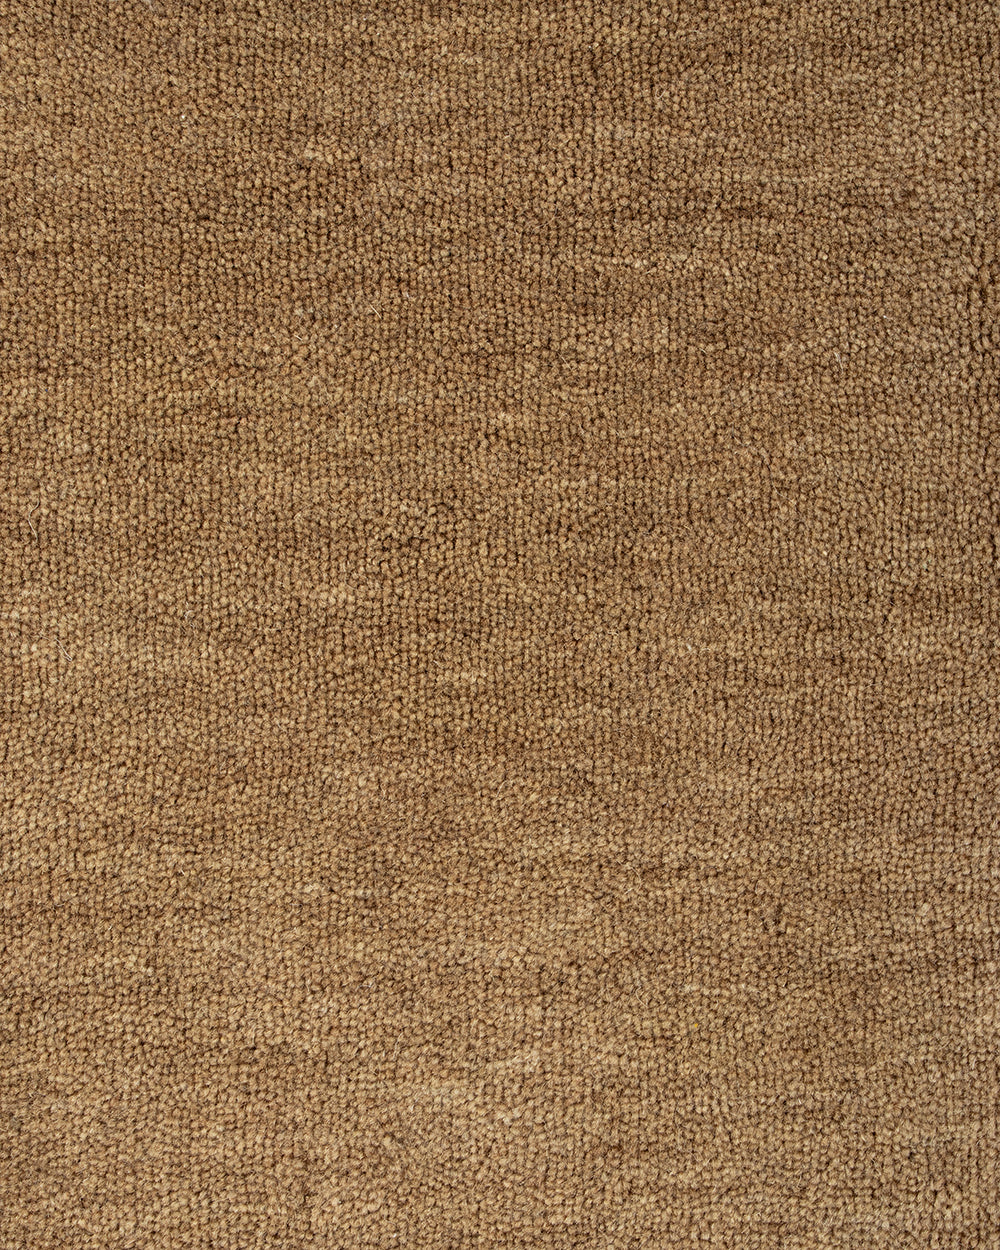
Shoreline Floor Rug
Shoreline Floor Rug
$999.00
An ode to coastal walks, the Shoreline Floor Rug echoes the rhythmic patterns carved into the sand. Hand-tufted from 100% wool, its undulating design is achieved through a combination of cut and looped pile, creating a captivating visual texture. Soft and supportive underfoot, the warm sandy tone of Shoreline embodies understated luxury, making ...
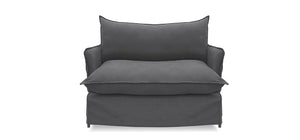
Simplicity Occasional Chair
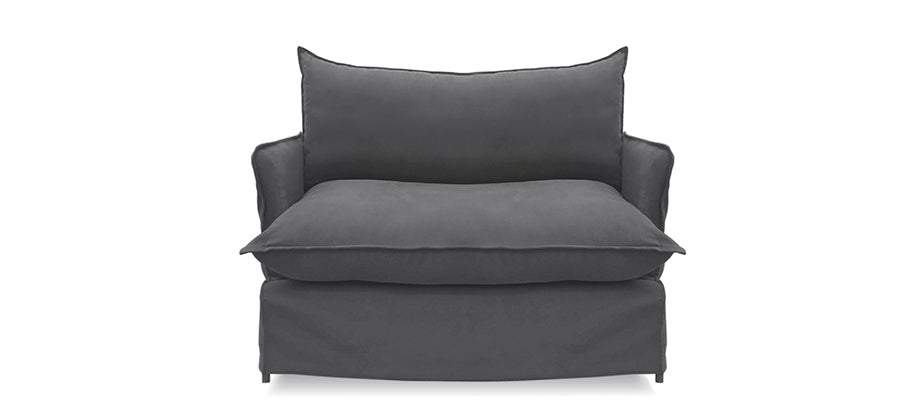
Simplicity Occasional Chair
$1,787.00
The Simplicity Occasional Chair is the perfect complement to the Simplicity Sofa, offering the same level of comfort and style in a more compact form. Designed for relaxation, the chair shares the sofa’s raw charm, generous proportions, and laid-back appeal, making it ideal for both intimate spaces and family rooms. With its traditional-inspired...
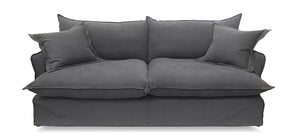
Simplicity Sofa
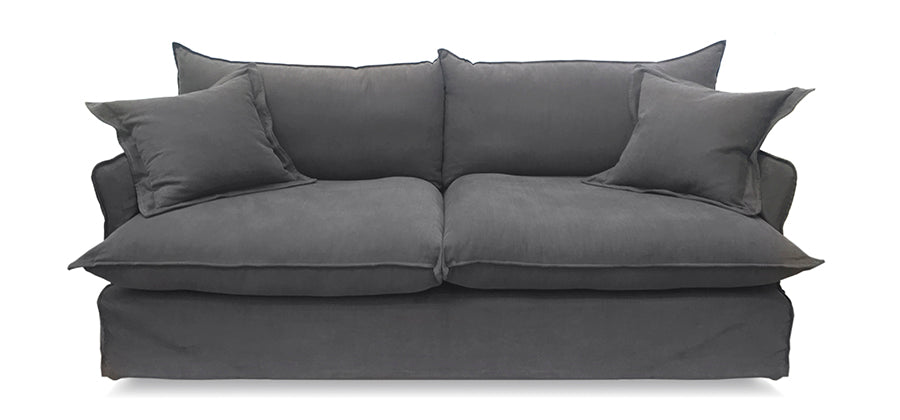
Simplicity Sofa
$4,799.00
The Simplicity Sofa is designed for ultimate relaxation. With its raw charm, generous proportions, and compact footprint, it offers lavish comfort without taking up excess space. The companion Simplicity Occasional Chair, built for two, is a true love seat in every sense. Blending traditional design with modern materials and craftsmanship, the S...
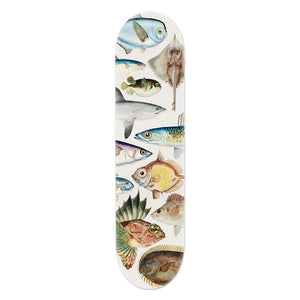

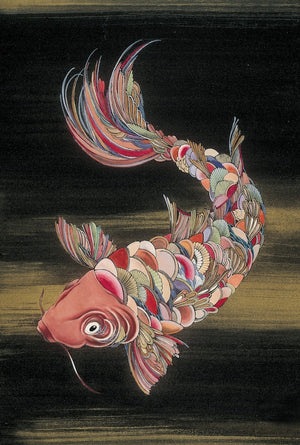
Skateboard Deck Art - Fishes of New Zealand
$169.00
This Canadian maple skateboard deck features the Fishes of New Zealand design, perfect to display on the wall as a contemporary art piece. Printed in Aotearoa New Zealand Material Canadian maple with nylon hanger - ready to hang on a picture hook or nail Size 800 x 200 mm Check out other skateboard deck art

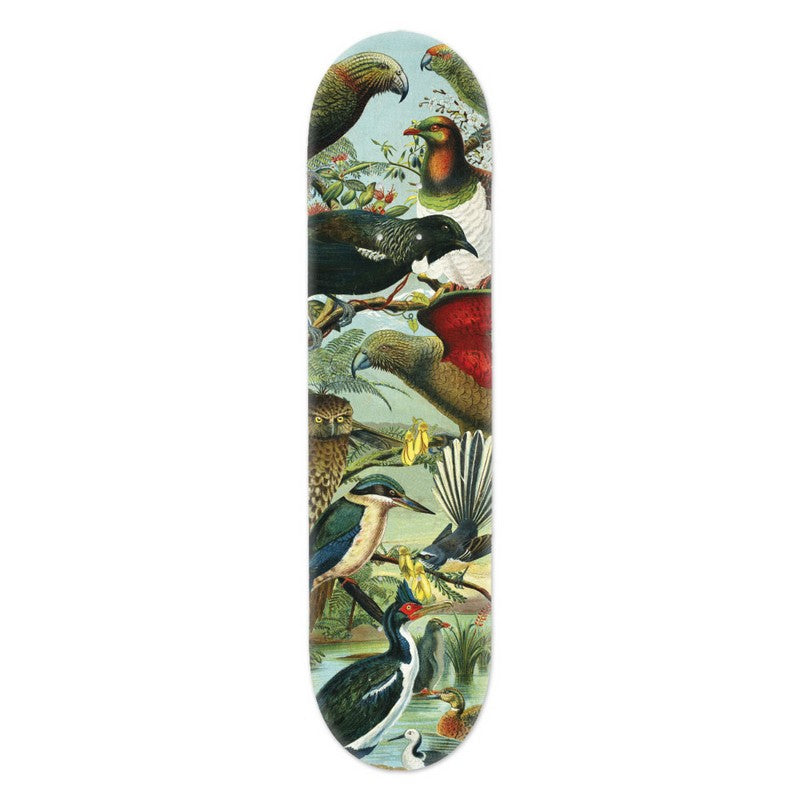
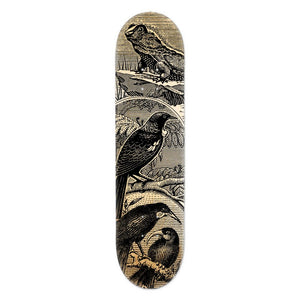
Skateboard Deck Art - Native Birds of New Zealand
$169.00
This Canadian maple skateboard deck features the Native Birds of New Zealand design, perfect to display on the wall as a contemporary art piece. Printed in Aotearoa New Zealand Material Canadian maple with nylon hanger - ready to hang on a picture hook or nail Size 800 x 200 mm Check out other Skateboard Deck Art
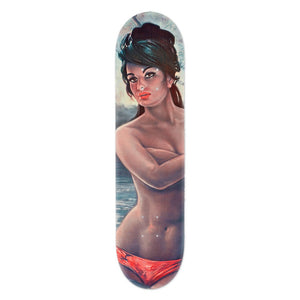
Skateboard Deck Art - Nymph
Skateboard Deck Art - Nymph
$169.00
This Canadian maple skateboard deck features the Nymph design, perfect to display on the wall as a contemporary art piece. Printed in Aotearoa New Zealand Material Canadian maple with nylon hanger - ready to hang on a picture hook or nail> Size 800 x 200 mm Check out other Skateboard Deck Art
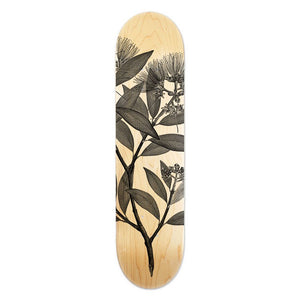

Skateboard Deck Art - Pōhutukawa stamp
$169.00
This Canadian maple skateboard deck features the Monochrome New Zealand Pōhutukawa design, perfect to display on the wall as a contemporary art piece. Printed in Aotearoa New Zealand Material Canadian maple with nylon hanger - ready to hang on a picture hook or nail Size 800 x 200 mm Check out other Skateboard Deck Art
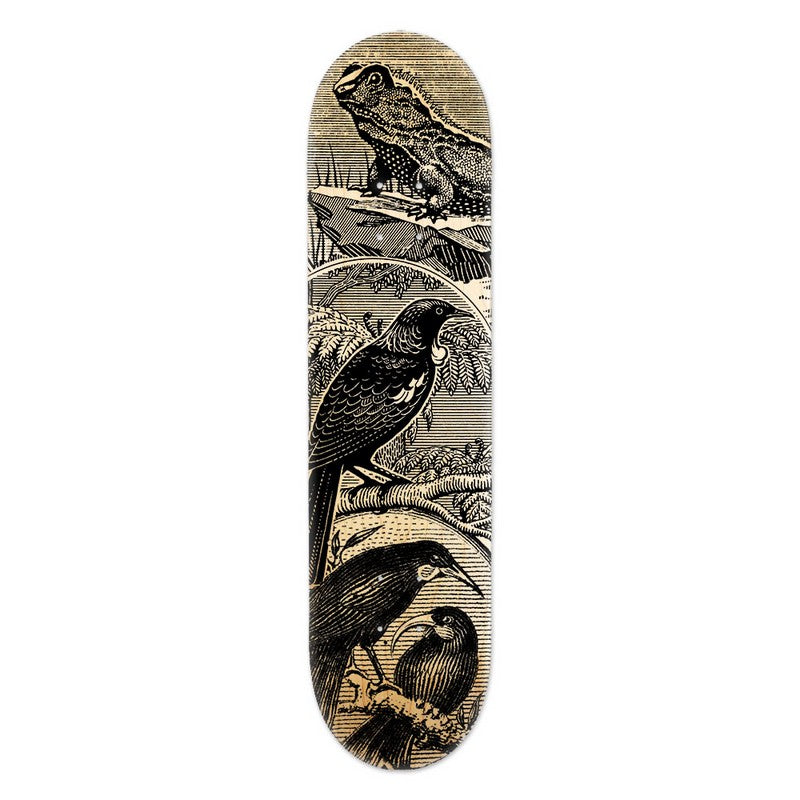
Skateboard Deck Art - Tuatara Stamp
$169.00
This Canadian maple skateboard deck features the Tuatara Stamp design — New Zealand wildlife icons inspired by vintage woodcuts — perfect to display on the wall as a contemporary art piece. Printed in Aotearoa New Zealand Material Canadian maple with nylon hanger - ready to hang on a picture hook or nail Size 800 x 200 mm Check out other Skatebo...

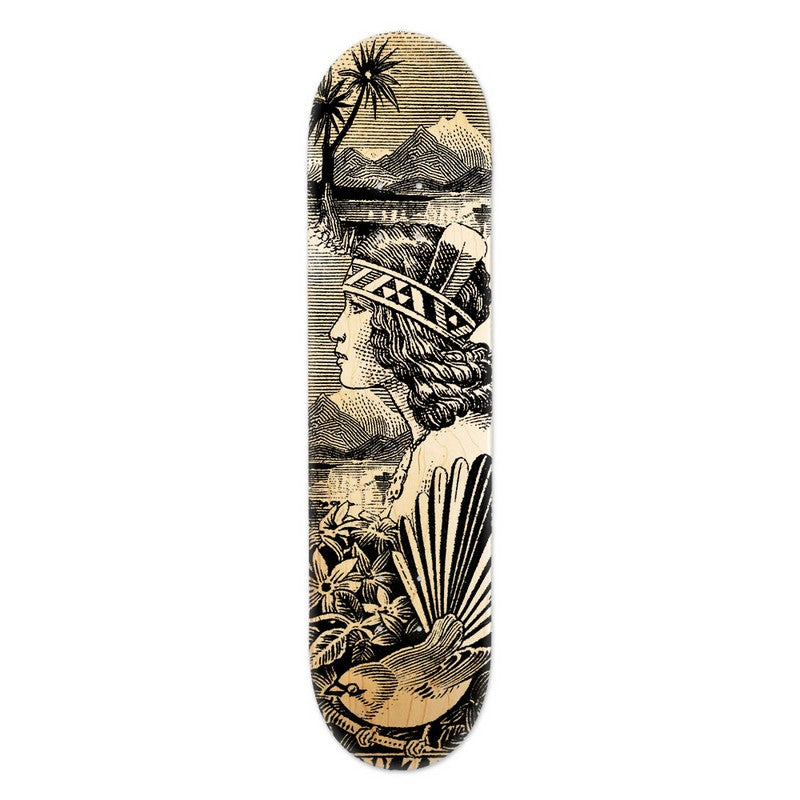
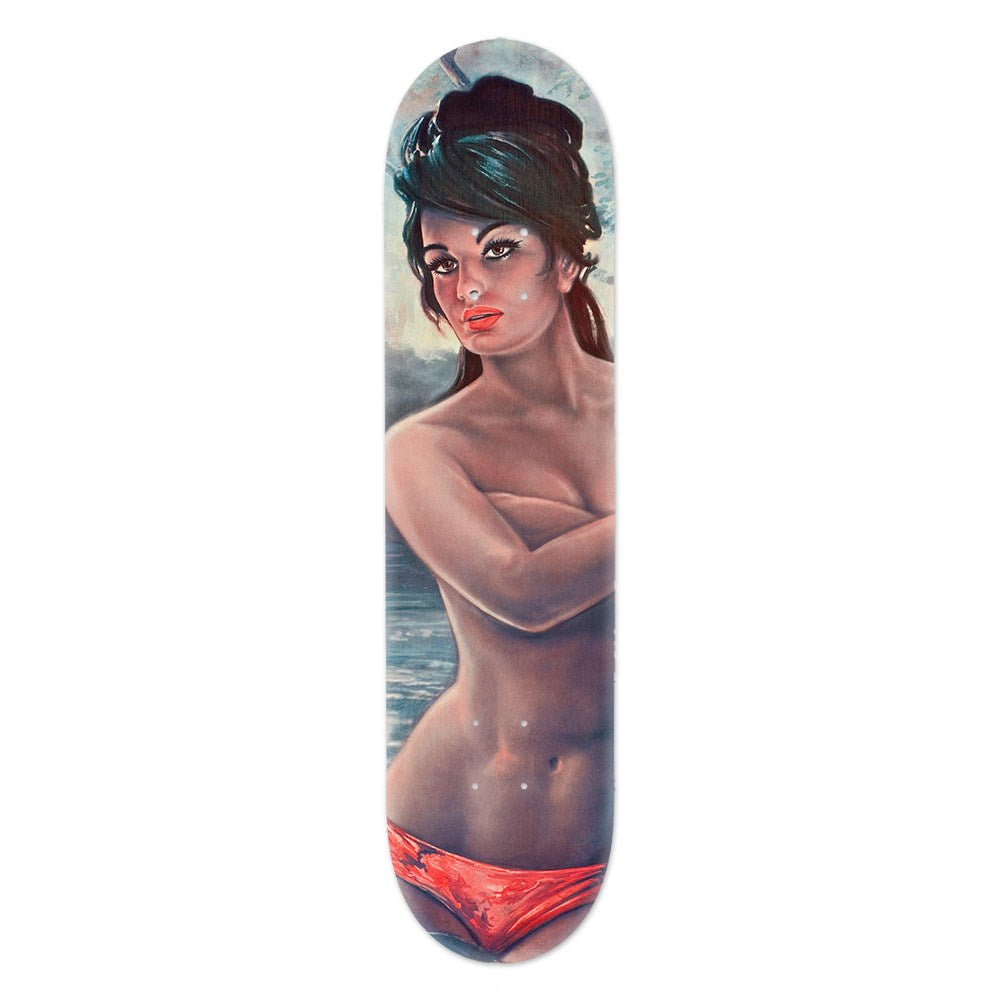
Skateboard Deck Art - Wahine Stamp
$169.00
This Canadian maple skateboard deck features the Wahine Stamp design — New Zealand icons inspired by vintage woodcuts — perfect to display on the wall as a contemporary art piece. Printed in Aotearoa New Zealand Material Canadian maple with nylon hanger - ready to hang on a picture hook or nail Size 800 x 200 mm Check out other Skateboard Deck Art
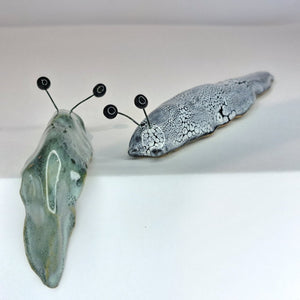
Slug & Shelf Slug ceramics
Slug & Shelf Slug ceramics
$19.00
The Slug & Shelf Slug ceramics are designed to keep company as a pair, equally they can go it alone. Shelf Slug features a gentle bend in its body, allowing it to perch and hang over a shelf, windowsill, book, or even plant pots—while the other Slug lays flat. Together you get the impression that the slugs are on the move… very slowly... Han...

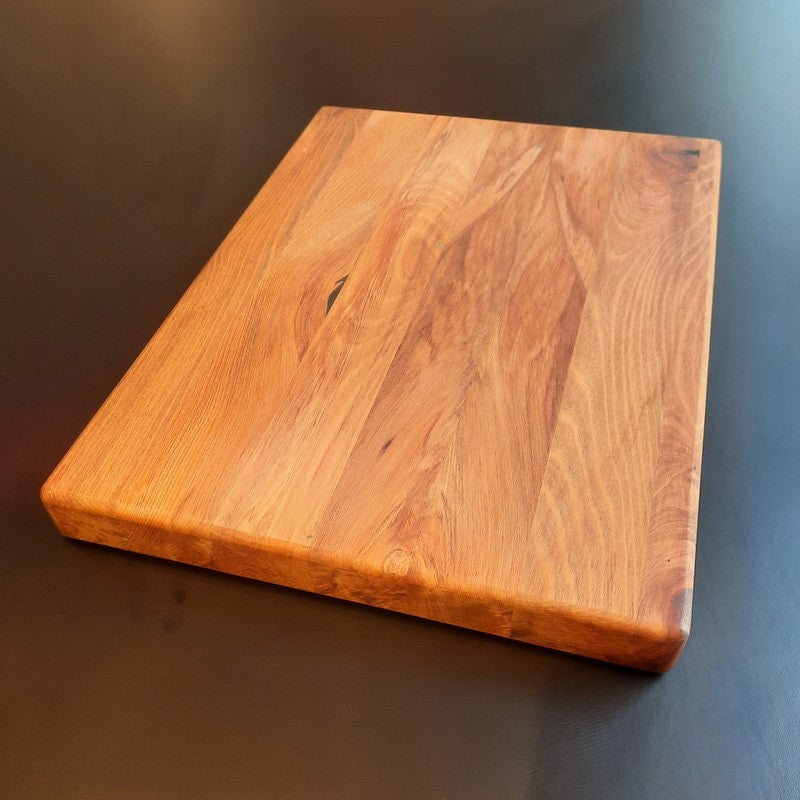
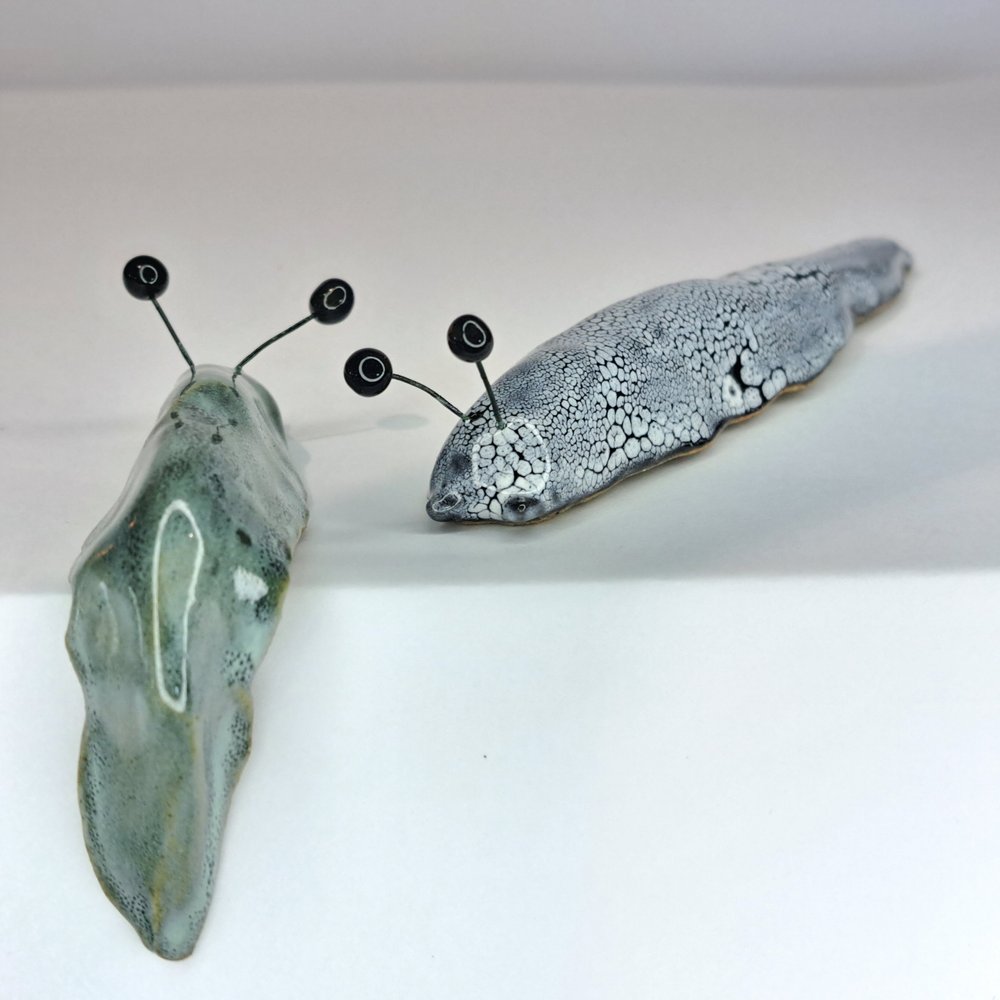
Solid Oak Food Board
Solid Oak Food Board
$89.00
Both sides of these solid oak food boards can be used for food preparation and serving. Material solid oak (natural un-oiled finish) Rectangle 500L x 350W x 20D mm Round 400Dia x 20 mm
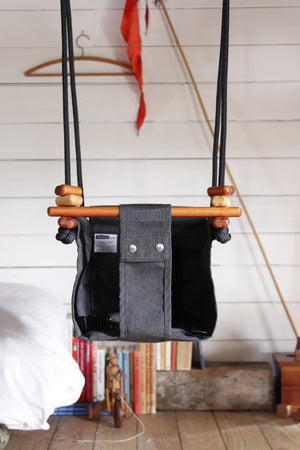
Solvej Baby & Toddler Swing


Solvej Baby & Toddler Swing
$289.00
Babies and children love to swing, and the Solvej Baby & Toddler Swing is designed to grow with them. Timeless in form and carefully crafted, it balances safety, durability, functionality, and beauty for years of everyday use. Convertible from a baby swing to a toddler swing, the design adapts easily as your child grows. The domed leg divide...


