Annual SALE : 1-31 March 2025
* Save 15% Online by using the code 'MARCH15%OFF' at checkout. Excludes : Bart de Vries, Gus Leen, Tim Webber, tailor-made, gift vouchers and items already reduced. No refunds or exchanges on sale items.
SALE Code : MARCH15%OFF *
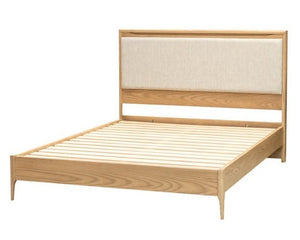
Havelock Padded Duvet-Foot Bed
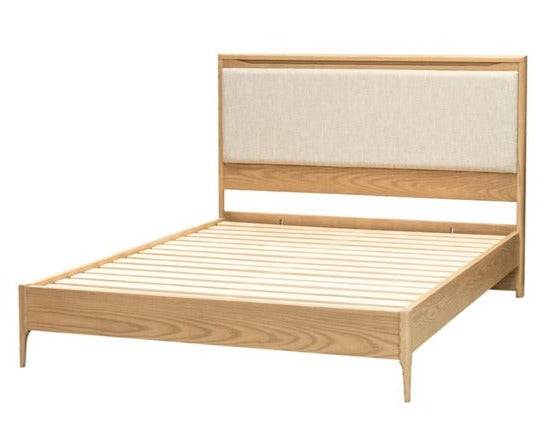

Havelock Padded Duvet-Foot Bed
$2,999.00
The Havelock bedroom range is a refined, contemporary design made from American ash timber and handcrafted here in New Zealand. Havelock features soft curved detailing with carved insets, and finely moulded tops and feet. These sculptural elements provide beautiful tactile detail, allowing the range to fit into any home with its elegant look and...
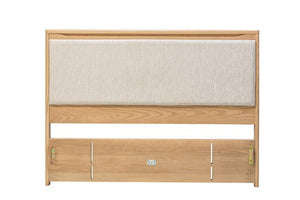
Havelock Padded Headboard
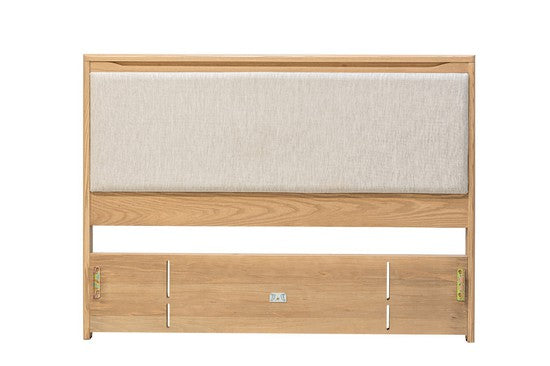

Havelock Padded Headboard
$1,499.00
The Havelock bedroom range is a refined, contemporary design made from American ash timber and handcrafted here in New Zealand. Havelock features soft curved detailing with carved insets, and finely moulded tops and feet. These sculptural elements provide beautiful tactile detail, allowing the range to fit into any home with its elegant look and...

Beaumont Wire Stool

Beaumont Wire Stool
$419.00
The Beaumont wire stool was designed to sit around a table with the Benmore bench. Hence, they’re both the same height and depth. Use them together as intended, or place Beaumont on its own as a little side table, or extra chair. Suited to both residential and commercial spaces, such as cafes and apartment developments - Beaumont is exceptionall...
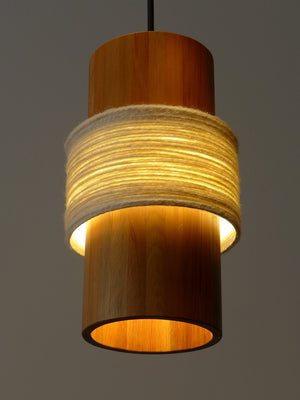
Circlet Light Shade

Circlet Light Shade
$499.00
Vertical rimu strips are juxtaposed with horizontal spun wool, bringing together similar forms with contrasting textures and functions. Once the Circlet light shade is lit, the wool radiates a soft glow and casts ambient light onto the timber. Note, due the wool wrap, Circlet light shade is not suited to moist environments. Material glue bonded ...

Paolo Floor Rug

Paolo Floor Rug
$1,099.00
Bring modern, sculptural style to your space with the visual beauty of a Paolo Floor Rug. Inspired by brutalist forms, this luxurious floor rug creates dramatic spaces with its distinctive patterning and soft underfoot texture. Hand-tufted from a blend of wool and viscose, the abstract design adds a sense of depth and sculptural form to a space....

Havelock Dresser with Mirror
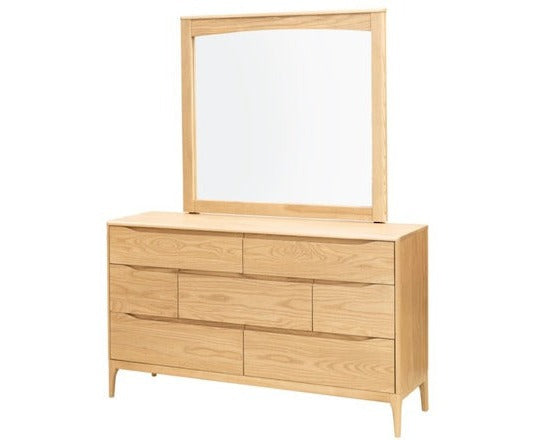

Havelock Dresser with Mirror
$3,549.00
The Havelock bedroom range is a refined, contemporary design made from American ash timber and handcrafted here in New Zealand. Havelock features soft curved detailing with carved inset drawer pulls, and finely moulded tops and feet. These sculptural elements provide beautiful tactile detail, allowing the range to fit into any home with its eleg...
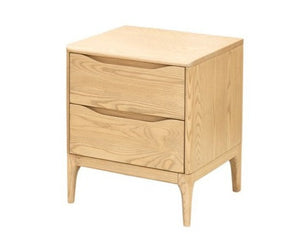
Havelock Bedside Drawers
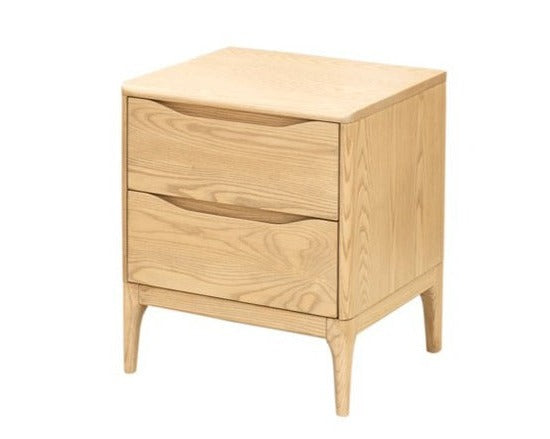

Havelock Bedside Drawers
$1,149.00
The Havelock bedroom range is a refined, contemporary design made from American ash timber and handcrafted here in New Zealand. Havelock features soft curved detailing with carved inset drawer pulls, and finely moulded tops and feet. These sculptural elements provide beautiful tactile detail, allowing the range to fit into any home with its eleg...

Aria Cushion
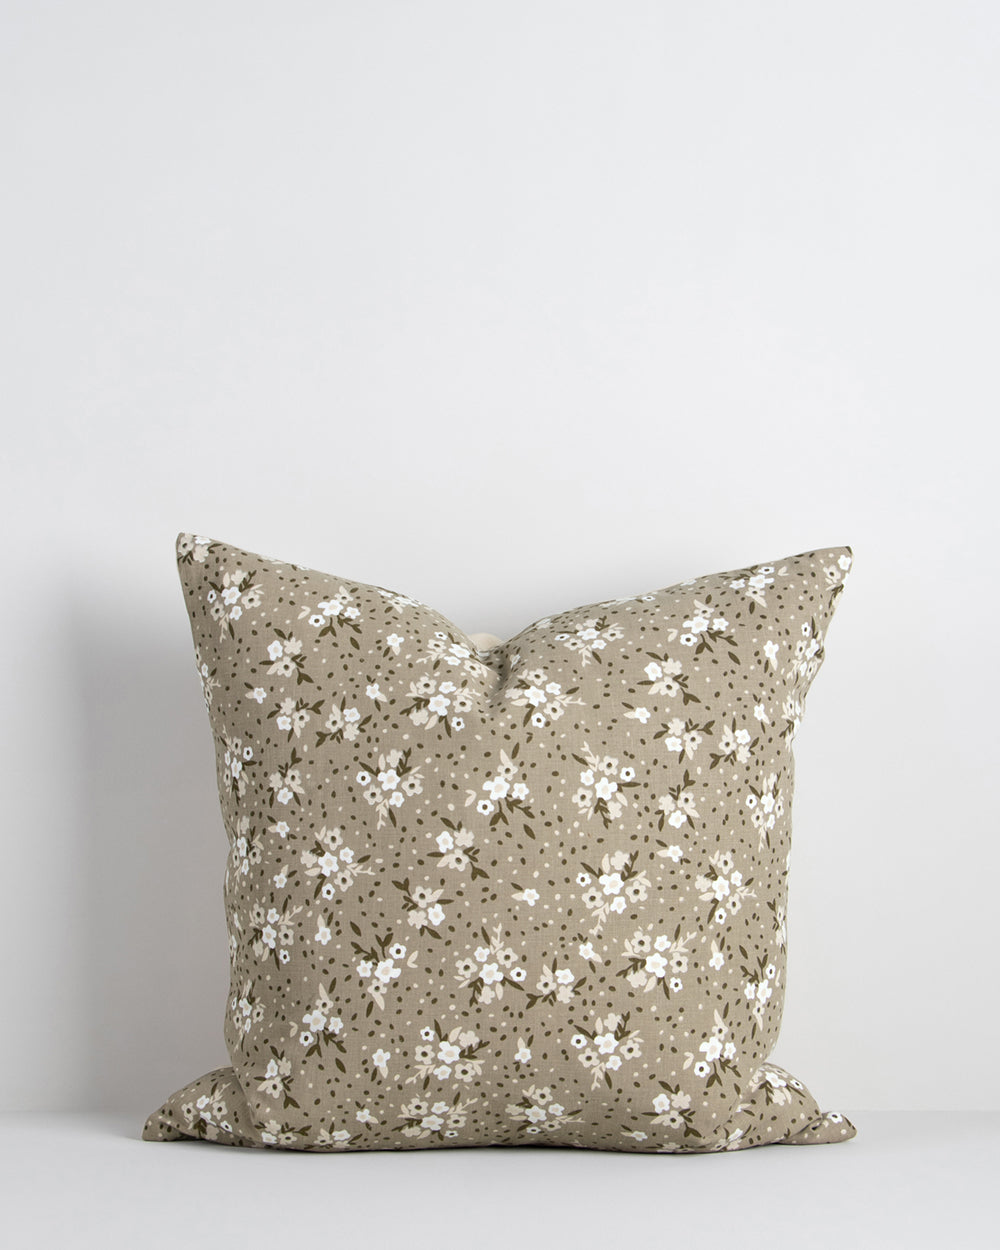
Aria Cushion
$99.00
Delicate florals, plaids and fresh cotton come together to form calm, informal spaces in which to retreat and relax. Vintage cottage charm has been reinterpreted for modern living in Aria cushion. A palette of cocoa, white, almond and sage feels fresh and contemporary, creating an inviting and comforting aesthetic. Material 75% cotton / 25% lin...

Eva Cushion

Eva Cushion
$99.00
Bring spring into your home with uplifting florals in soft hues of butter, white and olive. Drawing inspiration from cottage aesthetics, Eva cushion features a delicate pattern of small flowers, leaves and tiny twigs, screen printed onto a fresh cotton base. Pair with light linens and soft greens for a charming, informal space. Material 75% cott...

NZ Tourist Map Jigsaw Puzzle

NZ Tourist Map Jigsaw Puzzle
$39.00
Explore the rich history of New Zealand tourism with this fascinating 1000-piece jigsaw puzzle featuring a vintage tourist map of New Zealand. Packaged in a beautifully designed box, the puzzle comes with a convenient drawstring bag to keep all the pieces organized. This puzzle is a perfect way to unwind and challenge yourself while discovering ...
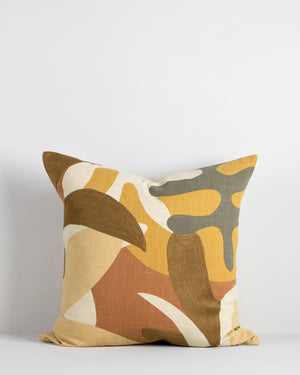
Abstract Jungle Cushion

Abstract Jungle Cushion
$99.00
Inspired by 1950’s jungle forms and Matisse, the Abstract Jungle Cushion designs are confident, with simplified leaf motifs screen-printed onto an ecru ground. Colours are rich, with gentle texture added through sections of matte embroidery. Use these expressive Labyrinth (square) and Maschera (rectangle) cushions to create an interior brimmi...
Lisa Jepson Print - Wild Heart
Lisa Jepson Print - Wild Heart
$349.00
Designing and Fine Art have been a life-long passion of Lisa Jepson. She works from home, based at the bottom of the beautiful Mount Grey in rural North Canterbury. Lisa has a strong desire, drive and love for her work, devoting countless hours. She has a love of colour and a need for detail, so keeping the simplistic approach is always an enthu...
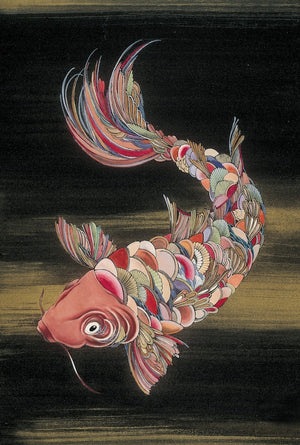
Rika Nagahata Print - Nishikigoi

Rika Nagahata Print - Nishikigoi
$179.00
Born in Japan, Rika Nagahata has been living in New Zealand since 2008. While in Japan Rika graduated from Osaka Art University majoring in printmaking. During this time at University Rika experimented with different copper-plate printing techniques which has greatly influenced her art today. Although Rika now uses ink and watercolours to creat...

Rika Nagahata Print - Kurage

Rika Nagahata Print - Kurage
$179.00
Born in Japan, Rika Nagahata has been living in New Zealand since 2008. While in Japan Rika graduated from Osaka Art University majoring in printmaking. During this time at University Rika experimented with different copper-plate printing techniques which has greatly influenced her art today. Although Rika now uses ink and watercolours to creat...
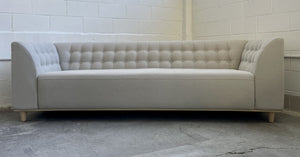
Ōwhiro Bay Sofa
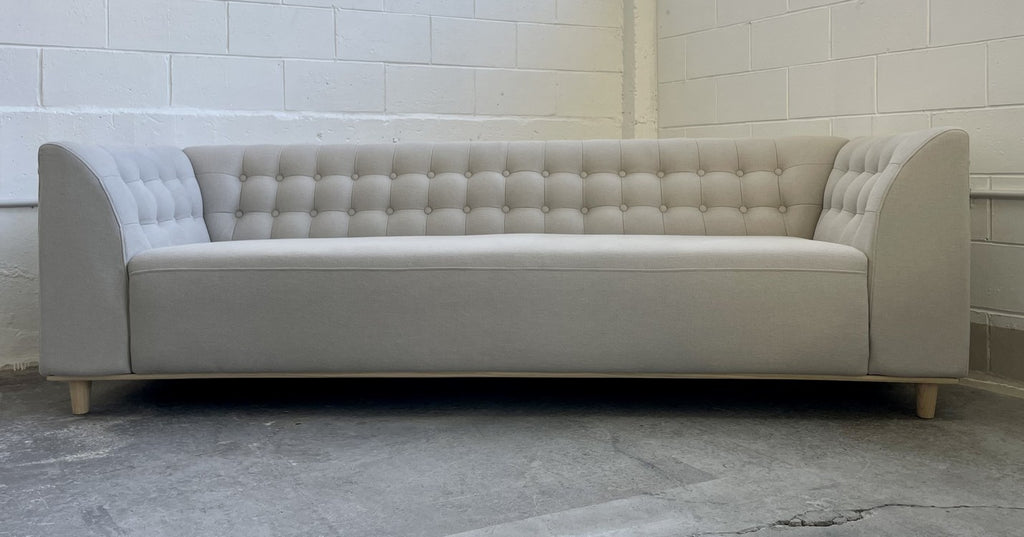
Ōwhiro Bay Sofa
$3,799.00
The Ōwhiro Bay Sofa is art-deco inspired; featuring modern profiling and elegant button-tufted detail on the fixed back-cushion (internal side only). With ample fixed seat-cushion depth, invite your family and friends to sit comfortably. A clean-lined silhouette with scrolled arms will add an elegant touch to your room; while the wooden plinth b...
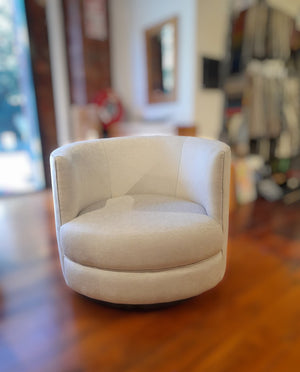
Day Spa Swivel Occasional Chair

Day Spa Swivel Occasional Chair
$2,299.00
Compact yet exceptionally comfortable, the Day Spa Swivel occasional chair suits a wide range of settings. Its sleek, modern design allows you to sit back, relax, and spin effortlessly. Whether you’re unwinding with a book or enjoying a long conversation, this chair provides the ultimate support for hours of relaxation. Frame kiln dried, furnitu...
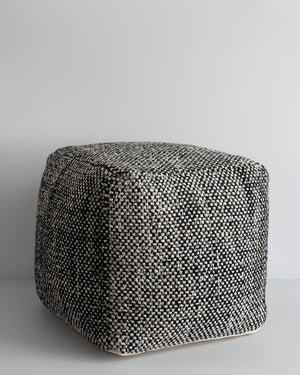
Ulster Ottoman
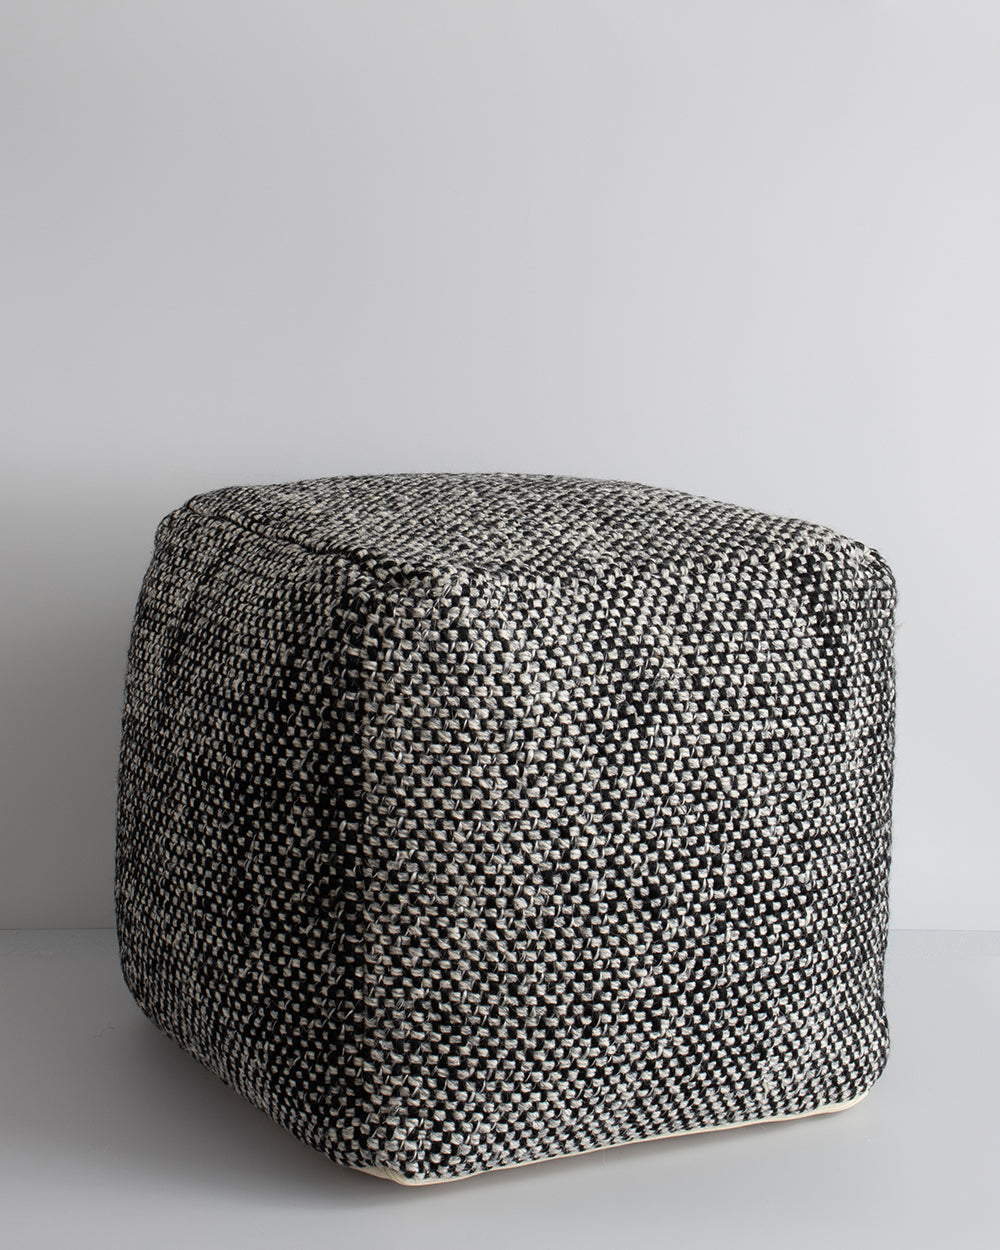
Ulster Ottoman
$499.00
Bring an element of comfort and texture into your space with a handwoven Ulster ottoman. Wool and linen fibres are combined in a classic 1-1 structure, producing a rustic yet refined look – the perfect finishing piece for a restful interior. Material 50% wool / 25% polyester (outer), polystyrene beads (inner) Size 400W x 400D x 400H mm Check out...
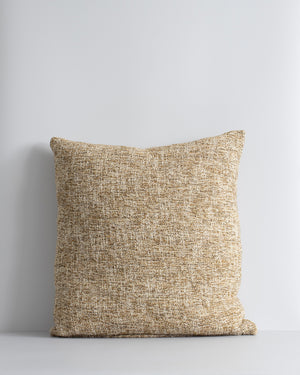
Cumbria Cushion

Cumbria Cushion
$99.00
Earthy colourways of marled yarn create the subtle tone of Cumbria cushion. Handwoven in a textural weave, the soft colourways and mottled effect make this a timeless style for restorative interiors. Material 50% cotton / 50% polyester (outer), feather (inner) Size 500 x 500 mm Check out other Essential cushions.
Brutalist Cushion

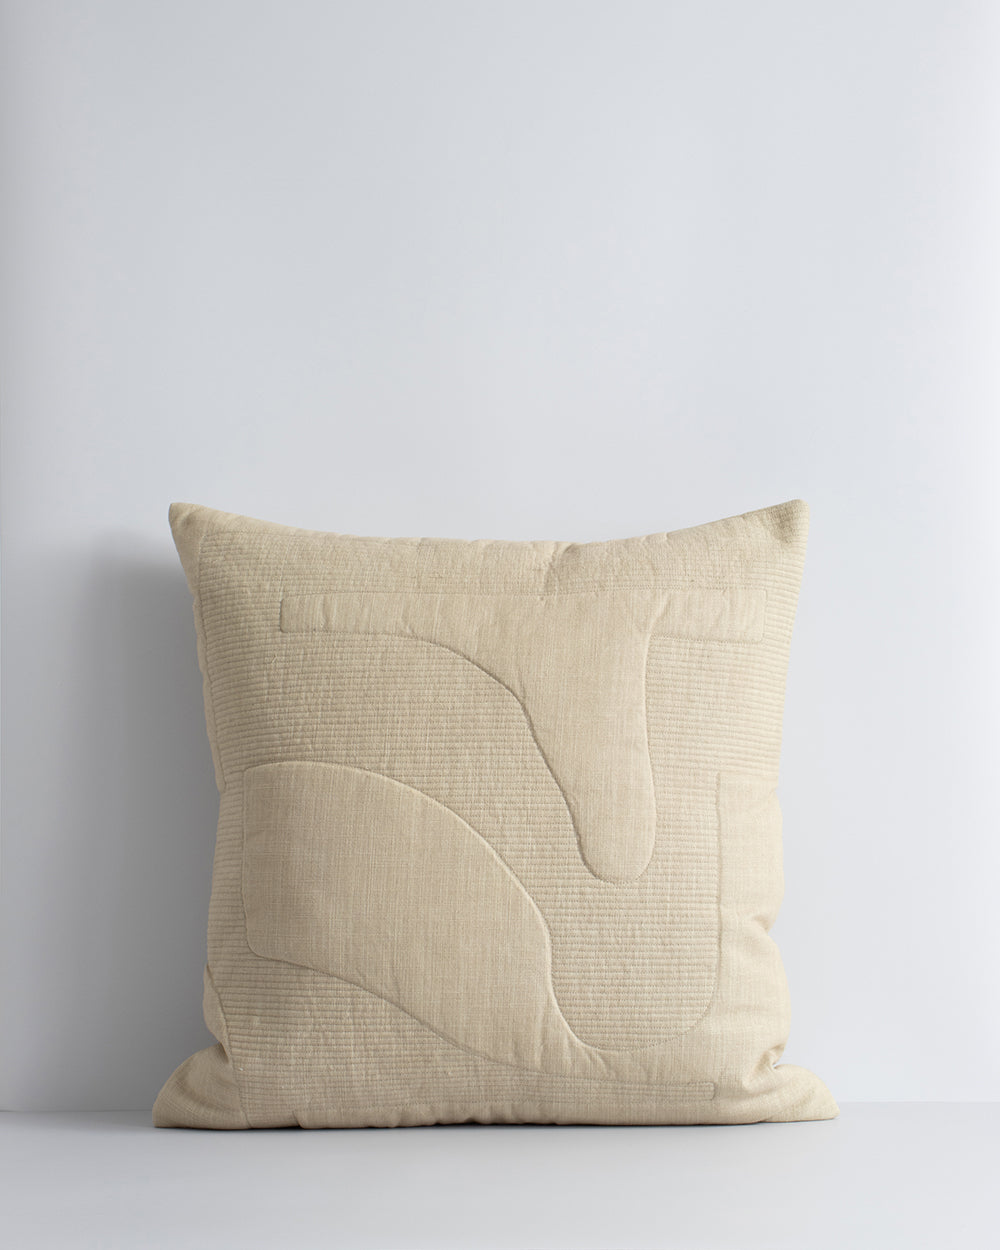
Brutalist Cushion
$99.00
Brutalist forms are subtly depicted in a quilted and ribbed design in 100% cotton. A quiet colour palette of ecru (Andes cushion) and nougat (Mila cushion) distinguishes the surface design and creates a composed and considered cushion design. Material 100% cotton (outer), feather (inner) Andres 450 x 550 mm (ecru) Mila 500 x 500 mm (nougat) Ch...
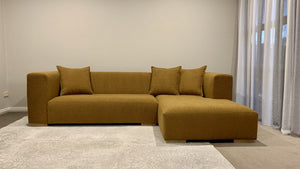
New York Sectional Sofa
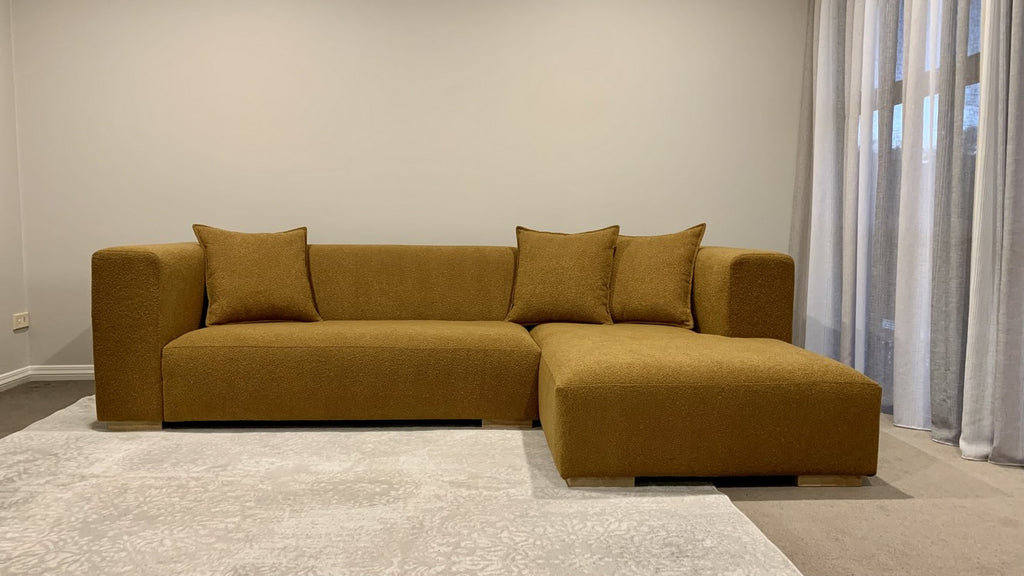
New York Sectional Sofa
$4,096.00
The New York sectional sofa was designed with generous proportional seating and clean lines in front of mind. Primarily configured for positioning in the corner of a room, the two portions can also be separated and stand-alone. Utilising locally sourced timber, the New York Sectional sofa frame is constructed of solid pine and plywood. High dens...

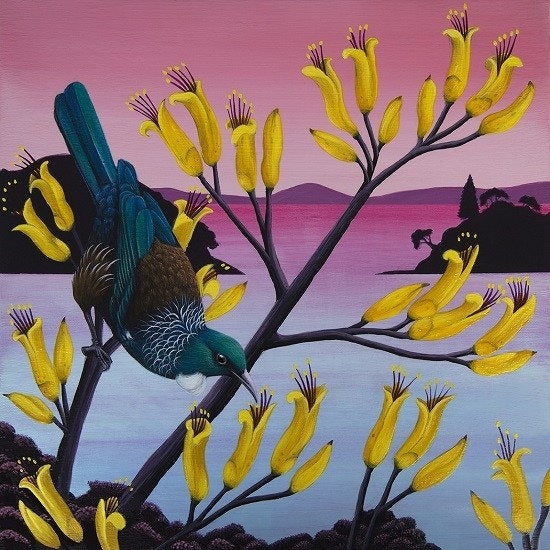
Anna Evans Print - Kahutianui of Mangonui / Towards Puwheke
$229.00
Versatile creative, Anna Evans says “my passion is painting, my profession is design and illustration, my exploration is ceramics”. A 2004 graduate of Elam School of Fine Arts specialising in painting, Evans has illustrated over 100 books, created Vector art for numerous ipad games, android apps and education learning aids, and facilitated large...

Nautilus Light Shade
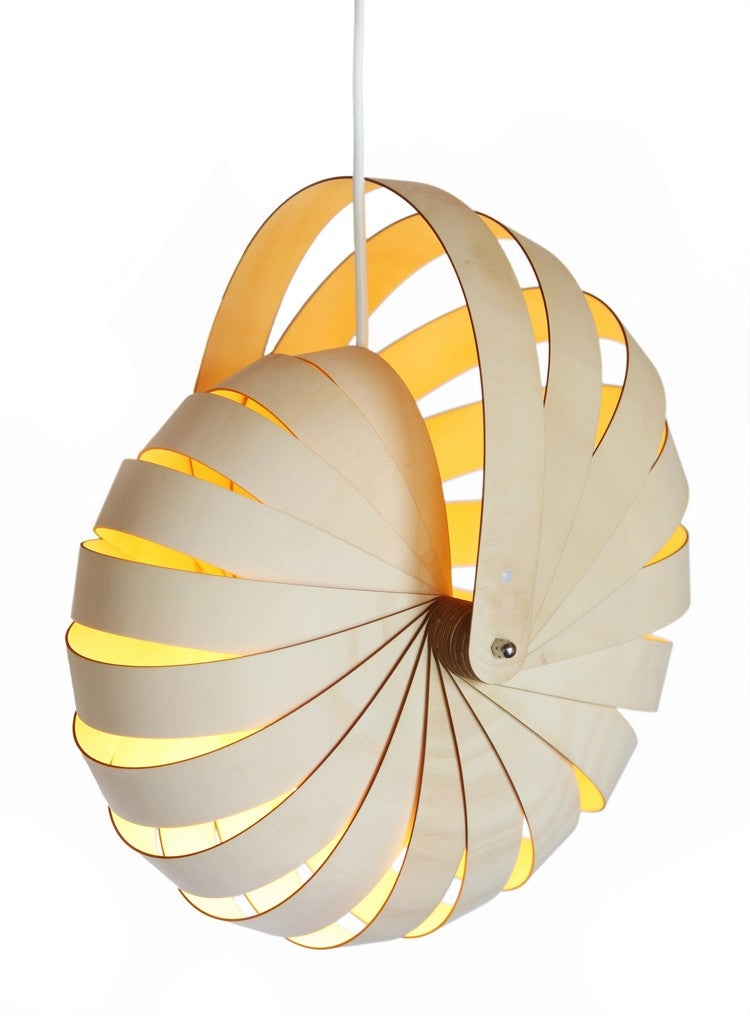
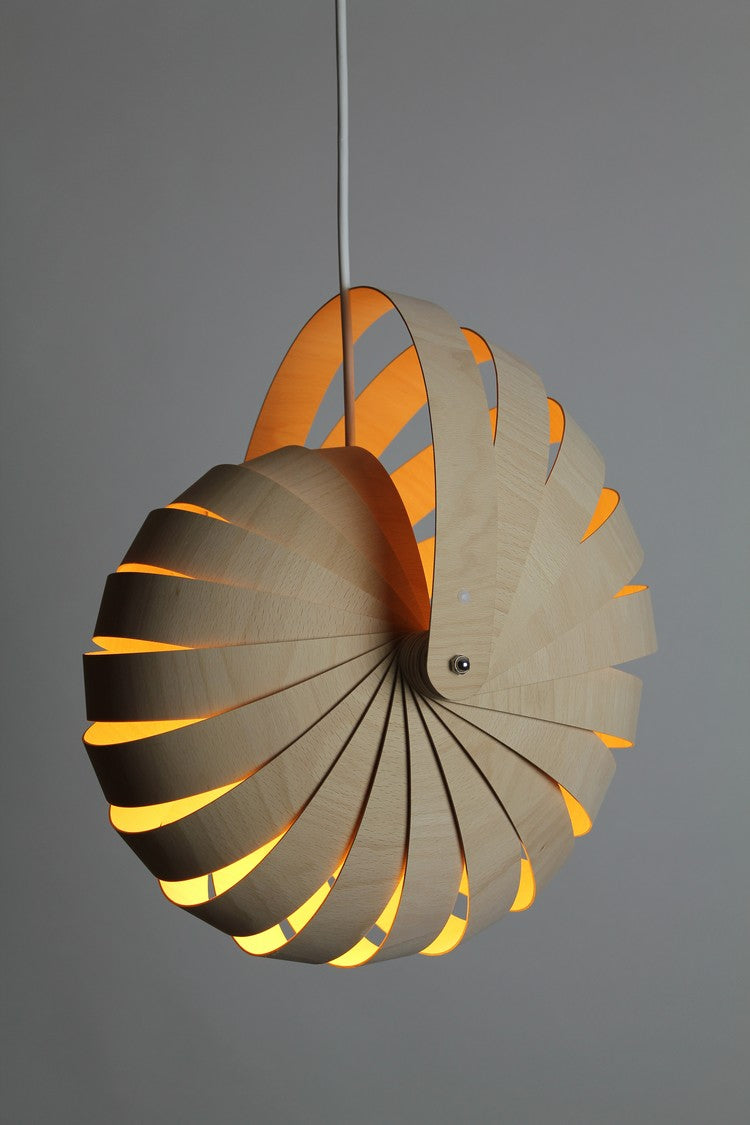
Nautilus Light Shade
$621.00
Inspired by a nautilus seashell, the Nautilus light shade rolls back into itself to mimic the complex organic form of the nautilus shell. Made from FSC architectural bamboo ply, parts are nested tightly together when cutting to minimise material waste. Nautilus comes flat-packed to minimise packaging materials and to reduce its size for transpor...


Anna Evans Print - Te Kohanga / Shipwreck Bay
$229.00
Versatile creative, Anna Evans says “my passion is painting, my profession is design and illustration, my exploration is ceramics”. A 2004 graduate of Elam School of Fine Arts specialising in painting, Evans has illustrated over 100 books, created Vector art for numerous ipad games, android apps and education learning aids, and facilitated large...

Anna Evans Print - Te Rerenga Wairua / Cape Reinga
$229.00
Versatile creative, Anna Evans says “my passion is painting, my profession is design and illustration, my exploration is ceramics”. A 2004 graduate of Elam School of Fine Arts specialising in painting, Evans has illustrated over 100 books, created Vector art for numerous ipad games, android apps and education learning aids, and facilitated large...

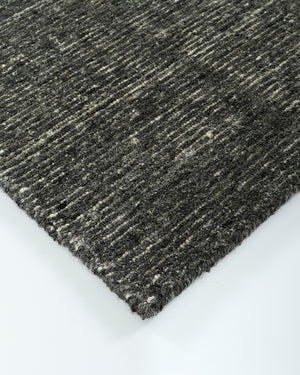
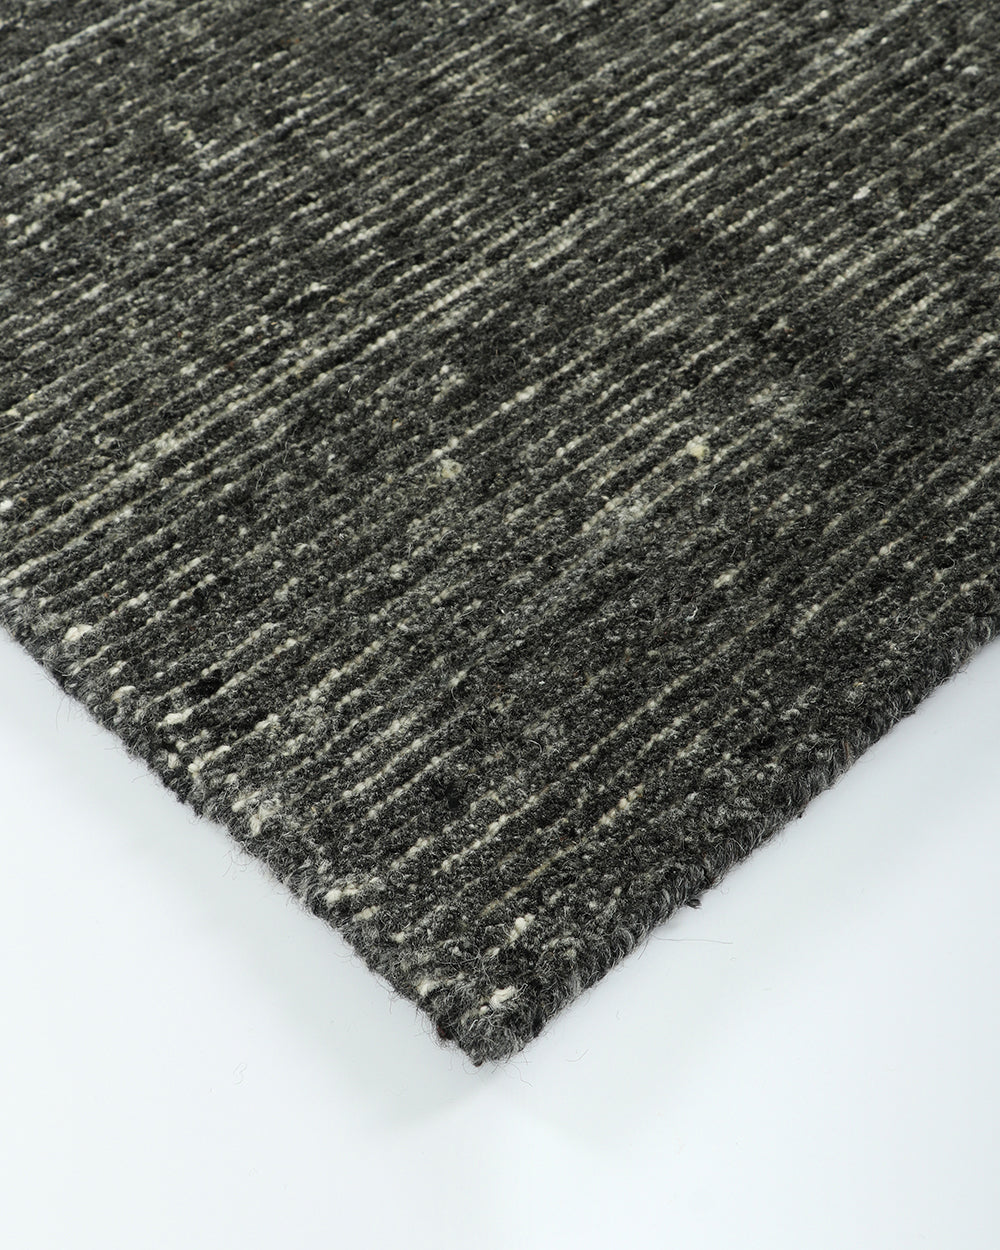
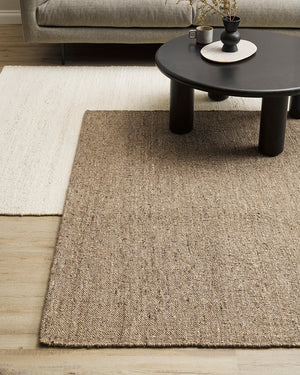
Lima Floor Rug
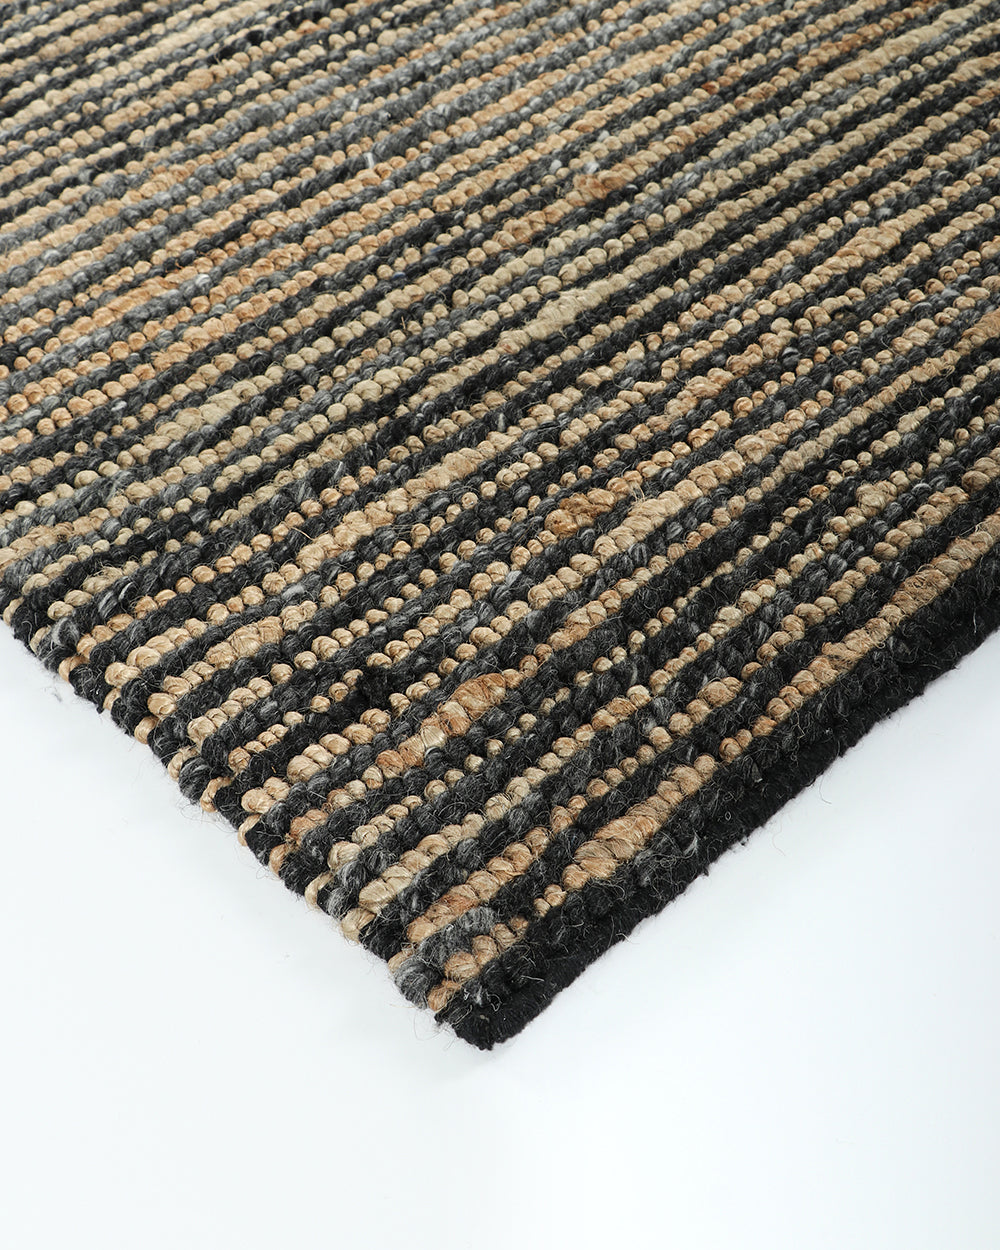

Lima Floor Rug
$999.00
Invite simple, raw texture into your space with the beauty of natural fibres. Handwoven from a stunning blend of jute and wool, the Lima floor rug features a stubble stripe pattern in nurturing, earthy colourways. An excellent all-rounder for a wide range of interior styles. Material 50% wool, 50% jute / Handwoven textured - 20mm pile This produ...
Emmett Floor Rug

Emmett Floor Rug
$1,099.00
An understated floor rug that is both simple and luxurious. The Emmett floor rug is hand-knotted from 100% wool, creating a soft minimal pile. Natural tones are defined by fine linear patterning, creating a texturally composed base to build your interior around. Material 100% wool with cotton backing / Hand-knotted - 12mm pile This product can b...
Wichita Floor Rug


Wichita Floor Rug
$999.00
Crafted from pure wool, the simplicity of the Wichita floor rug adds subtle tone and texture to a space. Hand-woven in an undyed palette of natural tones, the tight, slubby weave construction creates a natural base for contemporary living. Material 100% wool (cotton backing) / Hand-woven flatweave (14mm pile) This product can be tailor-made i.e...
Off-beat Cushion
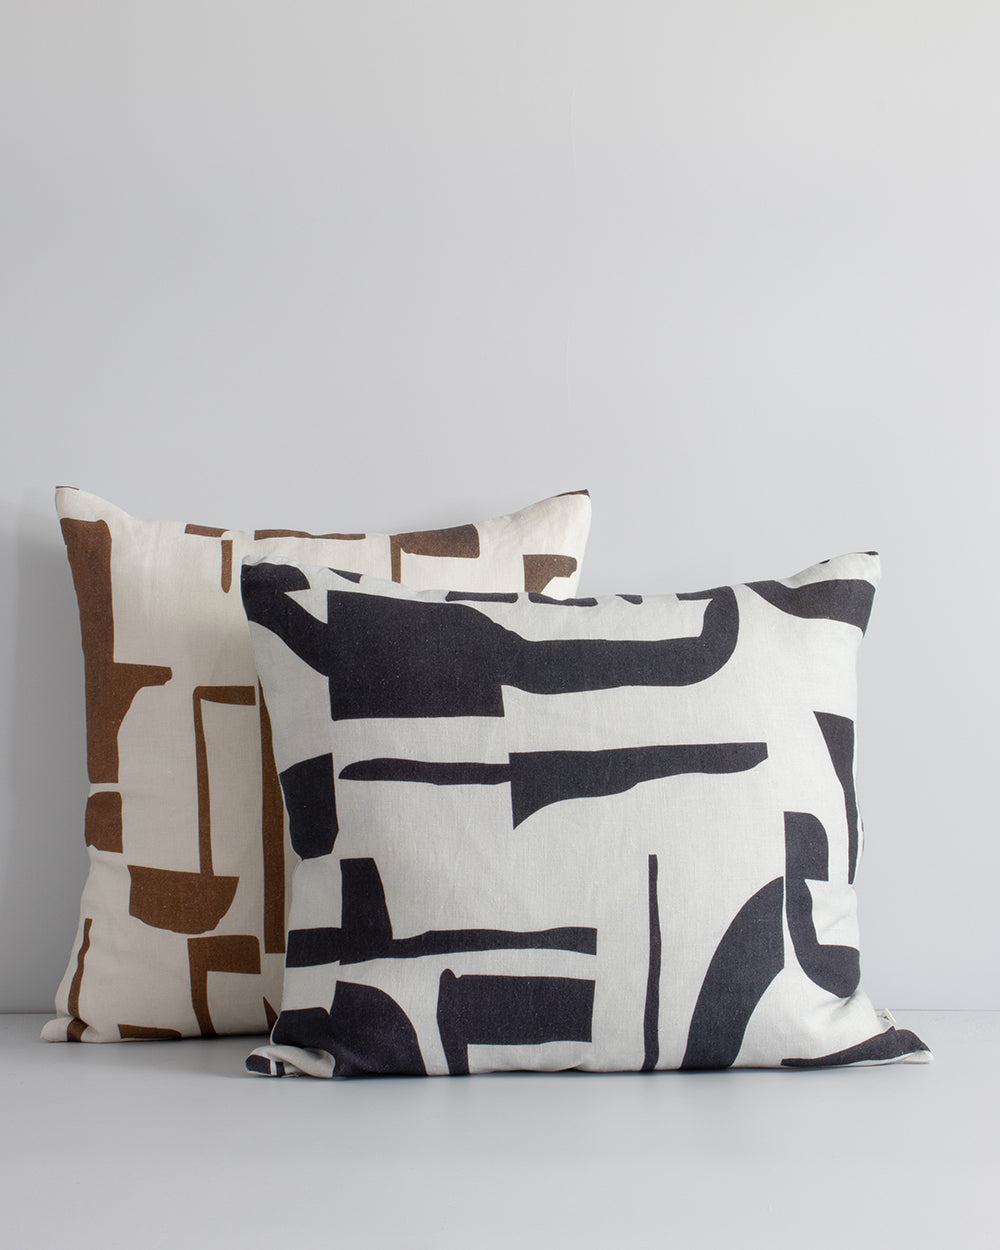
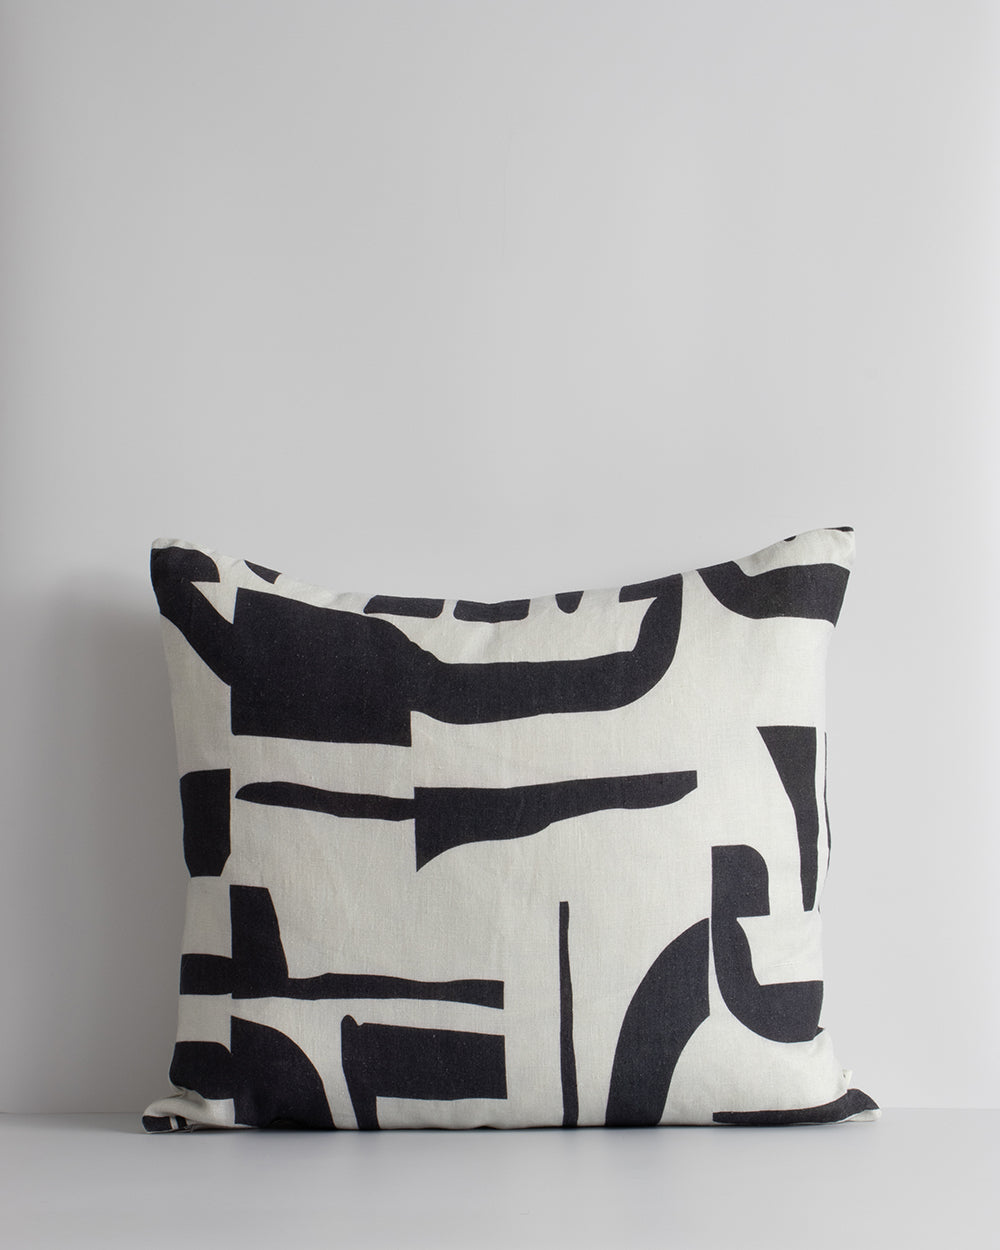
Off-beat Cushion
$99.00
Inspired by modernist forms, the design here is confident with off-beat shapes arranged on a pure, ivory linen base. Hand-painted, the black (Isla cushion) and coffee bean (Elle cushion) tones are expressed in fluid curves and contours to inspire and enrich the surrounding space. Material 100% linen (outer), feather (inner) Size 450 x 550 mm (bl...
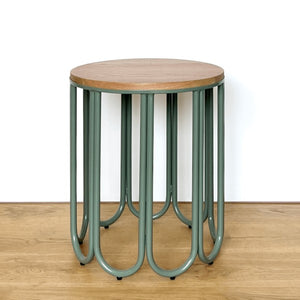
Montalto Oak Side Table


Montalto Oak Side Table
$499.00
The Montalto oak side table is designed to suit every home. It’s a visual beauty that’s made to last. Light enough to move around as you please from room to room, while still being sturdy. The Montalto oak top is made locally in Christchurch, New Zealand. Being able to work closely with the cabinet maker ensures the workmanship is spot on. Every...

Perret Coffee Table
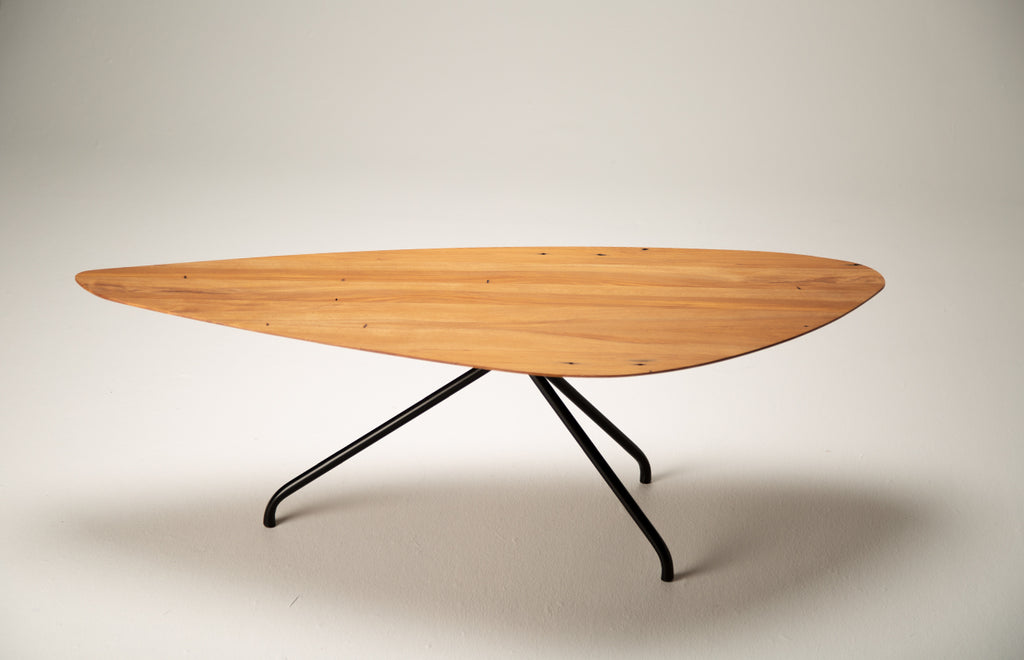
Perret Coffee Table
$1,799.00
The Perret Coffee Table was designed with an exceptional sense of lightness. It is built out of a gracious tubular steel base and a bevelled solid timber top, shaped by carefully curated lines that acknowledge New Zealand beach pebbles. Material steel, solid timber (ash, oak or NZ salvaged rimu) Size 1200L x 515W x 410H mm You may like other ite...

Anna Evans Print - Waikato Bay
Anna Evans Print - Waikato Bay
$229.00
Versatile creative, Anna Evans says “my passion is painting, my profession is design and illustration, my exploration is ceramics”. A 2004 graduate of Elam School of Fine Arts specialising in painting, Evans has illustrated over 100 books, created Vector art for numerous ipad games, android apps and education learning aids, and facilitated large...

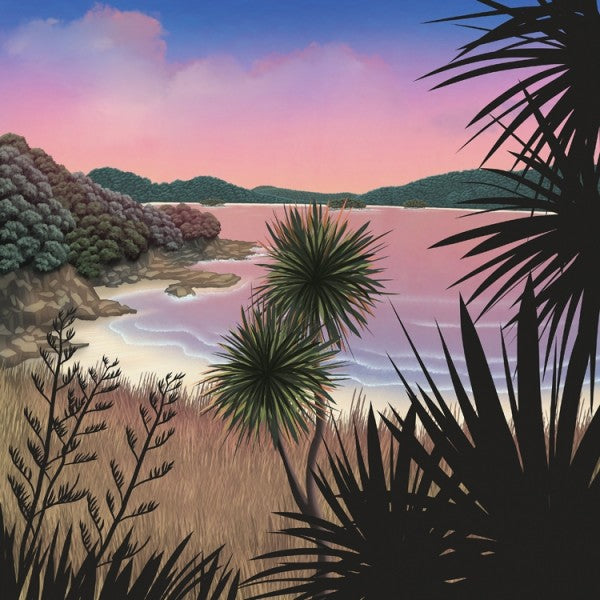
Anna Evans Print - Tokerau

Anna Evans Print - Tokerau
$229.00
Versatile and creative, Whangaparoa based artist Anna Evans says “my passion is painting, my profession is design and illustration, my exploration is ceramics.” A 2004 graduate of Elam School of Fine Arts specialising in painting, Evans has illustrated over 56 books and facilitated large scale public artworks at education and council facilities....


