Annual SALE : 1-31 March 2025
* Save 15% Online by using the code 'MARCH15%OFF' at checkout. Excludes : Bart de Vries, Gus Leen, Tim Webber, tailor-made, gift vouchers and items already reduced. No refunds or exchanges on sale items.
SALE Code : MARCH15%OFF *

Tetra Console
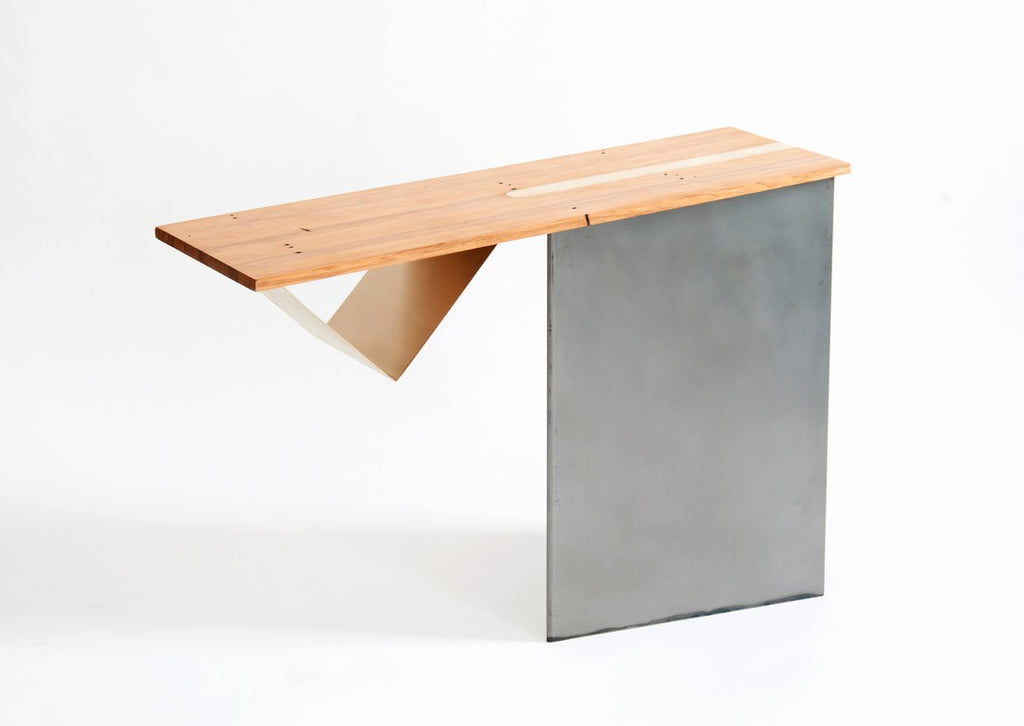
Tetra Console
$2,799.00
The Tetra Console is intended to create a bold welcome when entering a corridor or an open space. A heavy steel triangular base, a slender wooden top and brass insertions are combined to provide contrast, function and movement. Material NZ salvaged rimu finished in danish oil; polished brass; clear coated brushed steel

Wolves Dog Collar

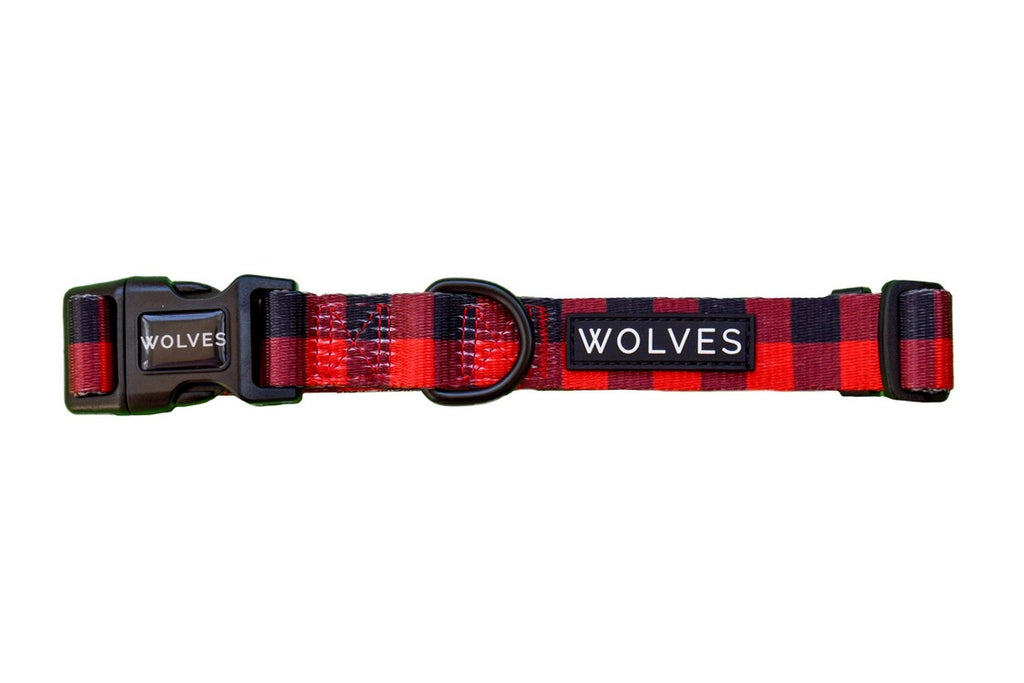
Wolves Dog Collar
$29.00
Upgrade your basics with a Wolves Dog Collar! Soft, yet resistent, these modish collars feature a four point safety buckle - all fittings are stainless steel for extended durability. Always rinse after using your Wolves Dog Collar at the beach. When a full clean is required, a neutral soap is recommended. Let it air-dry in the shade and avoid wa...
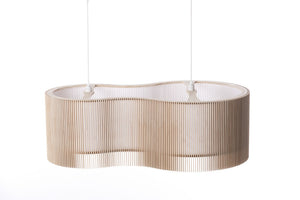
iO Nimbus Light Shade

iO Nimbus Light Shade
$2,999.00
iO Nimbus light shade is created using a mix of traditional craft skills and digitally based production methods, balancing between the realms of human and digital fabrication. This allows for a product that has meticulous detail in a simple form. Each iO Nimbus is unique, yet precise, eclipsing the challenges of its creation. The light emitted w...

3D Wooden Chart - Cook Strait

3D Wooden Chart - Cook Strait
$2,499.00
Designed and made in Lyall Bay, Wellington, the 3D Wooden Chart range is handcrafted using layered bamboo plywood; a by-product of plantation bamboo shoots grown for the restaurant industry. Each layer is hand-sanded and then dyed with non-toxic stains. Rounding off the construction is a wooden frame made from New Zealand grown plantation pine,...

3D Wooden Chart - Taupo
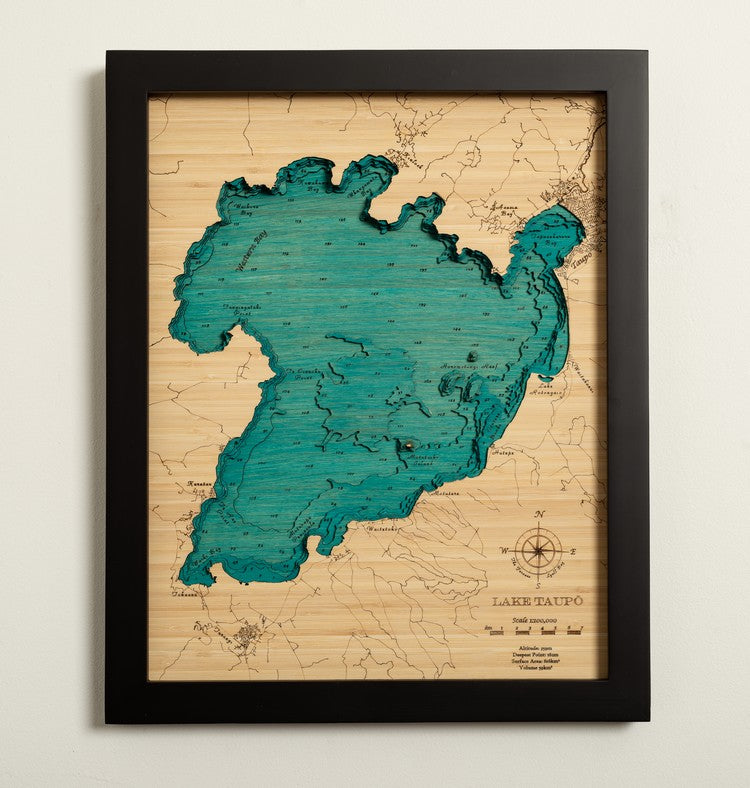
3D Wooden Chart - Taupo
$1,399.00
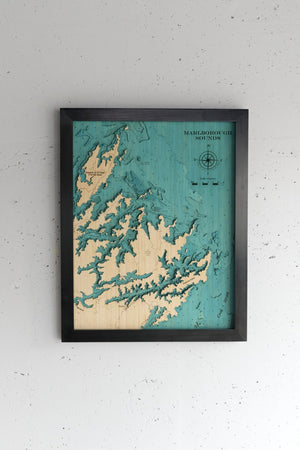
3D Wooden Chart - Marlborough Sounds
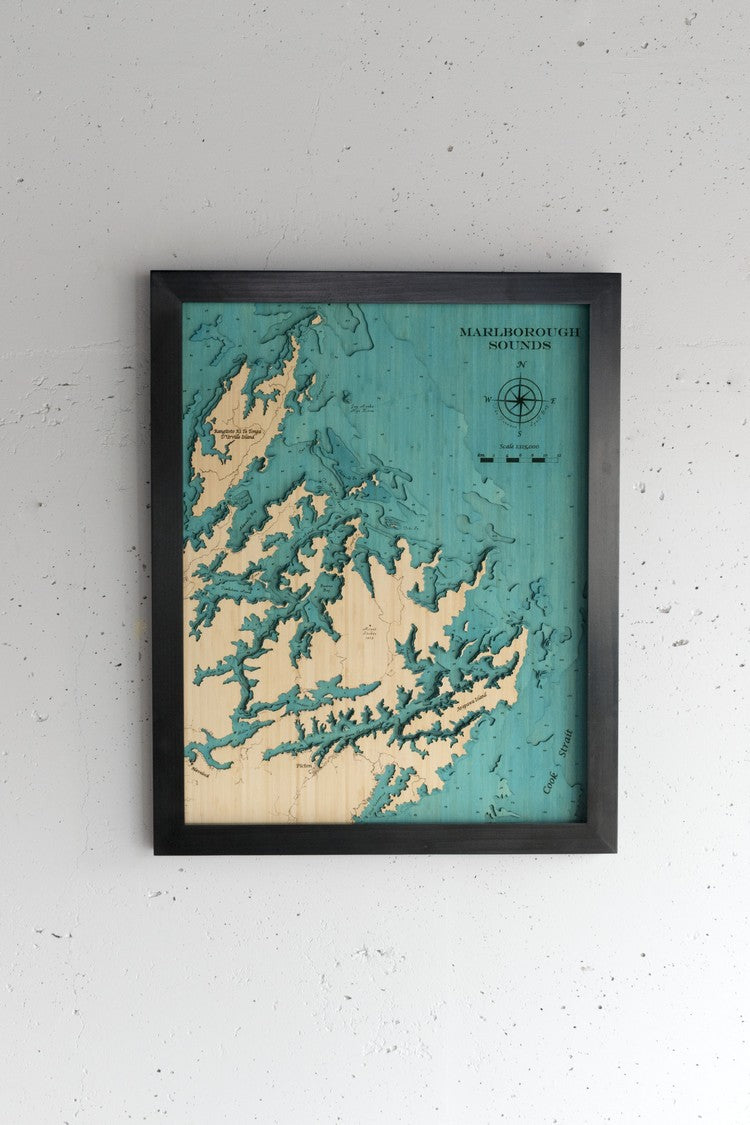
3D Wooden Chart - Marlborough Sounds
$1,350.00
Designed and made in Lyall Bay, Wellington, the 3D Wooden Chart range is handcrafted using layered bamboo plywood; a by-product of plantation bamboo shoots grown for the restaurant industry. Each layer is hand-sanded and then dyed with non-toxic stains. Rounding off the construction is a wooden frame made from New Zealand grown plantation pine,...

3D Wooden Chart - Banks Peninsula
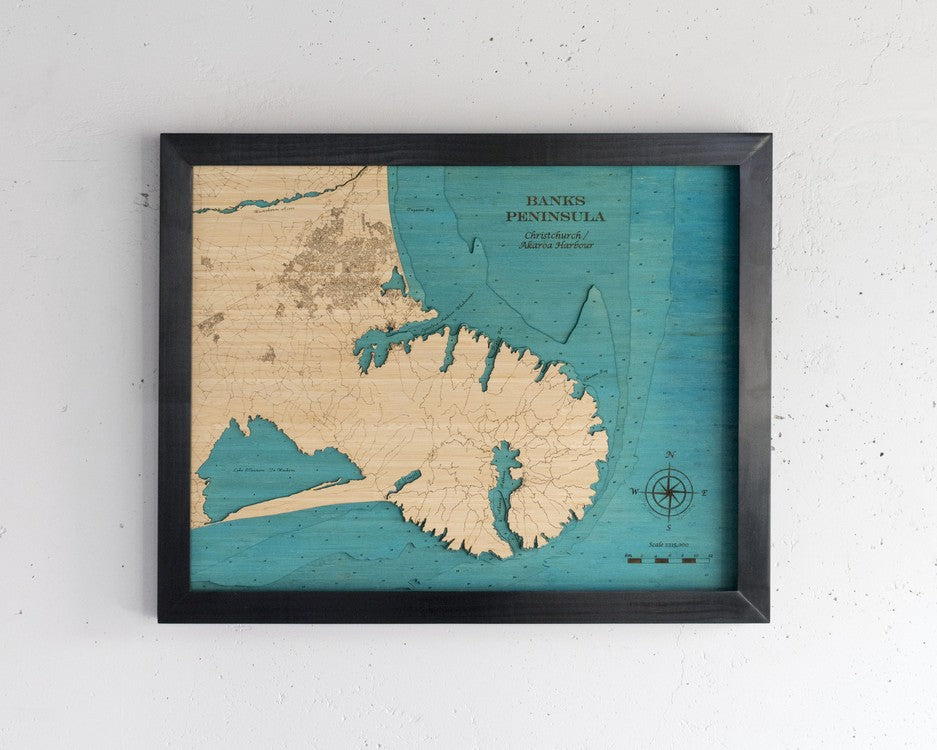
3D Wooden Chart - Banks Peninsula
$1,350.00
Designed and made in Lyall Bay, Wellington, the 3D Wooden Chart range is handcrafted using layered bamboo plywood; a by-product of plantation bamboo shoots grown for the restaurant industry. Each layer is hand-sanded and then dyed with non-toxic stains. Rounding off the construction is a wooden frame made from New Zealand grown plantation pine,...

3D Wooden Chart - Wellington Harbour
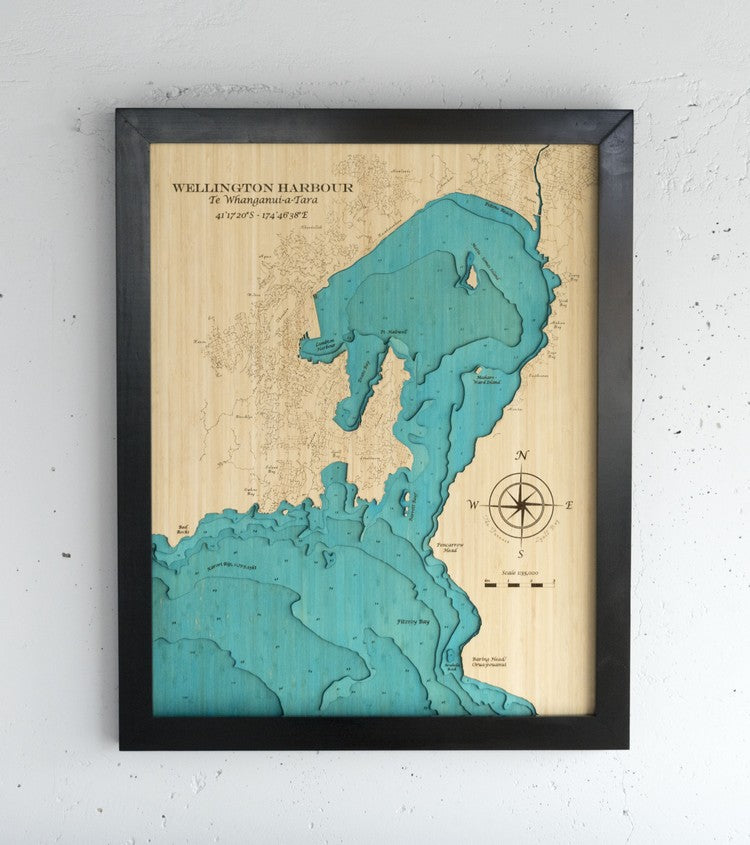
3D Wooden Chart - Wellington Harbour
$1,350.00
Designed and made in Lyall Bay, Wellington, the 3D Wooden Chart range is handcrafted using layered bamboo plywood; a by-product of plantation bamboo shoots grown for the restaurant industry. Each layer is hand-sanded and then dyed with non-toxic stains. Rounding off the construction is a wooden frame made from New Zealand grown plantation pine,...
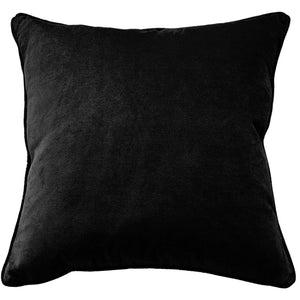
Montpellier Cushion

Montpellier Cushion
$99.00
Gently transform your house into a home with scrumptious, double-sided cotton velvet Montpellier cushion. Featuring a piped edge, the refined colour palette let's you mix and match to suit your style. Material 100% cotton (outer), feather (inner) Size 530 x 530 mm Check out other Essential cushions.
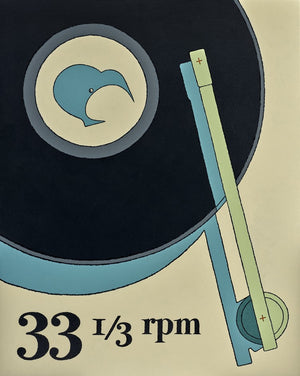
Hamish Allan Print - 33 1/3 RPM

Hamish Allan Print - 33 1/3 RPM
$249.00
Hamish Allan’s clean precise imagery incorporates New Zealand landscape, architecture and symbolic icons to give a contemporary visual experience. His work has a feeling of space and a sense of the serene created by leaving out unnecessary imagery creating a stripped back essential image. Material print in box frame (flush with print, no glass) ...

William Carden-Horton Print - We-Are-The-Champions
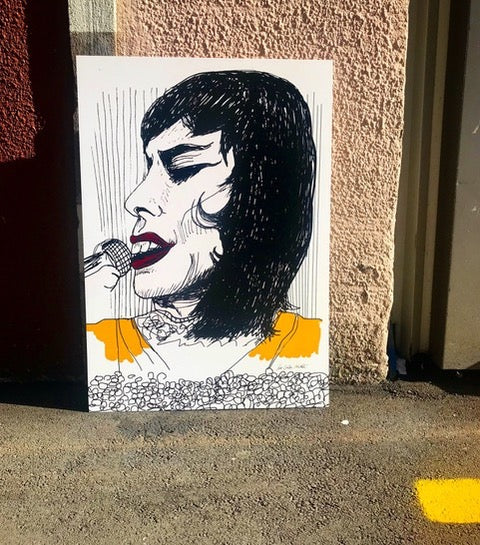
William Carden-Horton Print - We-Are-The-Champions
$449.00
From artist William Carden-Horton's 'Holding My Pen Loosely' series, We-Are-The-Champions honours song writer and lead singer of one of rock's most recognisable anthems, mastery Freddie Mercury - long live Freddie! Limited edition of 50 (A1) and 25 (A0) Material printed with Océ flatbed machine using UV cured inks, Palight board (3mm)
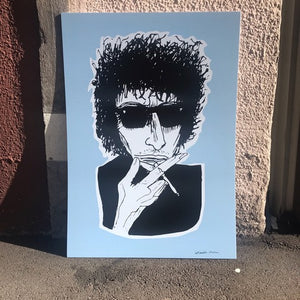
William Carden-Horton Print - Tangled-Up-In-Blue

William Carden-Horton Print - Tangled-Up-In-Blue
$449.00
From artist William Carden-Horton's 'Holding My Pen Loosely' series, Tangled-Up-In-Blue pays tribute to the ledgenday Bob Dylan; singer-songwriter, author, and visual artist. Limited edition of 50 (A1) and 25 (A0) Material printed with Océ flatbed machine using UV cured inks, Palight board (3mm)
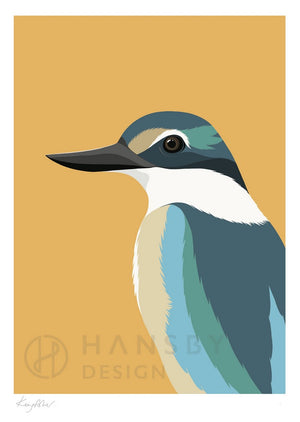
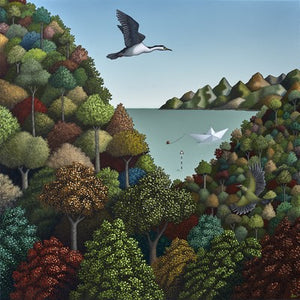
Cathy Hansby Print - Kingfisher

Cathy Hansby Print - Kingfisher
$699.00
Based in Auckland, freelance Illustrator / Designer Cathy Hansby likes to create engaging, fun and colourful images, capturing the personality and character of native wildlife from New Zealand and Australasia. Her images often feature endangered species, to highlight and remind us how close we are to losing them. How we act now has a huge impact...
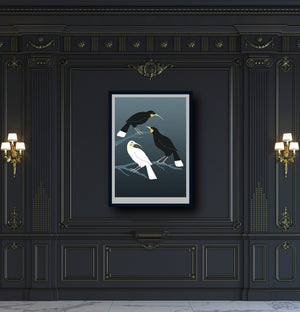
Cathy Hansby Print - Huia
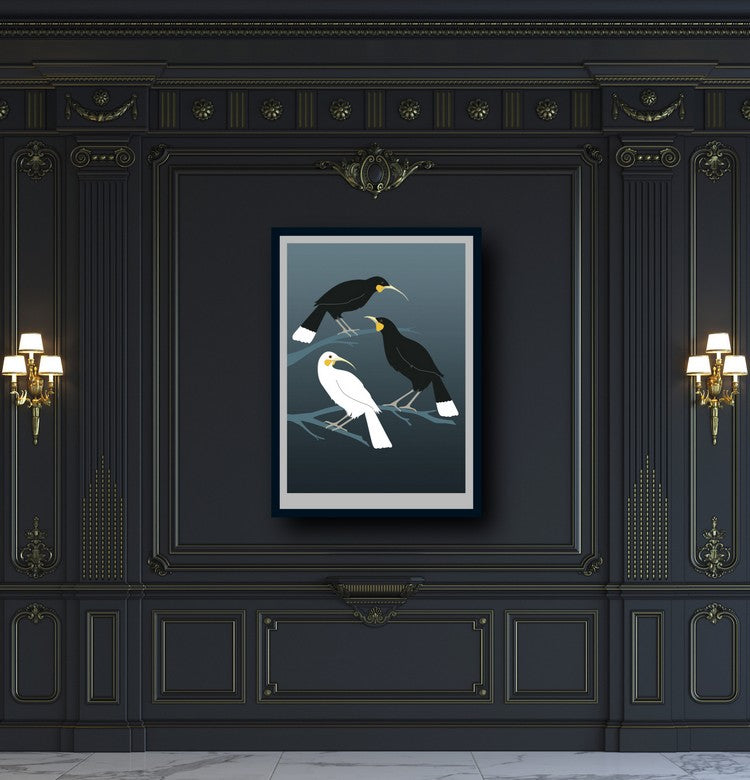
Cathy Hansby Print - Huia
$699.00
Based in Auckland, freelance Illustrator / Designer Cathy Hansby likes to create engaging, fun and colourful images, capturing the personality and character of native wildlife from New Zealand and Australasia. Her images often feature endangered species, to highlight and remind us how close we are to losing them. How we act now has a huge impact...
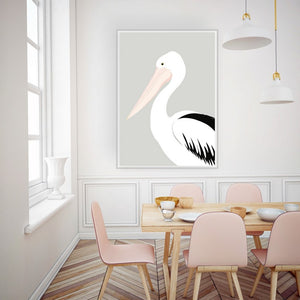
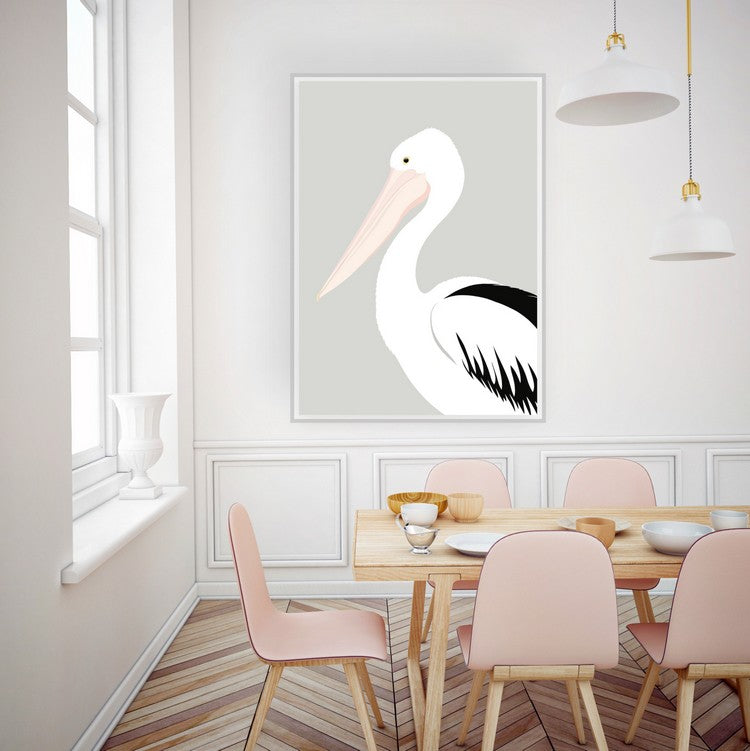
Cathy Hansby Print - Pelican Grey
$699.00
Based in Auckland, freelance Illustrator / Designer Cathy Hansby likes to create engaging, fun and colourful images, capturing the personality and character of native wildlife from New Zealand and Australasia. Her images often feature endangered species, to highlight and remind us how close we are to losing them. How we act now has a huge impact...
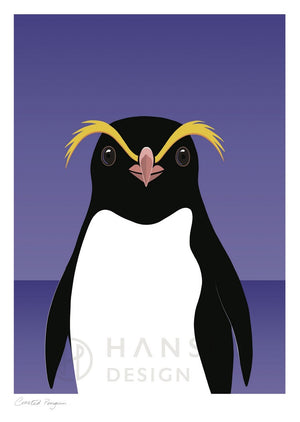


Cathy Hansby Print - Crested Penguin
$699.00
Based in Auckland, freelance Illustrator / Designer Cathy Hansby likes to create engaging, fun and colourful images, capturing the personality and character of native wildlife from New Zealand and Australasia. Her images often feature endangered species, to highlight and remind us how close we are to losing them. How we act now has a huge impact...

Karyn McDonald Map - Titahi Bay
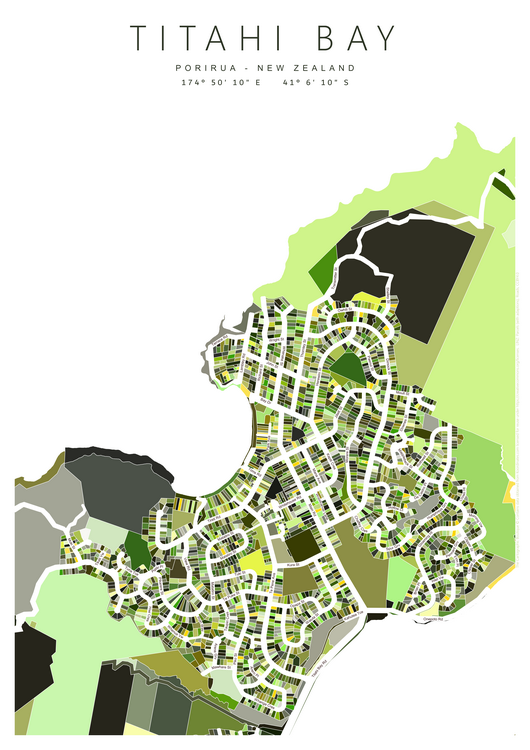
Karyn McDonald Map - Titahi Bay
$249.00
Karyn McDonald's path to map design has been slightly unorthodox. She studied Spatial Information Studies at Otago University, then worked for over 10 years as a Geographic Information Systems (GIS) Analyst in New Zealand, as well as in London and Melbourne. After returning from overseas and starting a family, Karyn wanted a more flexible work a...
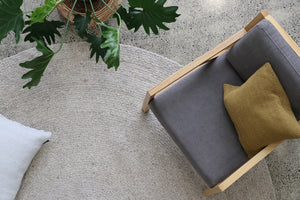
Tairua Round Floor Rug


Tairua Round Floor Rug
$799.00
New Season Colours - Moss Green and Dark Taupe Hand-braided from a wool and viscose blend, the subtly mottled yarn of the Tairua Round floor rug will bring a contemporary reminder of nature into your interior. Perfect for defining an area or anchoring key furniture pieces. Material 50% wool / 50% viscose This product can be tailor-made i.e. alte...

Hamish Allan Print - Melancholia And The Pleasure Garden
$199.00
Hamish Allan’s clean precise imagery incorporates New Zealand landscape, architecture and symbolic icons to give a contemporary visual experience. His work has a feeling of space and a sense of the serene created by leaving out unnecessary imagery creating a stripped back essential image. Material print in black box frame (flush with print, no g...
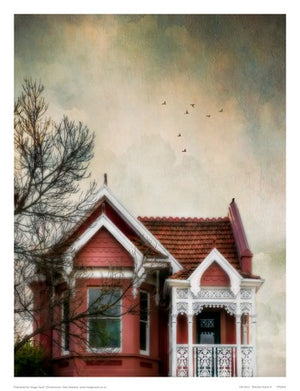
Brenda Qualls Print - Old Soul

Brenda Qualls Print - Old Soul
$199.00
Based in Christchurch, Brenda Qualls has been a photographer since the late 80’s. The majority of her work has included portraiture, weddings, commercial, editorial and illustrative photography. Having spent the last ten years exploring other creative avenues, she is now happily concentrating on Portraiture, Places & Spaces, and fine art Cre...
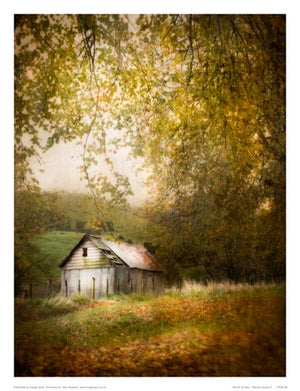

Brenda Qualls Print - Month of May
$199.00
Based in Christchurch, Brenda Qualls has been a photographer since the late 80’s. The majority of her work has included portraiture, weddings, commercial, editorial and illustrative photography. Having spent the last ten years exploring other creative avenues, she is now happily concentrating on Portraiture, Places & Spaces, and fine art Cre...
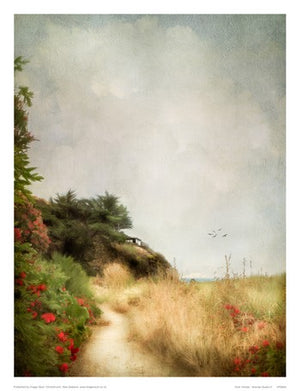
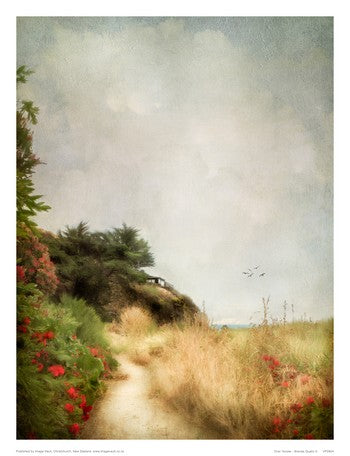
Brenda Qualls Print - Over Yonder
$199.00
Based in Christchurch, Brenda Qualls has been a photographer since the late 80’s. The majority of her work has included portraiture, weddings, commercial, editorial and illustrative photography. Having spent the last ten years exploring other creative avenues, she is now happily concentrating on Portraiture, Places & Spaces, and fine art Cre...
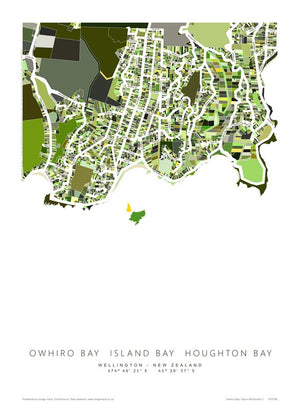
Karyn McDonald Map - Owhiro Bay
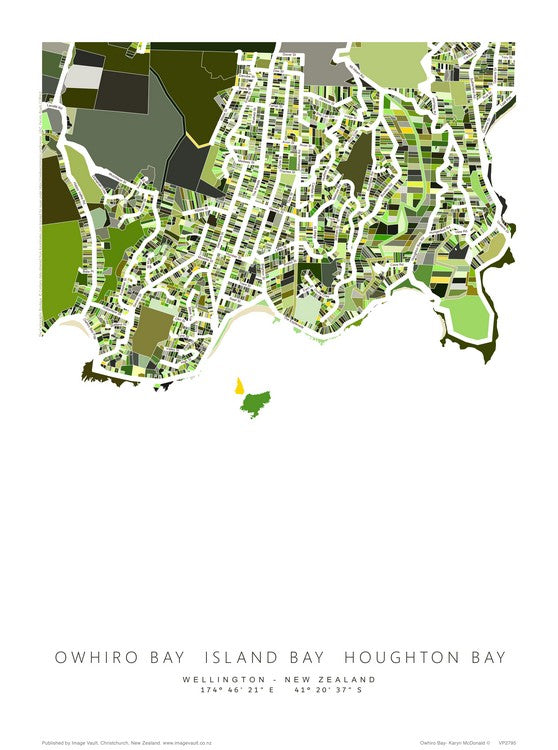
Karyn McDonald Map - Owhiro Bay
$249.00
Karyn McDonald's path to map design has been slightly unorthodox. She studied Spatial Information Studies at Otago University, then worked for over 10 years as a Geographic Information Systems (GIS) Analyst in New Zealand, as well as in London and Melbourne. After returning from overseas and starting a family, Karyn wanted a more flexible work a...
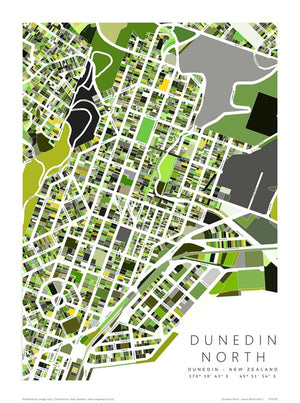
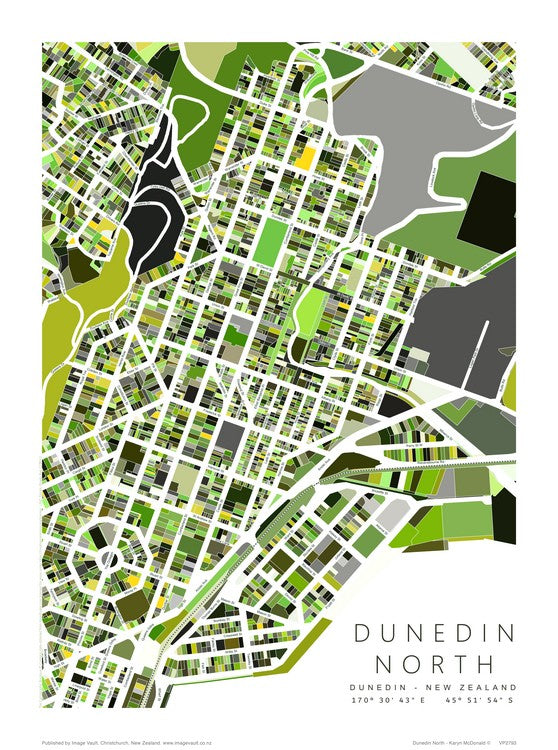
Karyn McDonald Map - Dunedin North
$249.00
Karyn McDonald's path to map design has been slightly unorthodox. She studied Spatial Information Studies at Otago University, then worked for over 10 years as a Geographic Information Systems (GIS) Analyst in New Zealand, as well as in London and Melbourne. After returning from overseas and starting a family, Karyn wanted a more flexible work a...

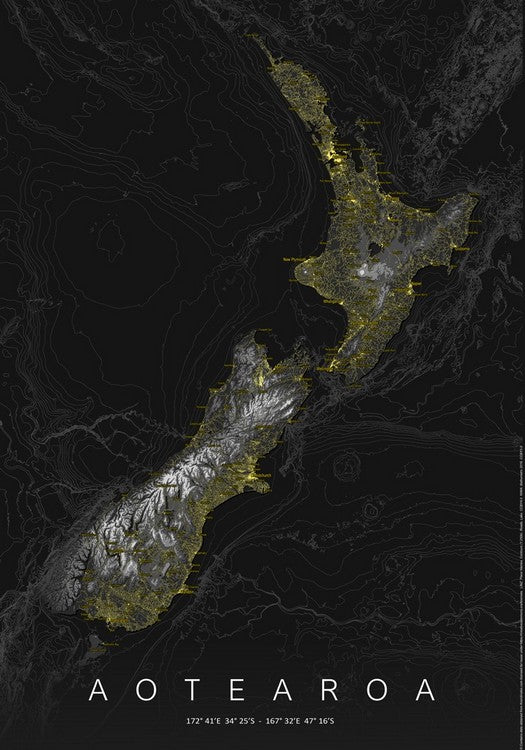
Karyn McDonald Map - New Zealand Black
$199.00
Karyn McDonald's path to map design has been slightly unorthodox. She studied Spatial Information Studies at Otago University, then worked for over 10 years as a Geographic Information Systems (GIS) Analyst in New Zealand, as well as in London and Melbourne. After returning from overseas and starting a family, Karyn wanted a more flexible work a...
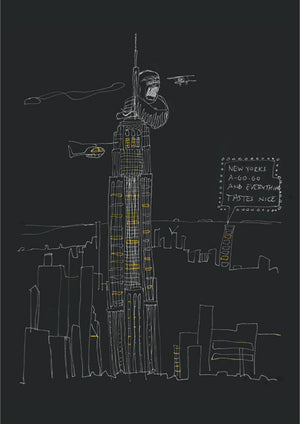
William Carden-Horton Print - New York's A Go Go
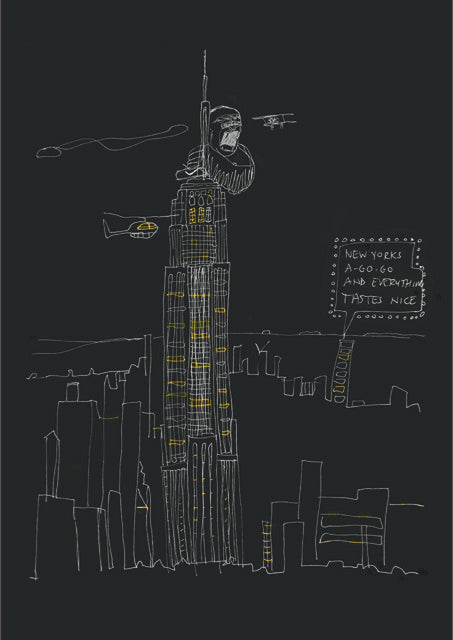
William Carden-Horton Print - New York's A Go Go
$449.00
From artist William Carden-Horton's 'Holding My Pen Loosely' series, in New York's A-Go-Go NIKE wearing Kong meets with David Bowie’s Jean Genie lyrics, while folk live oblivious in their condo’s. New York is a mixed up crazy good World. Limited edition of 50 (A1) and 25 (A0) Material printed with Océ flatbed machine using UV cured inks, Palight...
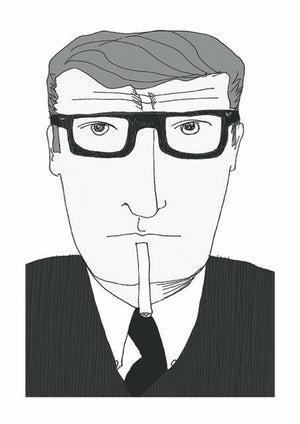
William Carden-Horton Print - Quintessential Cane
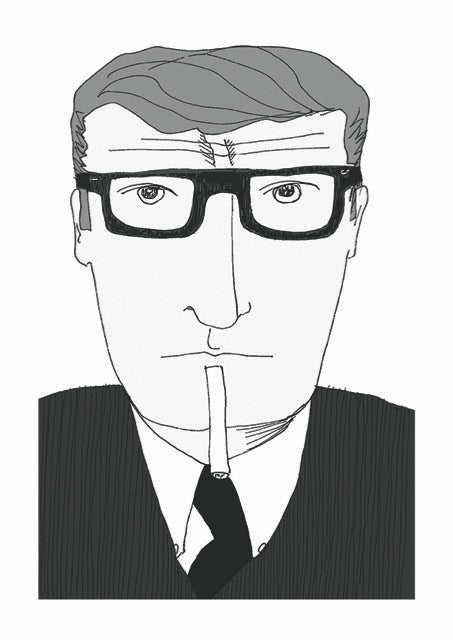
William Carden-Horton Print - Quintessential Cane
$449.00
From artist William Carden-Horton's 'Holding My Pen Loosely' series, Quintessential Cane captures cool-calm-collected, Michael Cane. The 1960’s British film icon was snapped by 1960’s British photography icon David Bailey. In Quintessential Cane he's caught by Carden-Horton's Staedtler felt pen. Limited edition of 50 (A1) and 25 (A0) Material pr...

William Carden-Horton Print - A-Lad-In-Sane
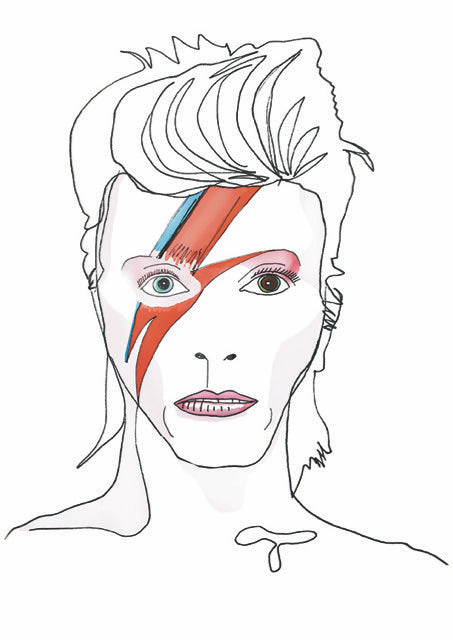
William Carden-Horton Print - A-Lad-In-Sane
$449.00
From artist William Carden-Horton's 'Holding My Pen Loosely' series, A-Lad-In-Sane is Carden-Horton's take on his "main-man" David Bowie's incarnation number four - Aladdin Sane. Bowie liberated a generation, now he can liberate your wall. Limited edition of 50 (A1) and 25 (A0) Material printed with Océ flatbed machine using UV cured inks, Palig...
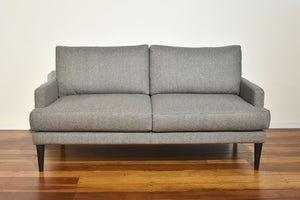
Nikki Sofa
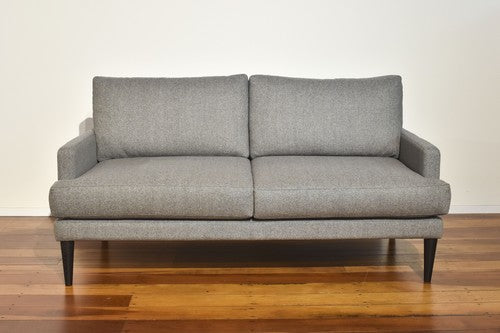

Nikki Sofa
$2,899.00
Streamline, classic with a contemporary twist, Nikki Sofa is a wise solution for both traditional and modern environments, especially those restricted for space. It's rather unique, slimline arm, minimizes it's presence in the room. And highest grade memory foam seats, and feather and pearl cushion backs, provide the ultimate in comfort. Frame f...
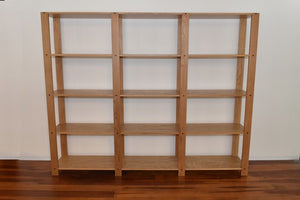
Wooden Display Unit

Wooden Display Unit
$1,899.00
Our solid American oak Wooden Display Unit is a simple, understated shelving solution. Featuring five shelves for ample storage, this versatile piece can be positioned against a wall, or free-stand to double as a room divider. Material solid American oak finished in clear stain This product can be tailor-made. It may be an option to change the d...
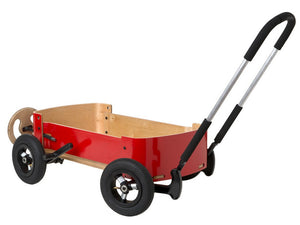
Wishbone Wagon

Wishbone Wagon
$450.00
Equal parts classic wagon, soap box racer and Flintstone car, Wishbone Wagon is a multi-functional, timeless heirloom toy that children and parents alike will love. Wishbone Wagon adapts to suit every child any day. Pull your gear or toddler to the beach with ease. Play together, one child can push while the other steers. Install the steering wh...
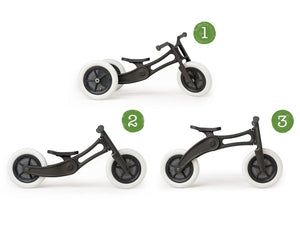


Wishbone Recycled 3n1 Balance Bike
$299.00
Wishbone Bike Recycled turns waste plastic into a 3-in-1 balance bike for kids learning to walk, balance and ride the easy way. This convertible trike-to-bike is lightweight, durable and fully repairable. The highly adjustable frame fits perfectly thanks to 11 inches seat height adjustability, from first birthday to 6 years old. Use in tricycle ...


